Low Calorie Chicken Seekh Kebab
by Viruthiga Veni
Loading rating...
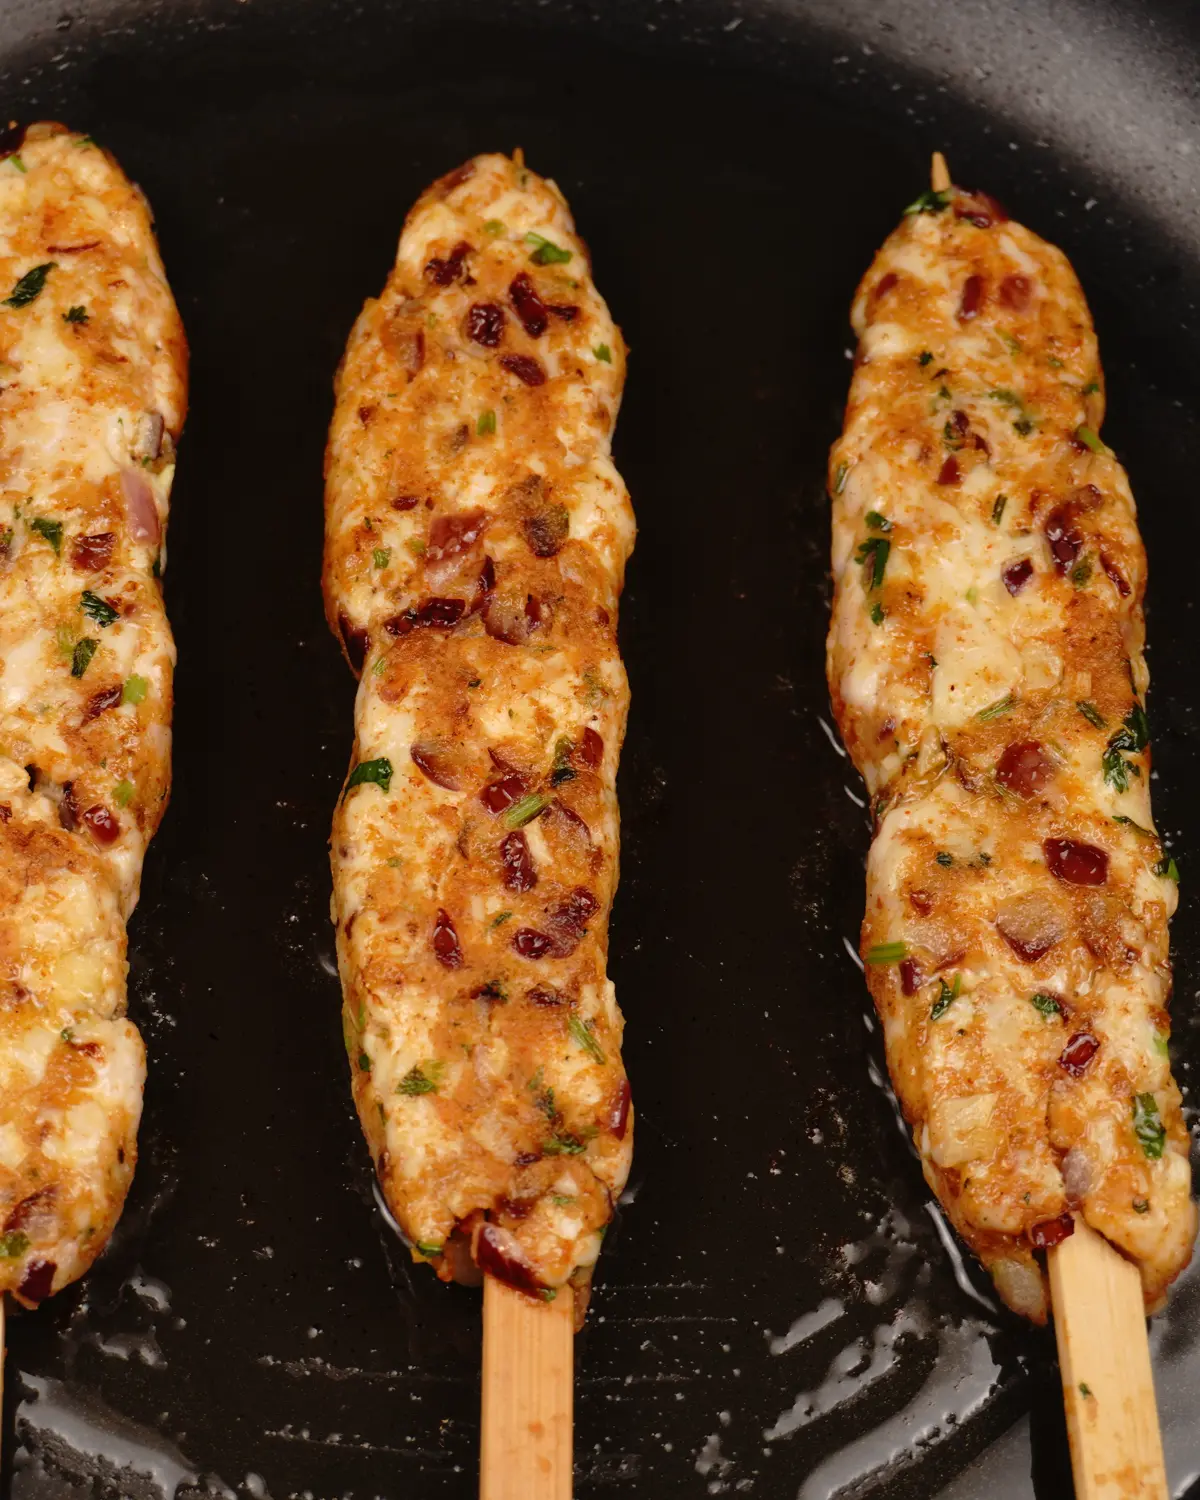
Chicken seekh kebabs are typically made with rich, fattier, boneless leg pieces and pan-fried in ghee.
To reduce your calorie intake, simply switch to chicken breast and use less oil. This adaptation makes the kebabs a healthier, more frequent meal option. Even with reduced fat and coarse chicken breast, these chicken seekh kebabs remain moist, tender and tasty.
For a restaurant-style version, try this Restaurant style chicken seekh kebab; or, for a quick version, try the Less prep time 15 mins chicken seekh kebab.
Ingredients
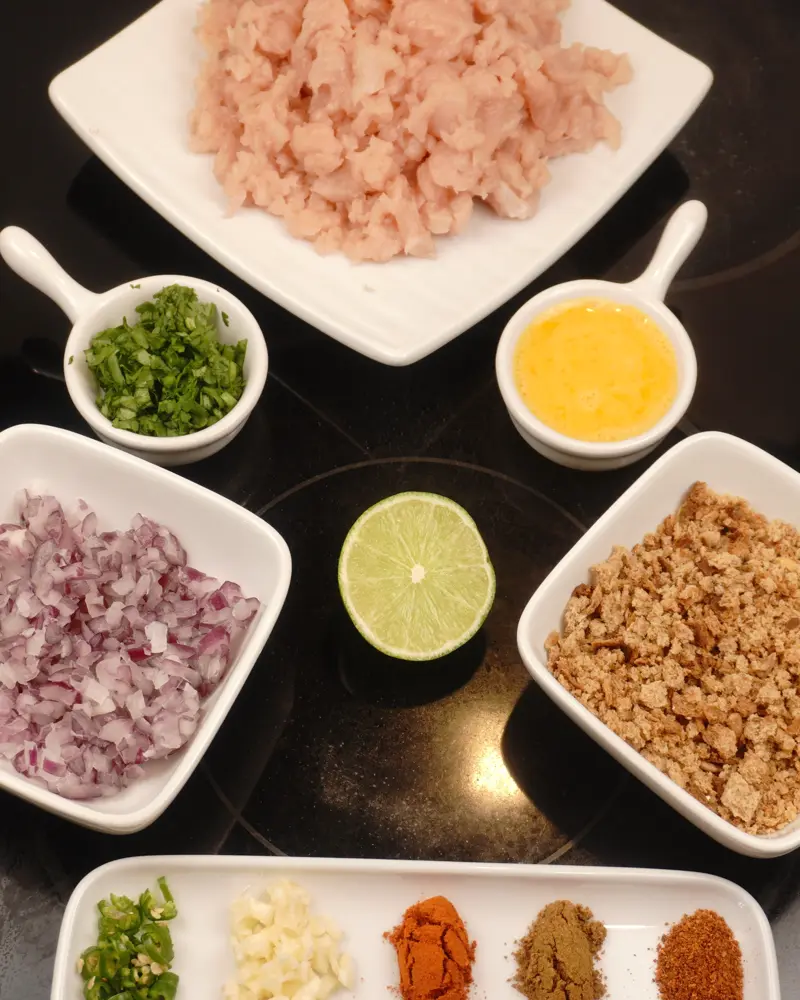
Coarse chicken breast – 300 grams
Finely chopped onion – 75 grams (half medium size )
Finely chopped garlic – 2 tsp (3 to 4 small size cloves)
Finely chopped green chili – 2 tsp
Breadcrumbs – 45 grams (3 tbsp)
Beaten Egg – 30 ml (approx. half egg)
Garam masala powder – ½ tsp
Zeera powder – ½ tsp
Chili powder – ½ tsp
Lime juice – ½ tbsp (half medium size)
Finely chopped Coriander leaves – 1 to 2 heaped tbsp
Oil – 1 tbsp
Salt – ¾ tsp (approx.)
How to Choose and Prep Chicken
Why Choose Chicken Breast?
Chicken breast is very high-protein, low-fat, and zero-carb, making it the perfect choice for muscle building or weight loss.
Aim for a Coarse Mince
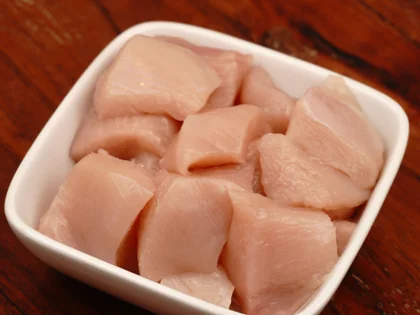
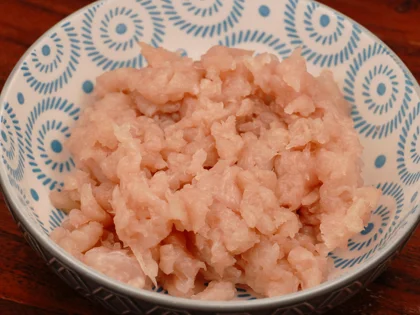
When prepping the meat for chicken skewers, the goal is a coarse mince. You want the chicken ground into very small pieces—not a smooth, fine paste, but without large chunks either. This coarse texture is exactly what keeps the kebabs light instead of dense.
You can achieve this texture in one of two ways:
At the Shop: Ask your butcher to coarsely mince boneless chicken breast.
At Home: Pulse boneless chicken breast in a food processor until it reaches a coarse grind.
To remove moisture from onion
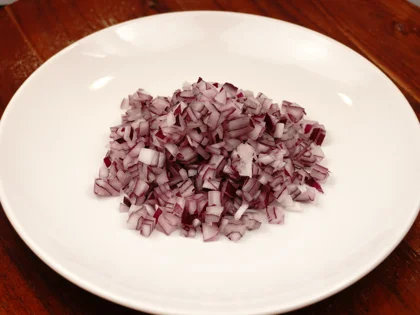
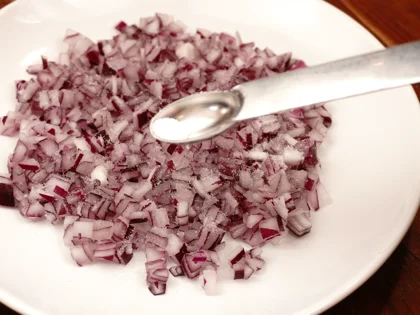
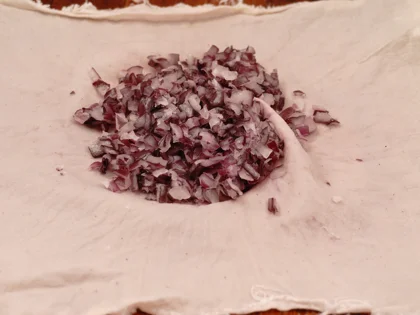
Prep and Salt: Finely chop 75 grams of onion. Spread the pieces in a shallow layer on a plate, sprinkle with ½ tsp of salt, and mix thoroughly.
Rest: Let the onions sit undisturbed for 20 to 30 minutes. The salt will naturally draw out the excess moisture.
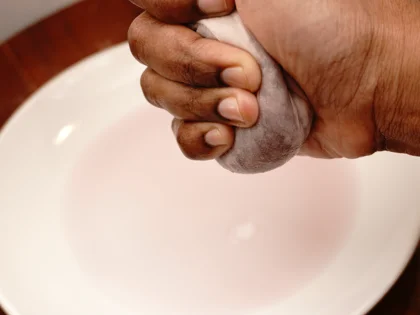
Squeeze: Transfer the salted onions into a piece of muslin cloth. Gather the edges of the cloth and squeeze firmly with your hands to extract as much onion juice as possible.
Prepare Chicken Mixture and Refrigerate
Make the Masala Mixture
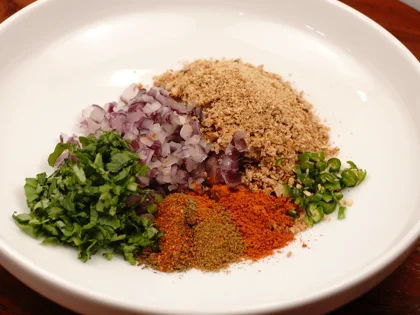
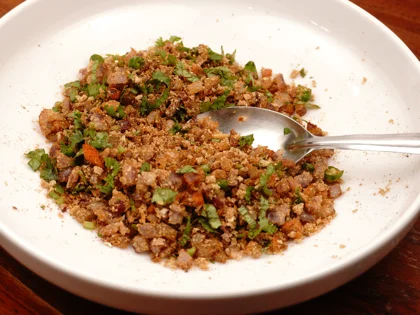
In a clean mixing bowl, combine
Prepared squeezed onion (75g)
45 grams bread crumbs (approx. 3 tbsp)
1 to 2 heaped tbsp finely chopped coriander leaves
2 tsp finely chopped green chilies
½ tsp zeera (cumin) powder
½ tsp chili powder
½ tsp garam masala powder (such as Everest brand)
Note: Wash the coriander leaves and ensure they are completely dry before chopping. Using a sharp knife, finely chop the garlic, green chilies and coriander leaves into very small pieces.
Note: Bread crumbs- I used homemade coarse bread crumbs. To save time, plan ahead to prepare them in advance, or simply use store-bought whole-grain bread crumbs.
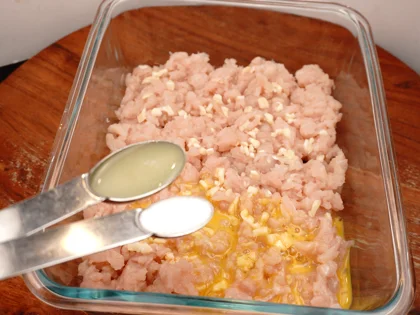
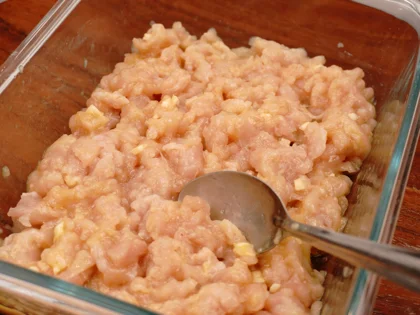
Marinate the Chicken
In a separate bowl with the minced chicken, add
30 ml beaten egg (approx. half egg)
2 tsp finely chopped garlic
½ tbsp lime juice
½ tsp salt
Don’t dump the salt and lime juice with spoon on chicken pieces. Just sprinkle ½ tsp salt and ½ tbsp lime juice all over the coarse mince chicken and mix well.
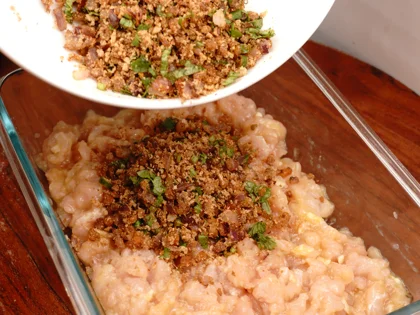
Combine and Chill
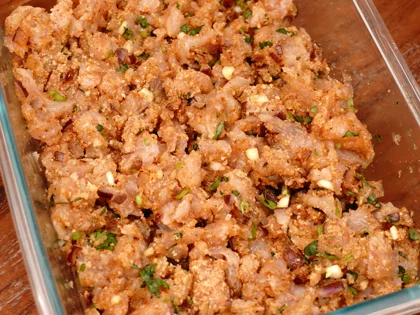
Bring the masala mixture and the marinated chicken together.
Mix Gently: Fold the ingredients together until just combined. Do not overmix the mixture then it became dense kebab.
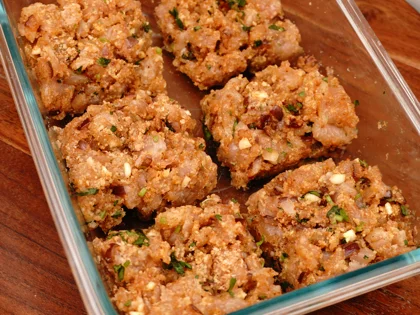
Refrigerate: Cover and place the mixture in the refrigerator for at least 45 minutes. This rests the meat, allows the flavors to marinate, and firms up the mixture so it easily shapes around the skewers.
To Wrap chicken mixture around the skewers
Check Consistency
Take the chicken mixture out of the refrigerator. Before dividing it, check its texture—it should be just a little bit sticky so it holds onto the skewers.
If it's too wet: Mix in extra breadcrumbs, 1 teaspoon at a time.
If it's too dry: Mix in beaten egg, 1 teaspoon at a time.
If it won't stay on the stick: Give the mixture a quick, gentle knead by hand to help it bind.
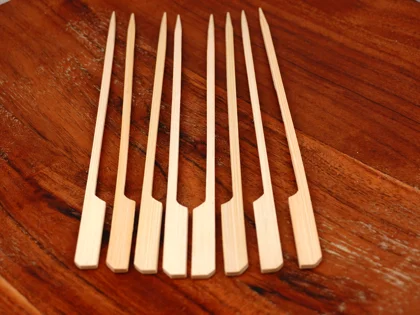
Once the consistency is right, gather your flat wooden skewers and roughly divide the mixture into 6 equal portions.
Don't over-chill: While a 45-minute chill prevents the chicken mixture from falling off the skewers, leaving it in the fridge for hours can make it too hard. If it feels too cold and hard, let it sit at room temperature for 20 to 30 minutes to reduce the chill before cooking.
Don't wait too long: Because of the lime juice in the mixture, cook these within 2 to 3 hours of prepping. If left longer, the acid will break down the meat, making the texture mushy.
Shaping onto Skewers
Oil Your Hands: Pour 1 teaspoon of cooking oil into a small bowl. Rub a little oil onto your hands to keep the chicken from sticking to your skin.
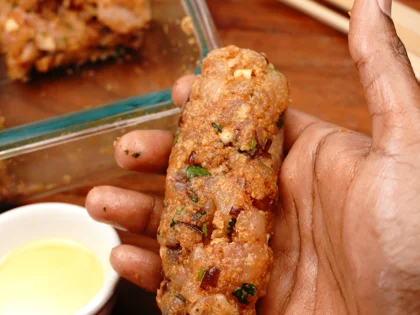
Form the Base: Take one portion of the mixture and press it into a rough cylindrical shape.
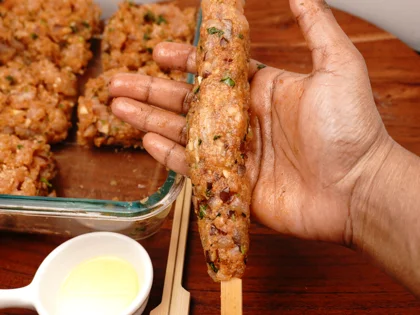
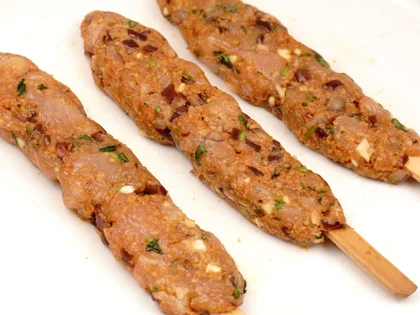
Thread the Skewer: Insert a flat wooden skewer straight through the center of the cylinder. Using gentle, even pressure with both hands, mold the chicken along the length of the skewer. Aim for a medium pack—not squeezed so tight that it becomes dense, but not so loose that it falls apart.
Repeat the same for the remaining chicken masala mixture.
Gently Roll and Flatten
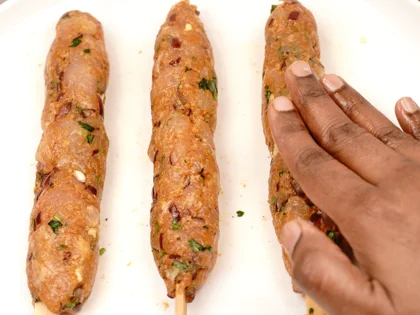
Even the Surface: Using your hands, gently roll the chicken mixture on the skewers. Apply light, consistent pressure to ensure an even surface on all sides of the skewer.
Form the Flattened Shape: Gently flatten the top and bottom surfaces of the rolled chicken mixture to form a thin, flattened skewer shape.
Use Oil as Needed: To prevent sticking and maintain a smooth texture, apply a little oil to your hands when rolling and flattening the skewers..
Pan Selection and Cooking Spacing Guide
Choosing the right pan and managing your spacing is the key to achieving a light browning.
Why Use Non-Stick: It allows you to cook the chicken skewers with less oil, prevents the meat from sticking, and makes cleanup much easier.
Option 1: Ceramic Non-Stick (Medium Heat): A premium ceramic coating safely works at medium heat. Best for cooking fewer pieces at a time. Leave plenty of space between the chicken skewers so moisture can escape, helping you attain a brown color.
Option 2: Hybrid or Seasoned Carbon Steel (Medium-High Heat): If using these durable pans, you can safely use the stove up to medium-high heat. This higher heat allows you to cook more pieces at a time in a pan and leave a little space between the chicken skewers to still achieve a brown color.
Cooking the chicken skewers
Heat the oil
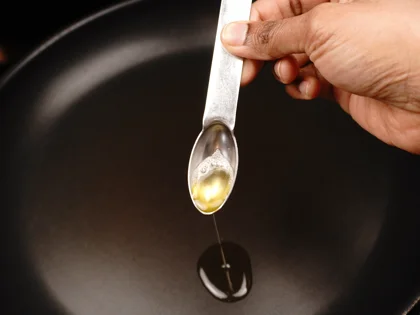
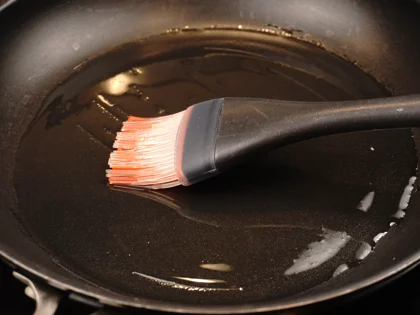
Oil the Pan: Add ½ tbsp of oil to a non-stick frying pan. Use a pastry brush to coat the bottom of the pan evenly.
Preheat: Place the oiled pan over a medium flame and let it preheat for 4 to 5 minutes before adding the skewers.
Note: The exact amount of oil needed will depend on the surface area of your pan.
Aim for Light golden color
The Sizzle Check: Before adding the chicken, make sure the pan is hot. You should hear a sizzling sound when the meat hits the oiled pan. If it doesn't sizzle, the pan is not hot enough. If the pan is smoking, it's too hot.
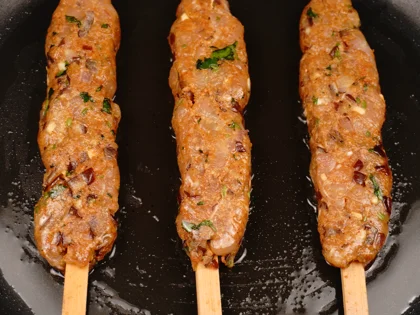
Give Them Space : Once the pan is ready, place the chicken skewers into the hot pan, leaving plenty of space between each one. Spacing them out ensures they attain golden brown instead of crowding the pan and steaming.
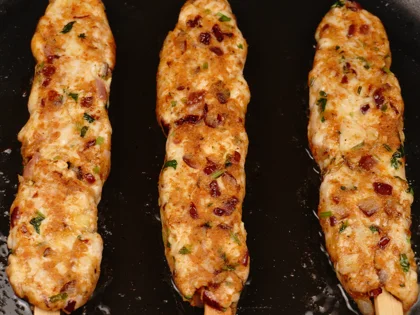
Check and Flip: After about 2 to 3 minutes, gently lift the edge of a skewer to check the underside. Once a light golden color has formed, the kebabs are ready to flip.
Note: Less oil in the pan can cause the chicken skewers to burn easily, so don’t cook for too long on one side over a medium flame. Cook them until to attain light golden color.
Flip and Finish Cooking
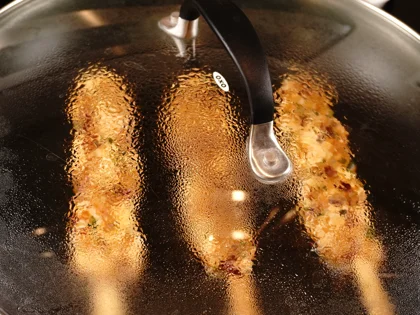
Flip and Cover : Flip the chicken skewers over to the second side, then immediately reduce the heat to medium-low and cover the pan with a lid.
Note: If your lid does not have a built-in vent hole, leave it partially open (cracked) to allow a little steam to escape.
Complete the Cook : Cook the second side covered over medium-low heat for 2 to 3 minutes. For a standard batch of three skewers, the total cooking time across both sides will be about 6 to 8 minutes.
Evaporate Surface Moisture : If the chicken skewers look a bit too moist when you remove the lid, let them cook for an additional minute or two completely uncovered. This allows any surface liquid to evaporate.
Why Cooking Times Vary: Keep in mind that exact times can change depending on your cookware, the heat of your stove, how thickly you shaped the kebabs, and how coarsely the meat was minced.
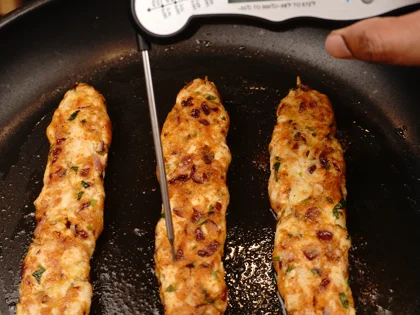
Check for Doneness : Verify with a Thermometer - For tender, juicy, and flavorful chicken skewers every time, insert an instant-read thermometer into the thickest part of the meat. Ensure it reaches an internal temperature between 165–180°F.This helps you avoid undercooked or overcooked chicken, ensuring it stays perfectly juicy and tasty.
Remove Surface Oil and Rest
Transfer the cooked skewers to a paper towel-lined plate. Using a fresh paper towel, gently pat all sides of the skewers to absorb the surface oil. Within a minute, move them to a clean plate and loosely cover them with a lid or foil to rest before serving.
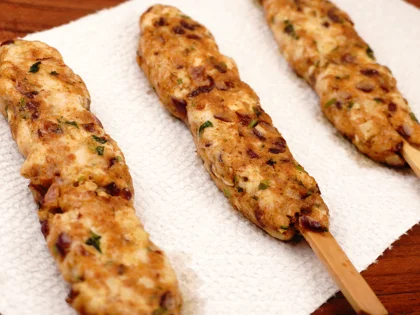
Serve and Enjoy!
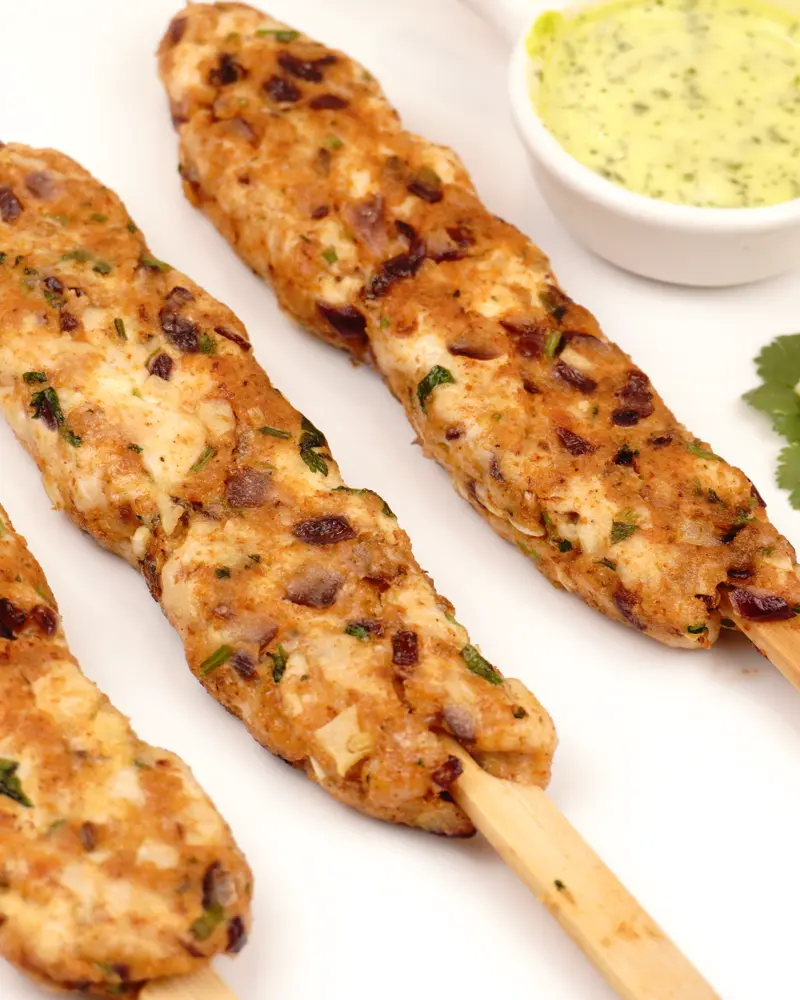
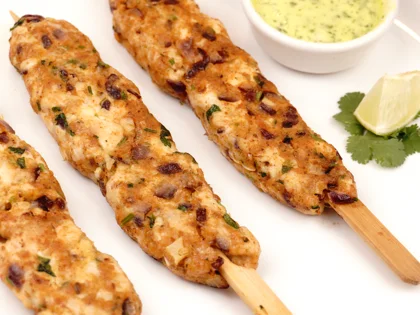
Ready to Serve: After resting for 5 to 10 minutes, your chicken seekh kebabs are perfectly juicy and ready to enjoy.
Perfect Pairings :Serve the warm skewers fresh alongside a refreshing, cool curd mint dip (pudina raita).
Tips
For prep chicken
💡 Low-Calorie Tip: Opt for chicken breast. As the leanest cut available, it’s your best choice for a high-protein, low-calorie meal.
💡 Pat it Dry: Make sure to thoroughly dry the whole boneless chicken breast with paper towels before cutting it into pieces to make coarse mince..
💡 To prepare coarse minced chicken, ask your butcher at the shop to grind boneless chicken breast to a coarse texture. Alternatively, you can easily make it yourself at home using electric chopper or mixi jar. The goal is to grind the chicken into very small pieces; it should not be a smooth paste (finely ground), nor should it have large chunks (too coarse).
For chicken mixture
💡 Chilling the mixture for at least 45 minutes allows the flavors to marinate and firms the texture for easier shaping.If you leave it in the fridge longer and it becomes too hard, let the skewers sit at room temperature for 15 to 20 minutes before cooking to reduce the chill.
💡 Don't leave the chicken mixture in the fridge for more than 2 to 3 hours after adding lime juice. If it sits too long, the texture will become mushy and the color will change.
💡 Check the Consistency: You want the mixture to be just a little bit sticky—that’s the secret to getting it to hold its shape on the skewers. If it is too wet, add breadcrumbs 1 teaspoon at a time. If it is too dry or crumbly, add beaten egg, 1 teaspoon at a time. If the mixture feels right but won't stay on the stick, just mix mixture again gently by hand. Then, try shaping it onto the skewers again.
For pan frying
💡 For a healthier option, use a ceramic non-stick pan and only 1 tablespoon of oil. Cook 300g of chicken pieces in two batches (using half a tablespoon each) to ensure every piece gets a light golden color. You can do this in one batch if you are using a large enough pan.
💡 To get a golden color, ensure the pan is hot enough to sizzle when placing the chicken skewers, but not smoking (too high) or failing to sizzle immediately (too low).
💡 To Attain a golden Color: Arrange the chicken skewers in a single layer, leaving plenty of space between them. If you are using a smaller pan, cook in multiple batches or switch to a larger pan
💡 My chicken skewers were thin—just a ¼-inch—so I only covered them after flipping. If yours are ½-inch thick, you’ll need to cook them covered from start to finish.
💡 For perfectly cooked, juicy, and safe skewers every time, rely on an instant-read meat thermometer. The target internal temperature is 165°F, measured in the thickest part of the meat.
For Salt & Taste-Testing
💡 Be careful with your salt, as it affects both flavor and texture. Too little salt leaves the chicken lacking flavor, while too much can make it tough. Remember that not all salts are the same; they have different levels of saltiness depending on the brand and type; for this recipe, I used 1/2 tsp of sea salt for 300g of boneless chicken and 1/2 tsp for the onion.
💡 Never taste the mixture once the raw chicken is added, as this can lead to food poisoning. To check the salt safely, fry a small sample piece and adjust the seasoning based on the cooked taste.
Frequently Asked Questions
Too sticky: If the chicken masala mixture is too sticky(moist), difficult to wrap around the skewers, add some bread crumbs, 1 tsp at a time.
Too dry: If you add more bread crumbs in chicken mixture then it becomes too dry and difficult to wrap around the skewers. Add some beaten egg, 1 tsp at a time.
Aim for Little sticky: The chicken masala mixture will be little sticky, so that it will help the mixture to bind together to shape around the skewers.
Refrigeration firms up the chicken mixture and allows it to marinate. This makes it much easier to shape around the skewers and prevents the meat from breaking apart while cooking.
The mixture becomes too hard from over chilling, let the prepared skewers sit at room temperature for about 30 minutes to reduce chill before cooking. This ensures the chicken cooks evenly.
The most likely reason is overcrowding the pan. If you don't leave enough space between the skewers, you prevent them from light golden color.
You can use these chicken skewers in many different meals. Try chopping them up to use in fried rice, soups, or noodles. They also make an excellent filling for sandwiches, burgers, and chapati wraps, or you can use them as a savory stuffing for dosas and tacos.
Using flat wooden skewers is highly recommended because they prevent the chicken from rotating or spinning when you try to flip them. This ensures even cooking and a much better presentation.
Reuse the skewers - if wooden skewers are not burnt after cooking, you can wash them thoroughly and use them again. However, always inspect them for cracks or food residue to ensure they remain food-safe.
Chicken breast is the leanest cut available, making it the healthiest part of the chicken. Because it is low in fat, zero-carb, and has the most protein by weight, it’s an excellent choice for anyone prioritizing heart health or weight loss.
Just put it in an airtight container and store it in the fridge immediately after cooling (and always within 2 hours of cooking). According to food safety guidelines, cooked chicken lasts in the fridge for 3–4 days.
You Might Also Like
Low Calorie Chicken Seekh Kebab Recipe
Chicken seekh kebabs are typically made with rich, fattier, boneless leg pieces and pan-fried in ghee.
To reduce your calorie intake, simply switch to chicken breast and use less oil. This adaptation makes the kebabs a healthier, more frequent meal option. Even with reduced fat and coarse chicken breast, these chicken seekh kebabs remain moist, tender and tasty.
For a restaurant-style version, try this Restaurant style chicken seekh kebab; or, for a quick version, try the Less prep time 15 mins chicken seekh kebab.
Ingredients
- 300 grams Coarse chicken breast
- 75 grams (half medium size ) Finely chopped onion
- 2 tsp (3 to 4 small size cloves) Finely chopped garlic
- 2 tsp Finely chopped green chili
- 45 grams (3 tbsp) Breadcrumbs
- 30 ml (approx. half egg) Beaten Egg
- ½ tsp Garam masala powder
- ½ tsp Zeera powder
- ½ tsp Chili powder
- ½ tbsp (half medium size) Lime juice
- 1 to 2 heaped tbsp Finely chopped Coriander leaves
- 1 tbsp Oil
- ¾ tsp (approx.) Salt
Instructions
-
Why Choose Chicken Breast?
Chicken breast is very high-protein, low-fat, and zero-carb, making it the perfect choice for muscle building or weight loss.
-
Aim for a Coarse Mince
When prepping the meat for chicken skewers, the goal is a coarse mince. You want the chicken ground into very small pieces—not a smooth, fine paste, but without large chunks either. This coarse texture is exactly what keeps the kebabs light instead of dense.
You can achieve this texture in one of two ways:
At the Shop: Ask your butcher to coarsely mince boneless chicken breast.
At Home: Pulse boneless chicken breast in a food processor until it reaches a coarse grind.
-
Make the Masala Mixture
In a clean mixing bowl, combine
Prepared squeezed onion (75g)
45 grams bread crumbs (approx. 3 tbsp)
1 to 2 heaped tbsp finely chopped coriander leaves
2 tsp finely chopped green chilies
½ tsp zeera (cumin) powder
½ tsp chili powder
½ tsp garam masala powder (such as Everest brand)
Note: Wash the coriander leaves and ensure they are completely dry before chopping. Using a sharp knife, finely chop the garlic, green chilies and coriander leaves into very small pieces.
Note: Bread crumbs- I used homemade coarse bread crumbs. To save time, plan ahead to prepare them in advance, or simply use store-bought whole-grain bread crumbs.
-
Marinate the Chicken
In a separate bowl with the minced chicken, add
30 ml beaten egg (approx. half egg)
2 tsp finely chopped garlic
½ tbsp lime juice
½ tsp salt
Don’t dump the salt and lime juice with spoon on chicken pieces. Just sprinkle ½ tsp salt and ½ tbsp lime juice all over the coarse mince chicken and mix well.
-
Combine and Chill
Bring the masala mixture and the marinated chicken together.
Mix Gently: Fold the ingredients together until just combined. Do not overmix the mixture then it became dense kebab.
Refrigerate: Cover and place the mixture in the refrigerator for at least 45 minutes. This rests the meat, allows the flavors to marinate, and firms up the mixture so it easily shapes around the skewers.
-
Check Consistency
Take the chicken mixture out of the refrigerator. Before dividing it, check its texture—it should be just a little bit sticky so it holds onto the skewers.
If it's too wet: Mix in extra breadcrumbs, 1 teaspoon at a time.
If it's too dry: Mix in beaten egg, 1 teaspoon at a time.
If it won't stay on the stick: Give the mixture a quick, gentle knead by hand to help it bind.
Once the consistency is right, gather your flat wooden skewers and roughly divide the mixture into 6 equal portions.
Don't over-chill: While a 45-minute chill prevents the chicken mixture from falling off the skewers, leaving it in the fridge for hours can make it too hard. If it feels too cold and hard, let it sit at room temperature for 20 to 30 minutes to reduce the chill before cooking.
Don't wait too long: Because of the lime juice in the mixture, cook these within 2 to 3 hours of prepping. If left longer, the acid will break down the meat, making the texture mushy.
-
Shaping onto Skewers
Oil Your Hands: Pour 1 teaspoon of cooking oil into a small bowl. Rub a little oil onto your hands to keep the chicken from sticking to your skin.
Form the Base: Take one portion of the mixture and press it into a rough cylindrical shape.
Thread the Skewer: Insert a flat wooden skewer straight through the center of the cylinder. Using gentle, even pressure with both hands, mold the chicken along the length of the skewer. Aim for a medium pack—not squeezed so tight that it becomes dense, but not so loose that it falls apart.
Repeat the same for the remaining chicken masala mixture.
-
Gently Roll and Flatten
Even the Surface: Using your hands, gently roll the chicken mixture on the skewers. Apply light, consistent pressure to ensure an even surface on all sides of the skewer.
Form the Flattened Shape: Gently flatten the top and bottom surfaces of the rolled chicken mixture to form a thin, flattened skewer shape.
Use Oil as Needed: To prevent sticking and maintain a smooth texture, apply a little oil to your hands when rolling and flattening the skewers..
-
Heat the oil
Oil the Pan: Add ½ tbsp of oil to a non-stick frying pan. Use a pastry brush to coat the bottom of the pan evenly.
Preheat: Place the oiled pan over a medium flame and let it preheat for 4 to 5 minutes before adding the skewers.
Note: The exact amount of oil needed will depend on the surface area of your pan.
-
Aim for Light golden color
The Sizzle Check: Before adding the chicken, make sure the pan is hot. You should hear a sizzling sound when the meat hits the oiled pan. If it doesn't sizzle, the pan is not hot enough. If the pan is smoking, it's too hot.
Give Them Space : Once the pan is ready, place the chicken skewers into the hot pan, leaving plenty of space between each one. Spacing them out ensures they attain golden brown instead of crowding the pan and steaming.
Check and Flip: After about 2 to 3 minutes, gently lift the edge of a skewer to check the underside. Once a light golden color has formed, the kebabs are ready to flip.
Note: Less oil in the pan can cause the chicken skewers to burn easily, so don’t cook for too long on one side over a medium flame. Cook them until to attain light golden color.
-
Flip and Finish Cooking
Flip and Cover : Flip the chicken skewers over to the second side, then immediately reduce the heat to medium-low and cover the pan with a lid.
Note: If your lid does not have a built-in vent hole, leave it partially open (cracked) to allow a little steam to escape.
Complete the Cook : Cook the second side covered over medium-low heat for 2 to 3 minutes. For a standard batch of three skewers, the total cooking time across both sides will be about 6 to 8 minutes.
Evaporate Surface Moisture : If the chicken skewers look a bit too moist when you remove the lid, let them cook for an additional minute or two completely uncovered. This allows any surface liquid to evaporate.
Why Cooking Times Vary: Keep in mind that exact times can change depending on your cookware, the heat of your stove, how thickly you shaped the kebabs, and how coarsely the meat was minced.
Check for Doneness : Verify with a Thermometer - For tender, juicy, and flavorful chicken skewers every time, insert an instant-read thermometer into the thickest part of the meat. Ensure it reaches an internal temperature between 165–180°F.This helps you avoid undercooked or overcooked chicken, ensuring it stays perfectly juicy and tasty.
-
Remove Surface Oil and Rest
Transfer the cooked skewers to a paper towel-lined plate. Using a fresh paper towel, gently pat all sides of the skewers to absorb the surface oil. Within a minute, move them to a clean plate and loosely cover them with a lid or foil to rest before serving.
-
Serve and Enjoy!
Ready to Serve: After resting for 5 to 10 minutes, your chicken seekh kebabs are perfectly juicy and ready to enjoy.
Perfect Pairings :Serve the warm skewers fresh alongside a refreshing, cool curd mint dip (pudina raita).
Loading rating...
Write a Review
Loading reviews...