Less Prep time -15 Mins Pan Grilled Chicken Seekh Kebab
by Viruthiga Veni
Loading rating...
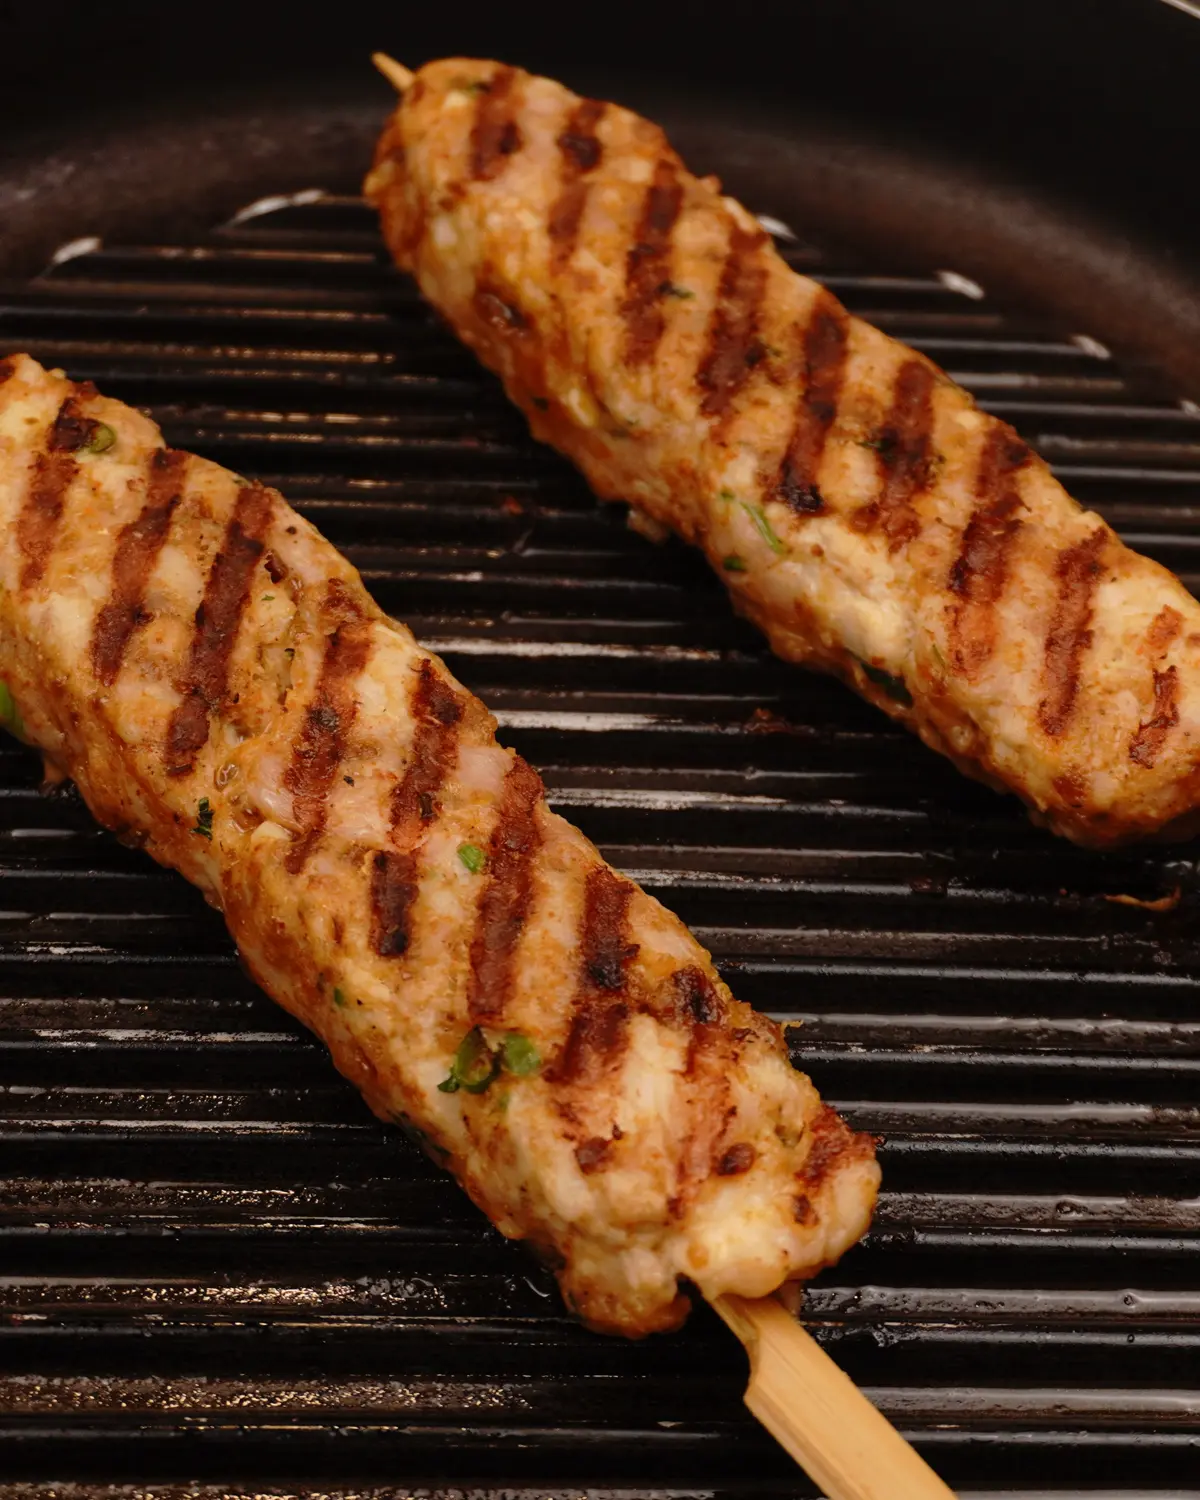
These pan-grilled chicken seekh kebabs will be tender and juicy on the inside, with dark brown grill marks on the outside.
Variations:
For traditional way, try this Perfect Pan-Grilled Chicken Seekh Kebab – Restaurant Style at Home
For a health-conscious persons, try this low calorie pan grilled chicken seekh kebab.
Ingredients
Boneless chicken leg(thigh/drumstick) coarsely minced – 300 grams
Crispy fried onion – 15 grams (1 tbsp)
Toasted breadcrumbs – 20 grams (1½ tbsp)
Finely chopped garlic – 1 tsp (3 small size cloves)
Garam masala powder – ½ tsp
Chili powder – ½ tsp
Zeera powder – ½ tsp
Lime juice – ½ tbsp (half medium size)
Finely chopped Coriander leaves – 1 heaped tbsp.
Beaten Egg – 25ml (approx. half egg)
Salt – ¾ tsp approx.
Ghee – 1 tbsp
Finely chopped green chili – 2 tsp
Instructions for how to make chicken seekh kebab
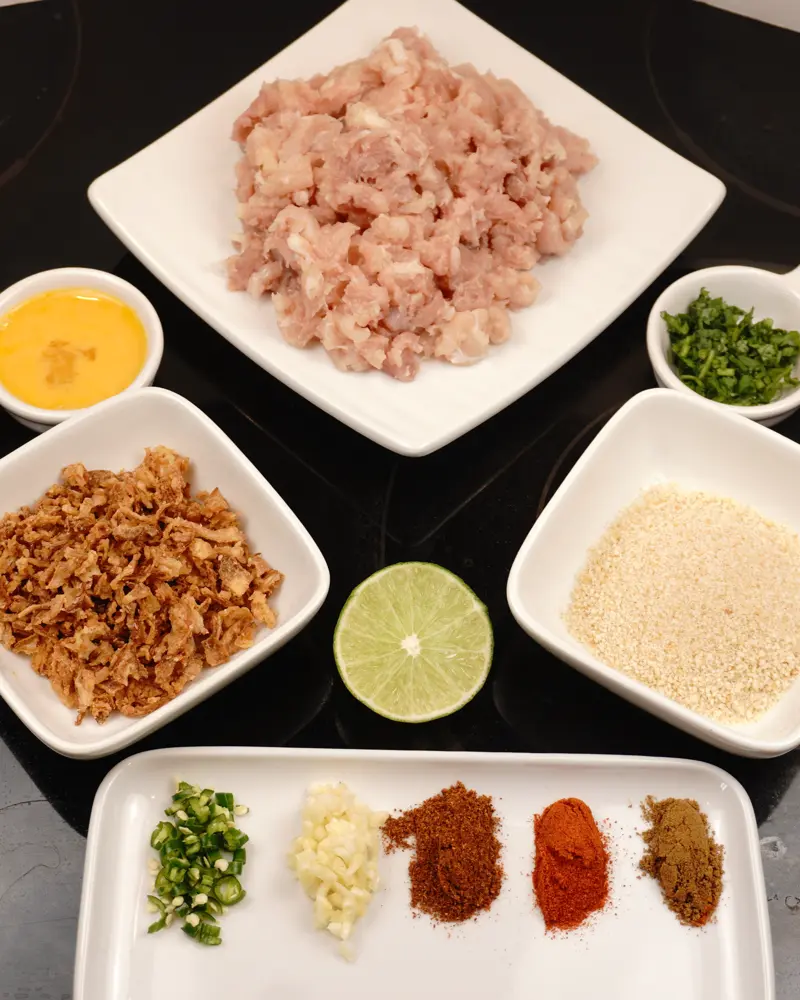
Gather and prepare the ingredients
Finely chop green chili, garlic and coriander leaves - Using knife to chop the garlic and coriander leaves into very small pieces. Make sure the green chili and coriander leaves are washed and dried before start to chop.
Ground spices - I used Everest garam masala powder and home-made cumin powder and chili powder.
Beaten egg - Beat 1 egg well. Use 30ml of the beaten egg (approx. half an egg).
Bread crumbs- Plan ahead to prepare in advance the homemade bread crumbs that are coarsely grind or use store bought bread crumbs. But using toasted bread crumbs gives a faster dark-brown grill marks than regular bread crumbs while pan grilling.
Prepare Chicken
Get coarse mince chicken from shop or prepare at home - Ask your butcher to grind boneless chicken leg pieces to a coarse texture. Alternatively, you can easily make it yourself at home using electric chopper or mixi jar.
Preparation of mince chicken mixture
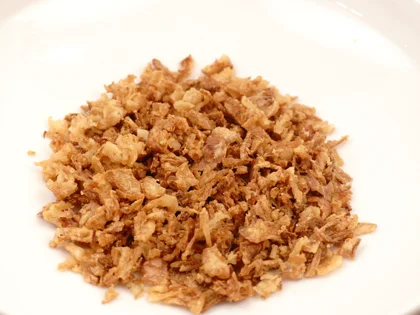
Place the fried onion in the clean bowl, using hands to crush them in to small pieces
15 grams crispy fried onion (1 tbsp)
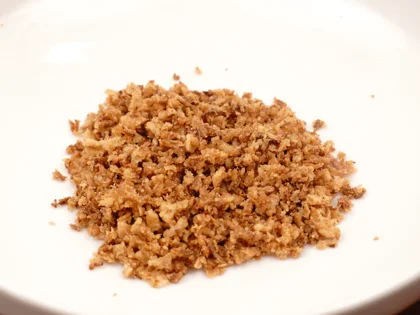
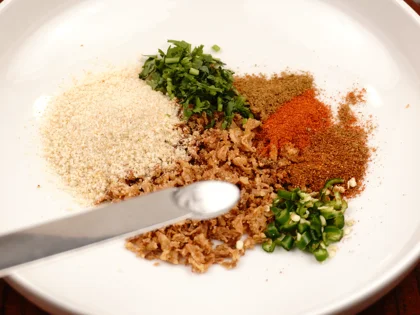
To prepare masala mixture, add the following ingredients to the crushed fried onion then mix well
20 grams bread crumbs (approx. 1½ tbsp)
½ tsp zeera powder
½ tsp garam masala powder
½ tsp chili powder
2 tsp finely chopped green chili
1 tbsp finely chopped coriander leaves
little salt
Note: Using toasted bread crumbs gives a faster dark-brown grill marks than regular bread crumbs while pan grilling.
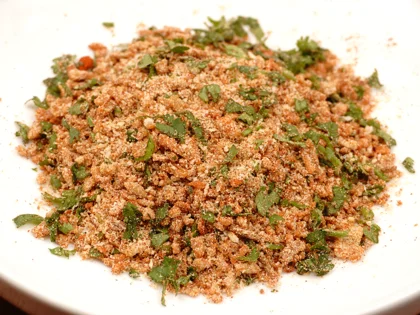
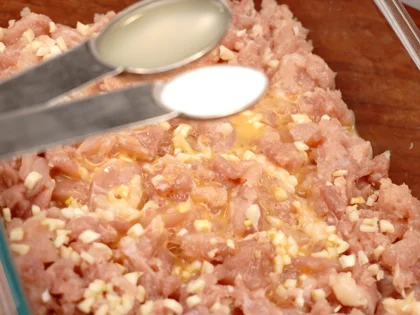
Add the following ingredients to mince chicken, combine them gently
25 ml beaten egg
1 tsp finely chopped garlic
½ tbsp lime juice
½ tsp salt
Don’t dump the salt and lime juice with spoon on chicken pieces. Just sprinkle ½ tsp salt and ½ tbsp lime juice all over the prepared mince chicken.
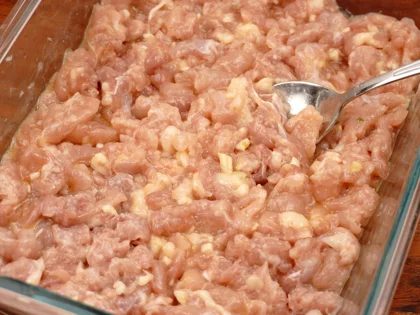
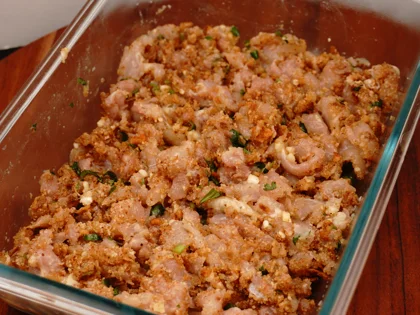
Combine both the prepared masala mixture and marinated mince chicken, don’t overmix then place them in refrigerator
If you over mix the chicken mixture then it became dense chicken kebab.
Place them in refrigerator for at least 45 minutes, to firm up the chicken mixture, to shape easily around skewers and also gets marinated well.
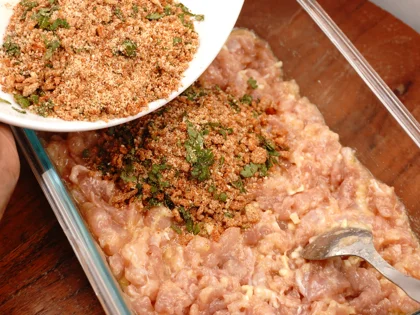
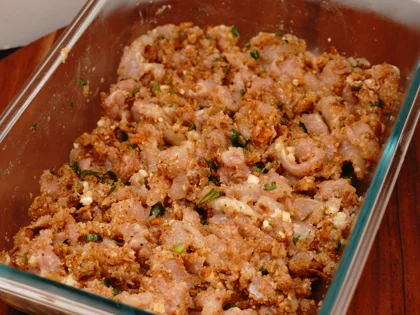
To Wrap chicken mixture around the skewers
Gather flat wooden skewers, take the chicken mixture from the refrigerator, roughly divide them in to equal size portions
Roughly divide them in to 5 to 6 equal size portions.
Note: Refrigerating for at least 45 minutes will also help to avoid breaking apart the chicken skewers while cooking. But if you refrigerate the chicken masala mixture for longer time then the chicken mixture become hard, so let them sit at room temperature for 20 to 30 minutes to reduce chill before cooking.
Note: Once lime juice is added to chicken mixture, it should be kept for only 2 to 3 hours. Reason being, if lime juice added chicken mixture kept for longer time, then it will become mushy and change texture.
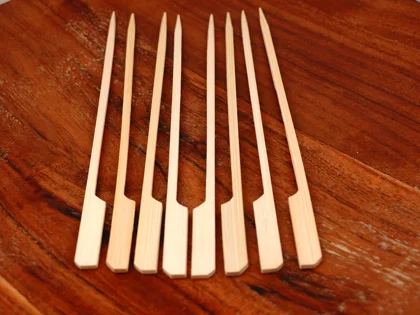
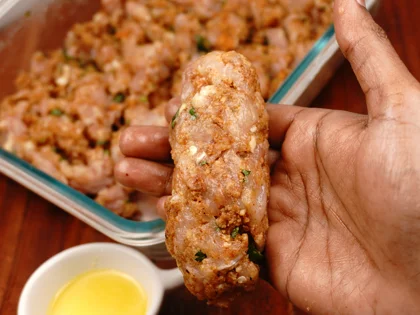
Apply oil on your hands, take one portion of chicken mixture, make a cylindrical shape, use two hands to form long cylindrical shape around the skewer
Take 1 tsp of oil in a small bowl. The chicken mixture will be little sticky so apply oil on your hands to avoid them not to stick to your hands.
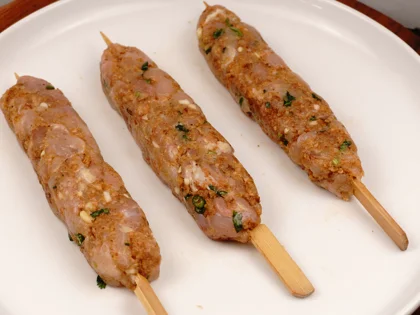
Insert the skewer through the center of the cylindrical shaped chicken mixture and using hand to apply little pressure to flatten them evenly and also as thin as possible.
It’s important by using hands to gently form the chicken mixture in to loosely packed around skewers not to form too tightly packed / too loosely packed around the skewers.
Repeat the same for the remaining chicken masala mixture.
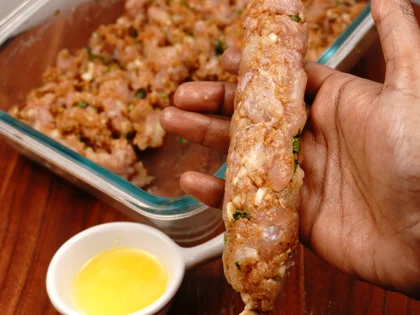
Gently roll and flatten the mixture on the skewers
Even the Surface: Using your hands, gently roll the chicken mixture on the skewers. Apply light, consistent pressure to ensure an even surface on all sides of the skewer.
Form the Flattened Shape: Gently flatten the top and bottom surfaces of the rolled chicken mixture to form a thin, flattened skewer shape.
Use Oil as Needed: To prevent sticking and maintain a smooth texture, apply a little oil to your hands when rolling and flattening the skewers.
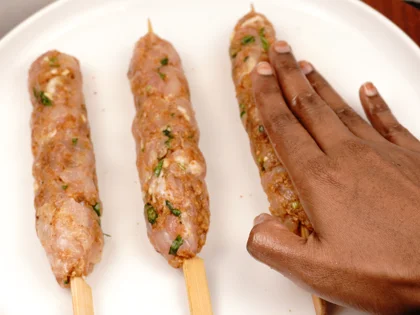
Cooking chicken skewers in a nonstick grill pan
Oil and preheat the grill pan
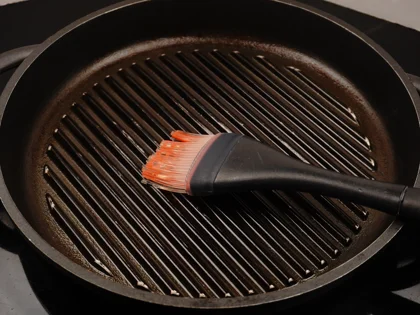
Gather pastry brush- It helps to coat the oil/liquid ghee evenly over the surface of the grill pan and chicken skewers.
Add 1 tsp oil to the grill pan. By using pastry brush, to spread the oil entirely in the bottom of the nonstick grill pan evenly. Preheat them for about 6 to 8 minutes over medium flame.
Prepare liquid ghee, just before placing them on hot pan, use pastry brush to apply ghee on top surface of the chicken skewers
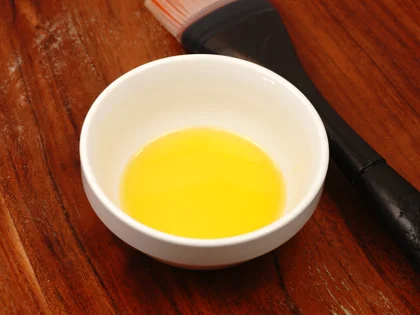
While the grill pan is preheating, gather ghee. If ghee is solid, you can simply melt it by heating it gently for a few minutes to achieve a liquid state. So, use liquid ghee. Don’t use butter. It contains too much water.
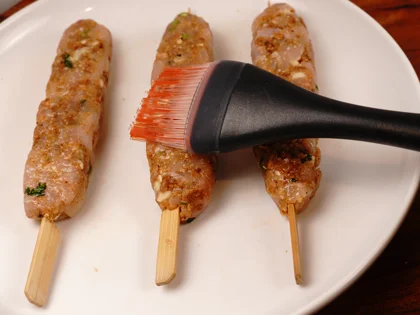
Apply ghee over the chicken skewers helps to fries the surface to create dark brown grill marks crust, and to keep the chicken kebab moist.
Note: Make sure to coat them with ghee right before it place on a grill pan.
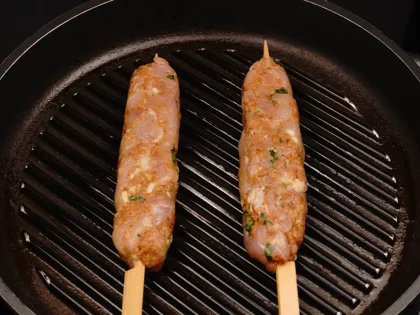
Place the oiled surface chicken skewers on the hot grill pan and continue to cook them without moving, untill to attain dark brown grill marks underside the chicken skewers for about 4 to 5 minutes over medium flame
You will hear a Sizzling sound when you place the chicken skewers in hot pan. Then the pan is ready. Don’t add the chicken skewers to the pan until the pan is very hot.
Place the chicken skewers with more space between them.
Note: The pan should be hot enough to sizzle, but not smoking (too high) or failing to sizzle immediately (too low). To achieve good looking results, place your chicken skewers at a 45-degree angle to the grates.
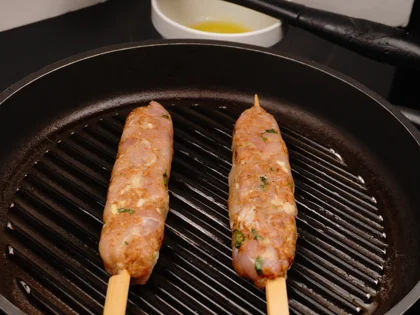
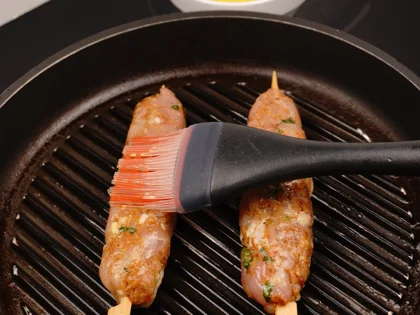
Just before flip them, baste ghee on top side of the chicken skewers then flip them & reduce the heat to low
After 4 to 5 minutes, just check quickly by lifting the sides of the skewers, whether dark brown grill marks formed.
Once grill marks formed, apply ghee on top side of the chicken skewers and then flip.
After flip the skewers reduce the heat to low .
Note: Be careful, don’t turn grill marks into burnt(black), then it will give bitter tatse. So the goal is to attained brown/dark brown grill marks.
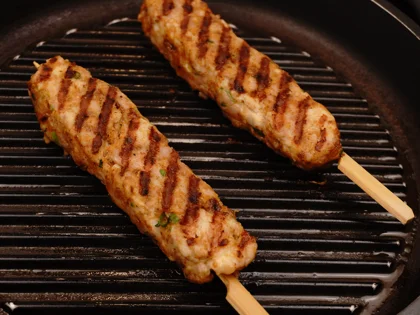
In low heat, continue to cook them for about 4 to 5 minutes, to cook inside
After flipping, cook them in low heat, for about 4 to 5 minutes or untill the internal temperature of the chicken skewers between 165-180F.
Usually the total cooking time for this chicken skewers is 8 to 9 minutes for 1 batch.
The cooking time will vary depends upon the thickness of the chicken skewers, how coarsely the chicken pieces are minced (size of chicken pieces), the type of cookware used, the amount of heat used.
Note: If you see food bits left behind, wipe the grill pan clean between batches. This ensures every skewer gets clean, perfect grill marks without any burnt flavor.
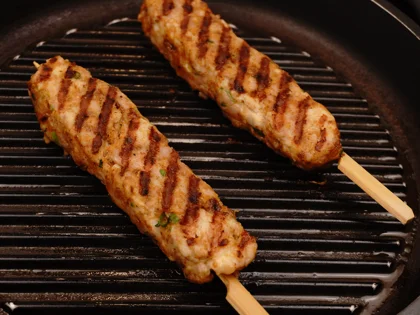
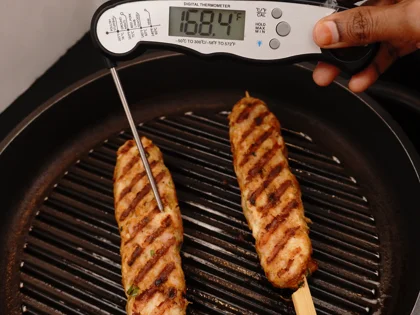
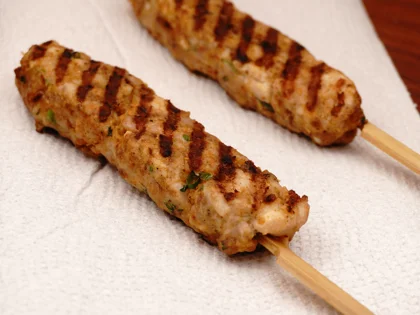
Transfer the grilled chicken skewers to a paper towel lined plate, transfer them to clean plate to rest for at least 5 to 10 minutes before serve
Transfer the cooked grilled skewers to a paper towel-lined plate. Using a fresh paper towel, gently pat all sides of the skewers to absorb the surface oil. After a minute or two, move them to a clean plate and loosely cover them with a lid or foil to rest before serving.
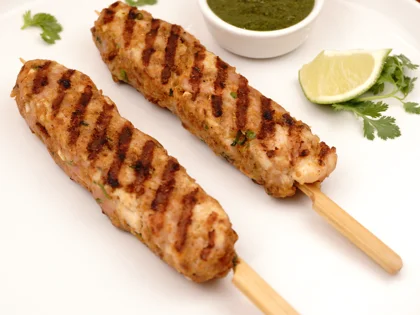
Now the pan grilled chicken seekh kebab is ready to be served with curd mint dip
After resting, the grilled skewers are ready to serve.
Tips
For prep chicken
💡 For the best flavor and juiciness, use boneless, skinless chicken thighs or drumsticks.
💡 To prepare coarse minced chicken, ask your butcher at the shop to grind boneless chicken leg pieces to a coarse texture. Alternatively, you can easily make it yourself at home using electric chopper or mixi jar.Remember to retain a little fat (the white soft part) in the chicken when making the coarse mince for extra juiciness.
For chicken mixture
💡 Using toasted bread crumbs helps achieve dark-brown grill marks faster than regular bread crumbs while pan-grilling.
💡 Chilling the mixture for at least 45 minutes allows the flavors to marinate and firms the texture for easier shaping.If you leave it in the fridge longer and it becomes too hard, let the skewers sit at room temperature for 15 to 20 minutes before cooking to reduce the chill
💡 The consistency of the chicken masala mixture should be slightly sticky. If the mixture is too sticky, add breadcrumbs 1 teaspoon at a time. Conversely, if the mixture is too dry or crumbly, add beaten egg, 1 teaspoon at a time. If the mixture feels right but won't stay on the stick, just mix mixture again gently by hand. Then, try shaping it onto the skewers again.
💡 Don't leave the chicken mixture in the fridge for more than 2 to 3 hours after adding lime juice. If it sits too long, the texture will become mushy and the color will change
For pan grilling
💡 I Used a non-stick grill pan to cook the skewers so they do not stick and to make cleaning up much easier.However, if you want the skewers to be more crispy grill marks crust, use a cast iron grill pan instead.
💡 Usually in restaurants chicken skewers are cooked in ghee which will infuses a rich flavor, enhancing the chicken skewer’s taste and texture.
💡 To get a nice brown or dark brown grill marks, ensure the pan is hot enough to sizzle when placing the chicken skewers, but not smoking (too high) or failing to sizzle immediately (too low).
💡 To Attain a Dark Brown grill marks: Arrange the chicken skewers in a single layer, leaving plenty of space between them. If you are using a smaller pan, cook in multiple batches or switch to a larger pan.
💡 Wait to flip! Check the bottom and only turn the skewers once you see brown grill marks.
💡 Be careful, don’t turn grill marks into burnt(black), then it will give bitter tatse. So the goal is to attained brown/dark brown grill marks.
💡 For perfectly cooked, juicy, tender and safe grilled skewers every time, rely on an instant-read meat thermometer. The target internal temperature is between 165–180°F, measured in the thickest part of the meat
💡 If you see food bits left behind, wipe the grill pan clean between batches. This ensures every skewer gets clean, perfect grill marks without any burnt flavor.
For Salt
💡 Be careful with your salt, as it affects both flavor and texture. Too little salt leaves the chicken lacking flavor, while too much can make it tough. Remember that not all salts are the same; they have different levels of saltiness depending on the brand and type; for this recipe, I used 1/2 tsp of sea salt for 300g of boneless chicken and 1/4 tsp for the onion mixture.
Safe Taste-Testing
💡 Never taste the mixture once the raw chicken is added, as this can lead to food poisoning. To check the salt safely, grill a small sample piece and adjust the seasoning based on the cooked taste.
Frequently Asked Questions
Too sticky: If the chicken masala mixture is too sticky(moist), difficult to wrap around the skewers, add some bread crumbs, 1 tsp at a time.
Too dry: If you add more bread crumbs in chicken mixture then it becomes too dry and difficult to wrap around the skewers. Add some beaten egg, 1 tsp at a time.
Little sticky: The chicken masala mixture will be little sticky, so that it will help the mixture to bind together to shape around the skewers.
Grill pan isn’t very hot enough, overcrowding the grill pan with skewers, flipping the meat too early, a lack of oil on the grill pan or meat, or using a dirty pan with leftover residue.
To get dark brown grill marks, ensure your grill pan is preheated until very hot and lightly coated with oil. Place the skewers in a single layer with plenty of space between them to prevent steaming, and flip them only once after a dark brown crust has formed.
While preheating your pan on medium heat for at least 7 to 8 minutes, hold your palm about 3 to 4 inches above the grill surface.
Hot & Ready: If you feel enough heat to pull your hand away due to discomfort after 2 to 4 seconds, the pan is ready.
Too Hot: If you must pull your hand away after only 1 to 2 seconds, the pan is too hot. This can lead to bitter, burnt (black) grill marks before the chicken is cooked through.
Too Cool: If you can hold your hand there for more than 5 seconds, the pan needs more time to preheat; otherwise, your meat will steam instead of browning.
To achieve good looking results, place your chicken skewers at a 45-degree angle to the grates. This positioning creates beautiful, angled grill marks that are more visually pleasing than straight lines.
Use ghee because it infuses a rich flavor while enhancing the chicken’s taste and texture. Avoid using butter, as it contains water and prevent the chicken from browning properly.
Thick skewers can stay raw in the middle. To fix this, cover the grill pan with a lid halfway through cooking to trap heat.
You can use these chicken skewers in many different meals. Try chopping them up to use in fried rice, soups, or noodles. They also make an excellent filling for sandwiches, burgers, and chapati wraps, or you can use them as a savory stuffing for dosas and tacos.
Using flat wooden skewers is highly recommended because they prevent the chicken from rotating or spinning when you try to flip them. This ensures even cooking and a much better presentation.
Reuse the skewers - if wooden skewers are not burnt after cooking, you can wash them thoroughly and use them again. However, always inspect them for cracks or food residue to ensure they remain food-safe.
Yes. The raised ridges keep the chicken skewers elevated, preventing them from sitting in their own fat. This allows excess oil to drain away and collect at the bottom of the pan, so less fat is absorbed by the chicken skewers, which reduces the calories.
Fat equals flavor. Leg meat (thighs and drumsticks) has more natural fat than chicken breasts, which makes the kebabs much more flavorful and juicy.
Refrigerate them right away. Put leftovers in shallow containers within 2 hours of cooking. For the best quality and safety, use the leftover chicken within 2 to 3 days.
You Might Also Like
Less Prep time -15 Mins Pan Grilled Chicken Seekh Kebab Recipe
These pan-grilled chicken seekh kebabs will be tender and juicy on the inside, with dark brown grill marks on the outside.
Variations:
For traditional way, try this Perfect Pan-Grilled Chicken Seekh Kebab – Restaurant Style at Home
For a health-conscious persons, try this low calorie pan grilled chicken seekh kebab.
Ingredients
- 300 grams Boneless chicken leg(thigh/drumstick) coarsely minced
- 15 grams (1 tbsp) Crispy fried onion
- 20 grams (1½ tbsp) Toasted breadcrumbs
- 1 tsp (3 small size cloves) Finely chopped garlic
- ½ tsp Garam masala powder
- ½ tsp Chili powder
- ½ tsp Zeera powder
- ½ tbsp (half medium size) Lime juice
- 1 heaped tbsp. Finely chopped Coriander leaves
- 25ml (approx. half egg) Beaten Egg
- ¾ tsp approx. Salt
- 1 tbsp Ghee
- 2 tsp Finely chopped green chili
Instructions
-
Prepare Chicken
Get coarse mince chicken from shop or prepare at home - Ask your butcher to grind boneless chicken leg pieces to a coarse texture. Alternatively, you can easily make it yourself at home using electric chopper or mixi jar.
-
Place the fried onion in the clean bowl, using hands to crush them in to small pieces
15 grams crispy fried onion (1 tbsp)
-
To prepare masala mixture, add the following ingredients to the crushed fried onion then mix well
20 grams bread crumbs (approx. 1½ tbsp)
½ tsp zeera powder
½ tsp garam masala powder
½ tsp chili powder
2 tsp finely chopped green chili
1 tbsp finely chopped coriander leaves
little salt
Note: Using toasted bread crumbs gives a faster dark-brown grill marks than regular bread crumbs while pan grilling.
-
Add the following ingredients to mince chicken, combine them gently
25 ml beaten egg
1 tsp finely chopped garlic
½ tbsp lime juice
½ tsp salt
Don’t dump the salt and lime juice with spoon on chicken pieces. Just sprinkle ½ tsp salt and ½ tbsp lime juice all over the prepared mince chicken.
-
Combine both the prepared masala mixture and marinated mince chicken, don’t overmix then place them in refrigerator
If you over mix the chicken mixture then it became dense chicken kebab.
Place them in refrigerator for at least 45 minutes, to firm up the chicken mixture, to shape easily around skewers and also gets marinated well.
-
Gather flat wooden skewers, take the chicken mixture from the refrigerator, roughly divide them in to equal size portions
Roughly divide them in to 5 to 6 equal size portions.
Note: Refrigerating for at least 45 minutes will also help to avoid breaking apart the chicken skewers while cooking. But if you refrigerate the chicken masala mixture for longer time then the chicken mixture become hard, so let them sit at room temperature for 20 to 30 minutes to reduce chill before cooking.
Note: Once lime juice is added to chicken mixture, it should be kept for only 2 to 3 hours. Reason being, if lime juice added chicken mixture kept for longer time, then it will become mushy and change texture.
-
Apply oil on your hands, take one portion of chicken mixture, make a cylindrical shape, use two hands to form long cylindrical shape around the skewer
Take 1 tsp of oil in a small bowl. The chicken mixture will be little sticky so apply oil on your hands to avoid them not to stick to your hands.
Insert the skewer through the center of the cylindrical shaped chicken mixture and using hand to apply little pressure to flatten them evenly and also as thin as possible.
It’s important by using hands to gently form the chicken mixture in to loosely packed around skewers not to form too tightly packed / too loosely packed around the skewers.
Repeat the same for the remaining chicken masala mixture.
-
Gently roll and flatten the mixture on the skewers
Even the Surface: Using your hands, gently roll the chicken mixture on the skewers. Apply light, consistent pressure to ensure an even surface on all sides of the skewer.
Form the Flattened Shape: Gently flatten the top and bottom surfaces of the rolled chicken mixture to form a thin, flattened skewer shape.
Use Oil as Needed: To prevent sticking and maintain a smooth texture, apply a little oil to your hands when rolling and flattening the skewers.
-
Oil and preheat the grill pan
Gather pastry brush- It helps to coat the oil/liquid ghee evenly over the surface of the grill pan and chicken skewers.
Add 1 tsp oil to the grill pan. By using pastry brush, to spread the oil entirely in the bottom of the nonstick grill pan evenly. Preheat them for about 6 to 8 minutes over medium flame.
-
Prepare liquid ghee, just before placing them on hot pan, use pastry brush to apply ghee on top surface of the chicken skewers
While the grill pan is preheating, gather ghee. If ghee is solid, you can simply melt it by heating it gently for a few minutes to achieve a liquid state. So, use liquid ghee. Don’t use butter. It contains too much water.
Apply ghee over the chicken skewers helps to fries the surface to create dark brown grill marks crust, and to keep the chicken kebab moist.
Note: Make sure to coat them with ghee right before it place on a grill pan.
-
Place the oiled surface chicken skewers on the hot grill pan and continue to cook them without moving, untill to attain dark brown grill marks underside the chicken skewers for about 4 to 5 minutes over medium flame
You will hear a Sizzling sound when you place the chicken skewers in hot pan. Then the pan is ready. Don’t add the chicken skewers to the pan until the pan is very hot.
Place the chicken skewers with more space between them.
Note: The pan should be hot enough to sizzle, but not smoking (too high) or failing to sizzle immediately (too low). To achieve good looking results, place your chicken skewers at a 45-degree angle to the grates.
-
Just before flip them, baste ghee on top side of the chicken skewers then flip them & reduce the heat to low
After 4 to 5 minutes, just check quickly by lifting the sides of the skewers, whether dark brown grill marks formed.
Once grill marks formed, apply ghee on top side of the chicken skewers and then flip.
After flip the skewers reduce the heat to low .
Note: Be careful, don’t turn grill marks into burnt(black), then it will give bitter tatse. So the goal is to attained brown/dark brown grill marks.
-
In low heat, continue to cook them for about 4 to 5 minutes, to cook inside
After flipping, cook them in low heat, for about 4 to 5 minutes or untill the internal temperature of the chicken skewers between 165-180F.
Usually the total cooking time for this chicken skewers is 8 to 9 minutes for 1 batch.
The cooking time will vary depends upon the thickness of the chicken skewers, how coarsely the chicken pieces are minced (size of chicken pieces), the type of cookware used, the amount of heat used.
Note: If you see food bits left behind, wipe the grill pan clean between batches. This ensures every skewer gets clean, perfect grill marks without any burnt flavor.
-
Transfer the grilled chicken skewers to a paper towel lined plate, transfer them to clean plate to rest for at least 5 to 10 minutes before serve
Transfer the cooked grilled skewers to a paper towel-lined plate. Using a fresh paper towel, gently pat all sides of the skewers to absorb the surface oil. After a minute or two, move them to a clean plate and loosely cover them with a lid or foil to rest before serving.
-
Now the pan grilled chicken seekh kebab is ready to be served with curd mint dip
After resting, the grilled skewers are ready to serve.
Loading rating...
Write a Review
Loading reviews...