Mughlai Chicken Curry
by Viruthiga Veni
Loading rating...
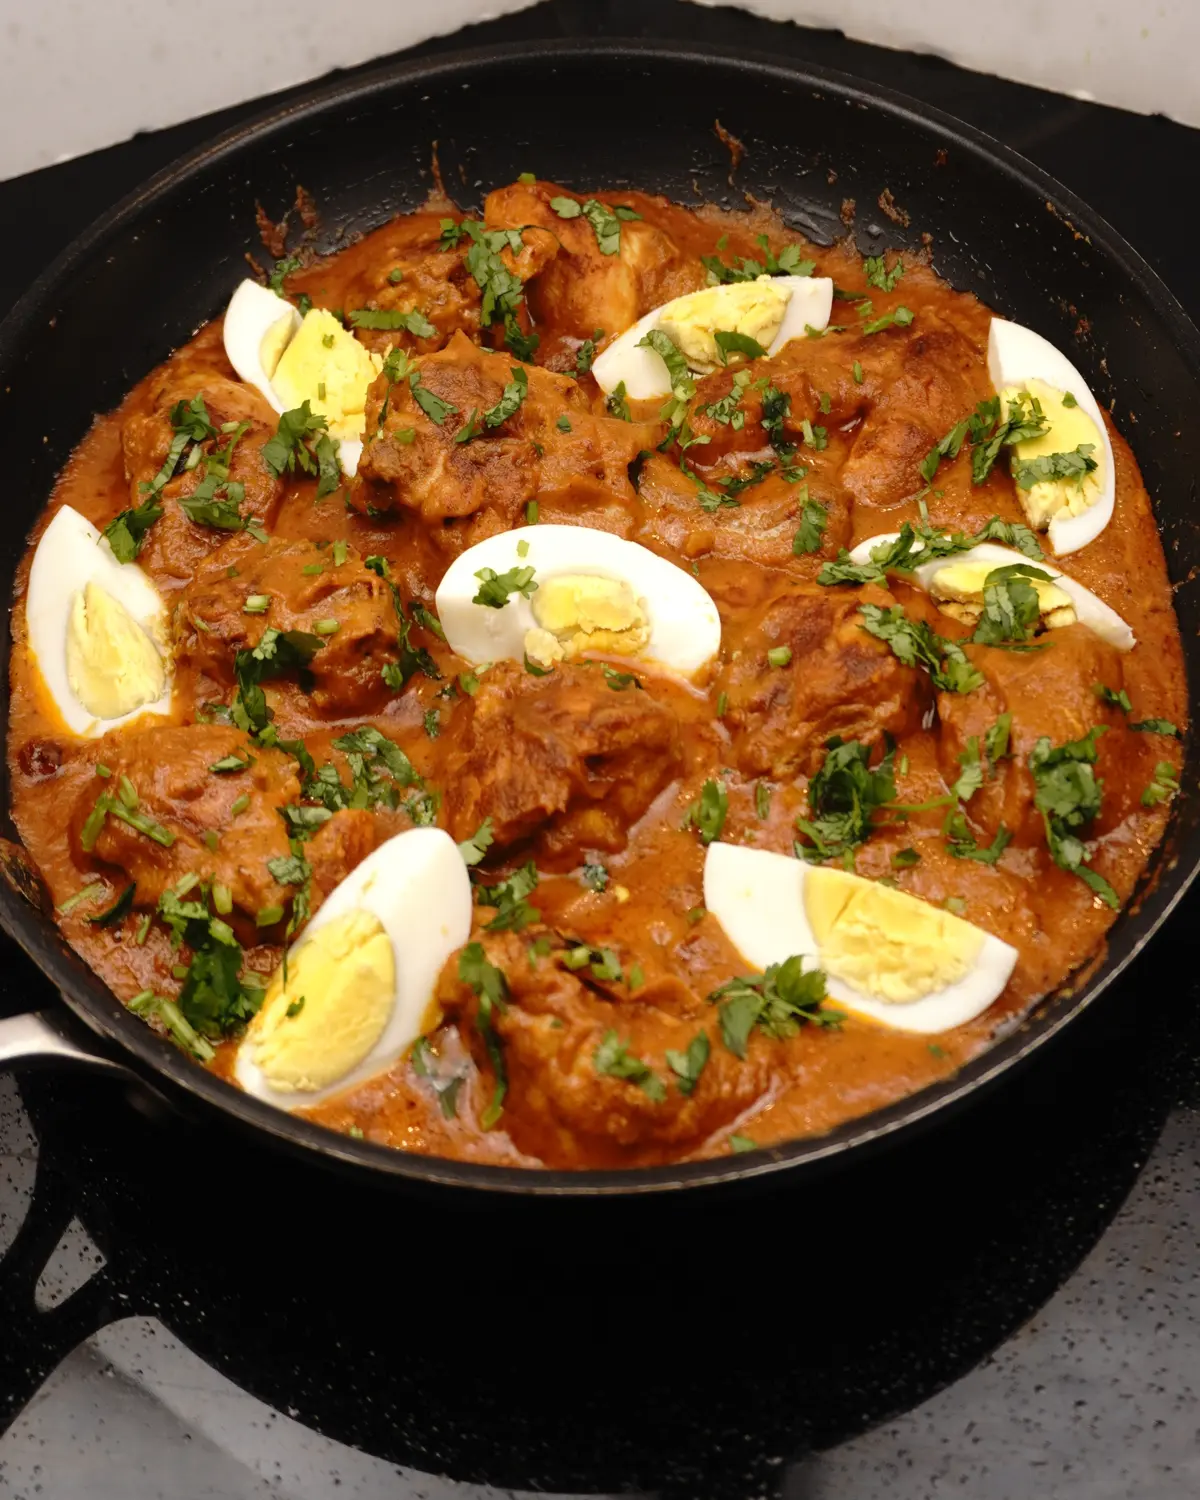
Mughlai Chicken is a rich, flavorful, and mildly spiced curry that originated in the royal kitchens of the Mughal Empire. It is known for its pan-seared chicken and thick gravy made from a base of fried onions, tomatoes, aromatic spices, yogurt, and milk. Simply pan-sear the chicken pieces until they are beautifully browned, then let them simmer in the mildy spiced gravy base until the chicken is cooked, juicy and tender.
Due to its thick consistency, Mughlai chicken gravy is traditionally paired with sturdy flatbreads like naan, chappathy, and paratha. This pairing is essential because the dense, milk and curd-based sauce requires a flat bread that can effectively scoop up the rich curry while balancing its complex aromatic spices.
Ingredients
Bone In Chicken – ½ kg
Onions – 150 gm (approx. 1 medium size)
Tomatoes – 150 g
Whole milk thick curd – 100 g
Whole milk and Zaran – 50 ml & ¼ tsp
Water – 120 ml approx.
Garlic – 4 to 5 cloves
Ginger – 1/2 inch
Green chili – 3 to 4
Boiled egg – 2
Garam masala powder – ¼ tsp
Red chili powder – 1½ tsp
Turmeric powder – ½ tsp
Cumin powder – ½ tsp
Coriander powder – ½ tsp
Cloves – 1
Cardamom – 1
Cinnamon – 1 inch
Pepper corns – ¼ tsp
Ghee – 2 tbsp
oil – 2 tbsp
Coriander leaves – 1 to 2 tbsp
Salt – approx. 1 1/2 tsp
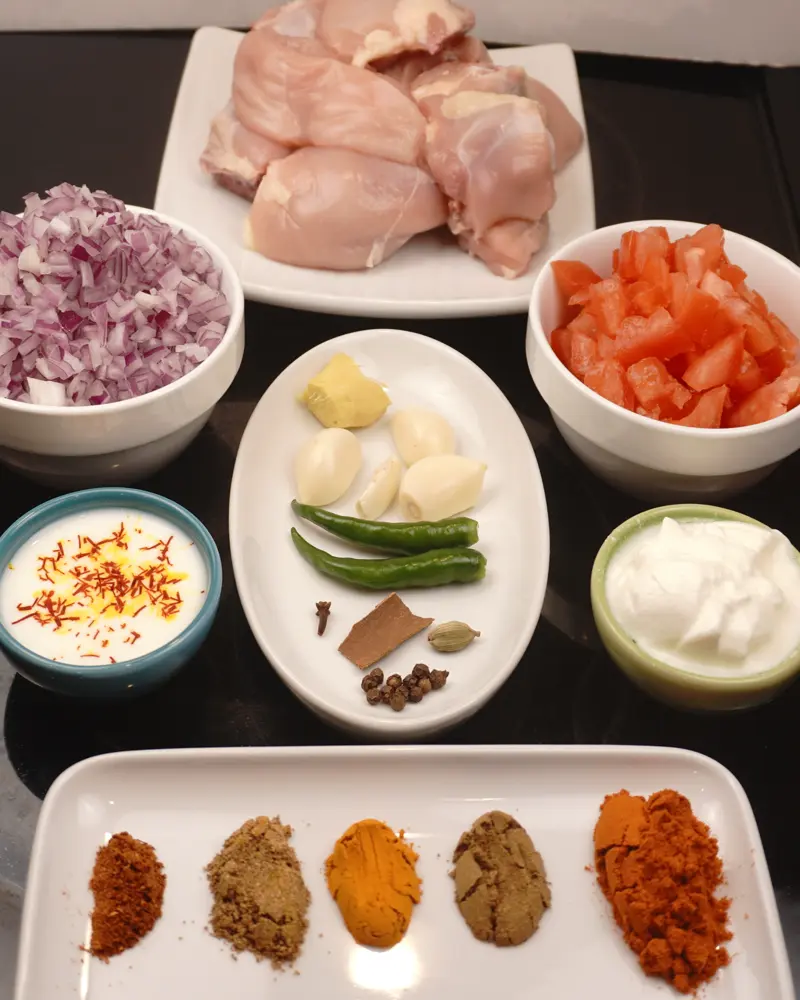
Gather and preparation of ingredients
Onion : Make sure the onions are thinly sliced or finely chopped to speed up the browning process.
Tomatoes : To prepare the tomatoes, slice them in half with a sharp knife and remove the stem, the tough core, and the seeds. Discard those parts and chop the remaining flesh into small pieces so they cook down into a mushy consistency quickly. If you skip removing the seeds while chopping, simply strain the mixture after cooking to achieve a smooth texture for the gravy.
Ginger, Garlic, and Green Chili : Wash and dry the ingredients. Peel the ginger and cut into half-inch pieces to help the blender process them easily. Similarly, peel and roughly chop the garlic. For the green chilies, wash them thoroughly and remove the stems before roughly chopping.
Ground Spices : I used Everest brand Garam Masala; all other spice powders are homemade.
Whole-milk thick curd : If your curd is too thin or runny, place it in a fine-mesh strainer over a bowl for 1 hour. This will drain the excess whey and leave you with a thick curd for marinating chicken.
Whole milk & saffron : Before you start the gravy, add 1/4 tsp of saffron threads to the milk. Let them soak to infuse the flavor while you prepare the gravy.
Boiled Eggs : While the gravy is simmering, simultaneously prepare two hard-boiled eggs. Dry them with a paper towel before you begin to slice each egg into four pieces. Place them on top of the dish as a garnish before serving.
1 to 2 heaped tbsp Coriander leaves : Make sure to wash and dry the coriander leaves. Then chop them very finely.
Prepare Chicken Pieces
Choose a Cleaning Method
Dry Wipe (Recommended): Skip rinsing the chicken pieces entirely. Simply wipe the 500 g chicken pieces clean with a dry paper towel and dispose of the towel in the trash immediately. This is the safest way to prevent the spread of kitchen bacteria and to preserve the meat's natural flavor.
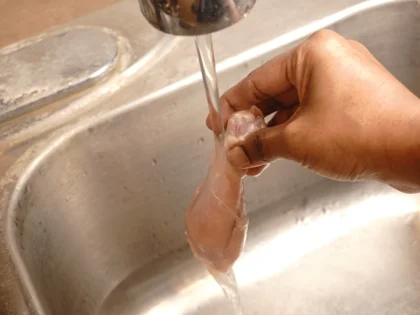
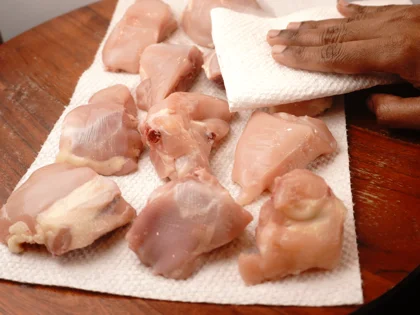
Rinse & Dry (Alternative): If you prefer to rinse the chicken, do so quickly under a very gentle, low-pressure stream of cold running water to avoid splashing. Also, keep the chicken piece deep down inside the sink basin. Transfer the chicken directly to a clean plate lined with paper towels, pat dry, and discard the paper towels right away.
Prep for Flavor Penetration
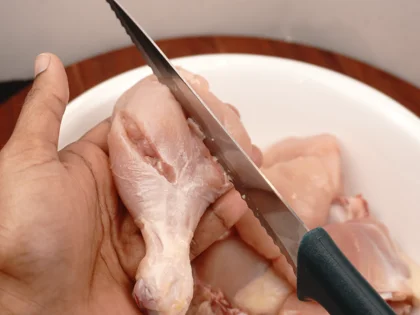
Slit Large Pieces: Use a sharp knife to make a few shallow cuts on the surface of large or thick chicken pieces. This allows the flavors to penetrate the meat thoroughly.
Marinate & Chill
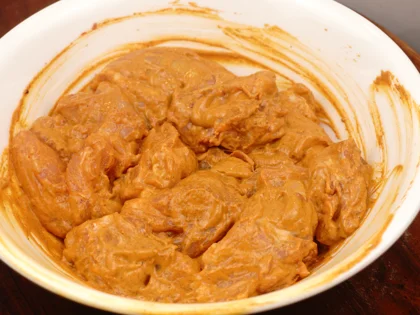
Prepare marinade, coat and refrigerate
Clear the Space : Use a spoon to move the marinated chicken to one side of the bowl to create space.
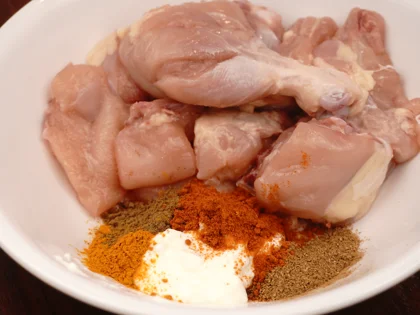
Make the Marinade in the empty space : Add the following ingredients in bowl and mix well.
Salt – 1 tsp
Whole milk thick curd – 50 g
Garam masala powder – ¼ tsp
Turmeric powder – ½ tsp
Red chili powder – 1 ½ tsp
Cumin powder – ½ tsp
Coriander powder – ½ tsp
Even distribution - Using hands, coat each piece of chicken and also in between the slits evenly with the marinade. Repeat this process until every piece is thoroughly covered.
Refrigerate: Place the marinated bone-in chicken pieces in the refrigerator.
Marinating Time: Marinate for a minimum of 3 to 4 hours, up to a maximum of overnight, to soak up the flavor.
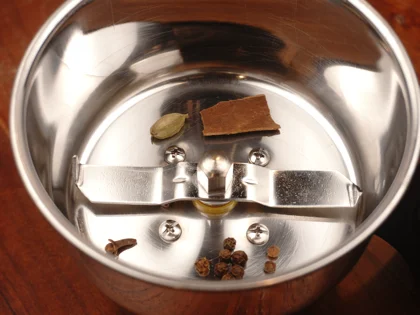
Spices to be ground for paste base
First grind the whole Dry Spices then fresh spices
Pulse Dry Spices: Placing the whole dry spices in a jar: 1 clove, 1 inch cinnamon stick, 1 cardamom pod, and ¼ tsp peppercorns. Pulse for a few minutes until they form a coarse powder.
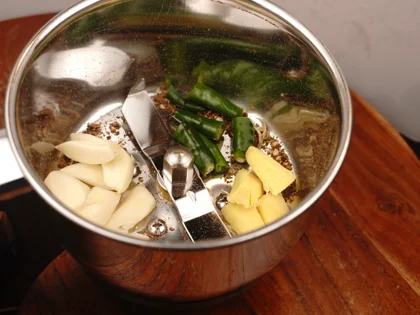
Pulse Fresh Aromatics: Add the fresh ingredients to the same jar: 4 garlic cloves, 1/2 inch ginger, and 3 to 4 green chilies. Pulse the mixture several times in short bursts until a fine texture is achieved.
Note: If the pieces are too big, just chop them down a bit first so the standard blender can handle them easily.
Making the Paste Base
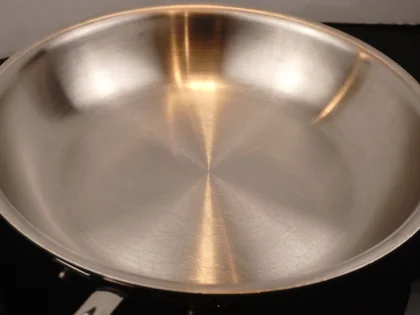
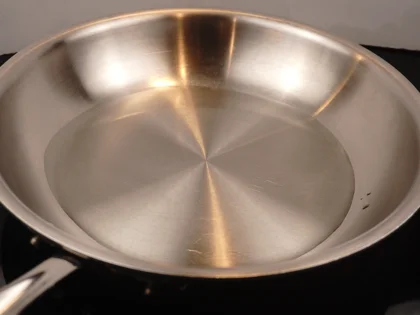
Preheat a heavy bottomed fry pan then add oil
Heat a heavy-bottomed frying pan over medium heat for 2 to 3 minutes. Add 2 to 3 tbsp of oil and let it get hot for another minute or two before adding the onions.
Note: Use a neutral oil with a high smoke point, such as vegetable, sunflower, canola, or peanut oil.
Saute onions until brown
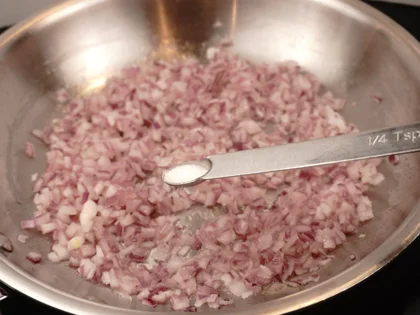
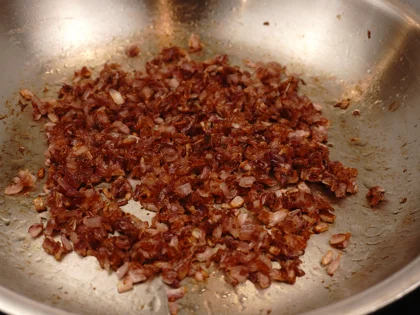
Once the oil is hot, add 150g of chopped onions and little salt. Sauté over medium heat for 25 to 30 minutes, stirring often so they don't stick. Aim for a brown color. As the moisture evaporates, turn the heat down to medium-low. This ensures they brown evenly and prevents them from burning.
Note: Be patient—the base flavor of your curry depends on this browning process. Let them reach a brown color rather than rushing this step.
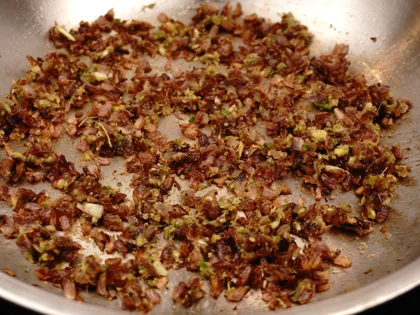
Add ground spices
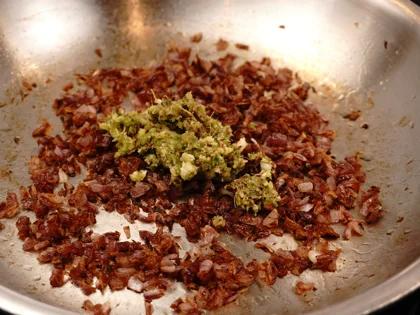
In low heat sauté the prepared ground spices in the oil well for about 1 minute.
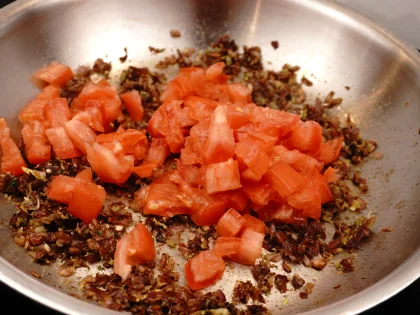
Add chopped tomatoes
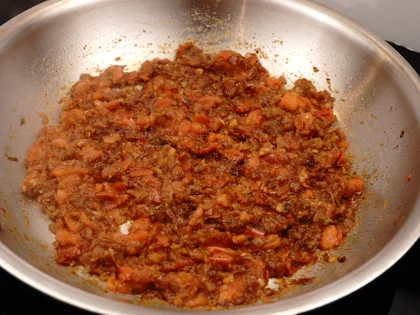
In medium heat sauté 150 grams tomatoes for 8 to 10 minutes until they soften and become mushy.
Note: Make sure the tomatoes are completely mushy. This removes the raw taste, creates a thick sauce, and helps all the spices mix in perfectly.
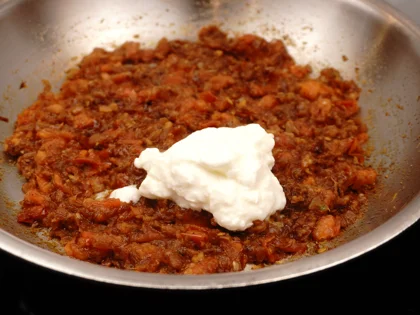
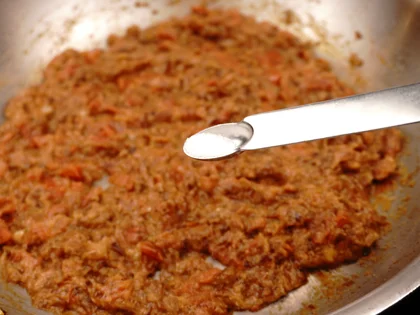
Saute thick curd and cool
Sauté 50 g of thick curd for a few minutes until the moisture from curd has evaporated. Remove the pan from the heat and allow it to cool.
Note: Make sure the mixture has cooled completely before grinding it into a smooth paste.
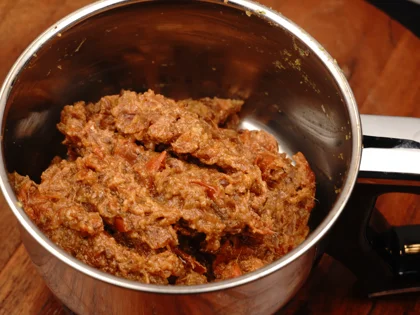
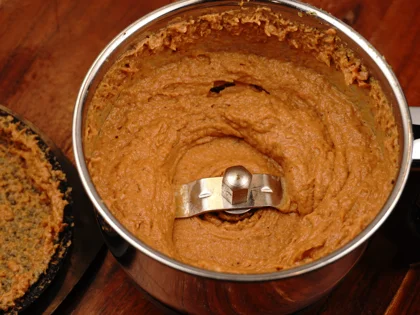
Make paste
Transfer: Place the cooled onion mixture into a blender.
Rinsing the Pan: Pour little water for about 50 ml into the still-warm pan. Gently swirl the water or use a ladle to pick up all the flavorful browned bits left behind.
Blend: Add this "flavor water" to the blender and process until the mixture is a completely smooth paste.
Browning the chicken pieces on both sides in nonstick pan
Pre-Cooking Preparation
Reduce Chill Before Cooking: Take the marinated meat out of the fridge and let it sit at room temperature for 30 to 45 minutes to ensure even cooking.
Watch for Moisture: If using an airtight container, make sure the lid is dry by wiping away any water droplets. This prevents extra moisture from dripping onto the marinated chicken, which would ruin your sear.
Pan Preheating Instructions
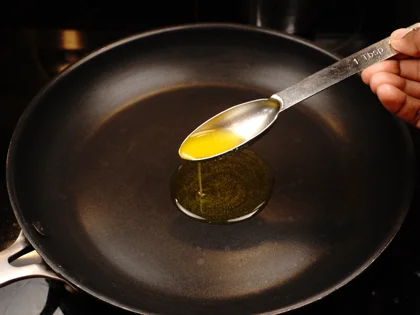
Ghee the pan - Add 2 tbsp liquid ghee to a non stick pan. Swirl the pan to spread the ghee to the entire surface evenly. Adjust the amount of ghee based on your pan size.
Preheat: Heat the pan for 5 to 6 minutes over a medium flame.
Note: Always use a high-quality, durable nonstick pan that can safely handle cooking temperatures. This prevents sticking and makes cleanup much easier.
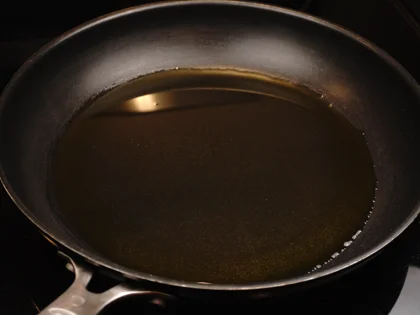
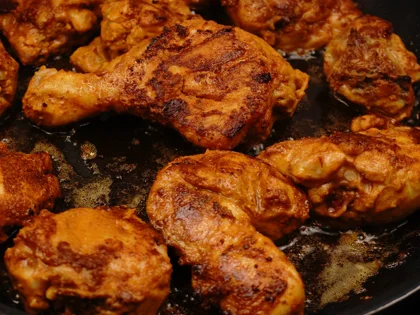
Brown the chicken pieces-( First side)
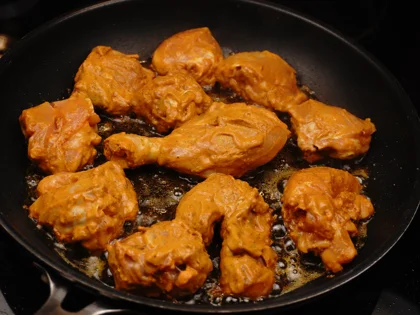
The Sizzle Test: Your pan is ready when it is hot but not smoking. Test it by touching the edge of one chicken piece to the pan surface. If it does not sizzle instantly, remove it and wait another 30 seconds before testing again.
First Side Cooking: Carefully place the chicken pieces into the hot pan over medium heat to quickly build a brown crust.
Pan Spacing : Give more space between the chicken pieces or cook in batches. If pan is crowded increase heat to medium high to maintain pan temperature.
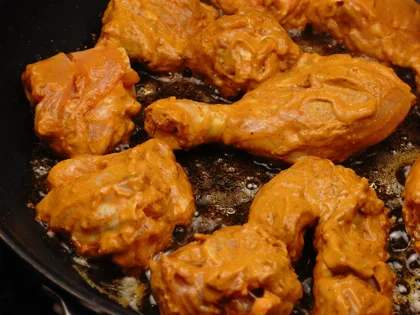
The 4 Minute Rule: Cook the pieces for 4 minutes without moving them at all. This completely undisturbed contact with the pan is essential for a brown crust to form.
Check and Flip: Use tongs or two spoons to gently lift the edge of a chicken piece to check the bottom color. Once a brown crust is achieved across the entire piece, flip it over.
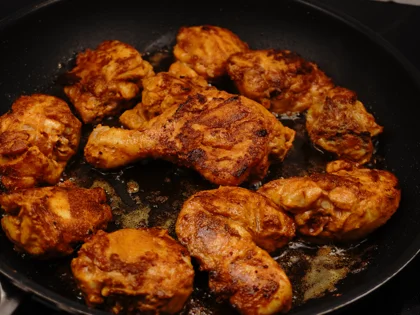
Note: Aim for a deep, golden brown color but avoid letting the chicken turn black color(burnt). Black spots can introduce a bitter flavor to your milk and curd curry.
Brown the chicken pieces- (Second side)
Cook - Continue cooking the chicken pieces without moving for about 2 to 3 minutes to attain brown crust.
Note : The pan is already very hot, so the second side sears much faster than the first side.
Combine the prepared paste and the seared chicken in the pan
Simmer and Slow-Cook
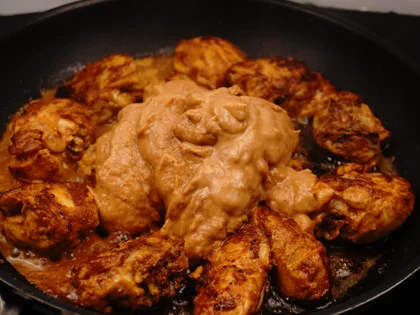
Add the Paste to the pan: Once the second side of the chicken is seared, transfer the prepared ground paste from the jar to the pan. Rinse the blender jar with 50–70 ml of water and add it to the pan.
Initial Boil: Bring the mixture to a boil over a medium flame for 4–5 minutes without a lid.
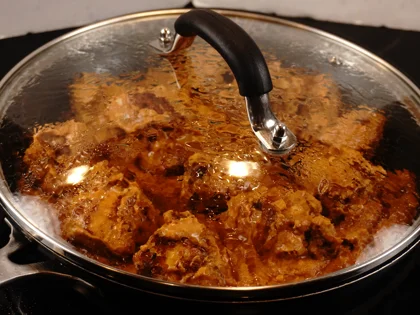
Covered Simmer: After it starts to boil steadily, reduce the heat to low and cook with the lid closed for 20 minutes until the chicken is tender.
Simmer with Milk and Saffron
Taste and Adjust: Open the lid and taste the curry. Add salt if needed, adding a small amount at a time and tasting again until the flavors are perfectly balanced.
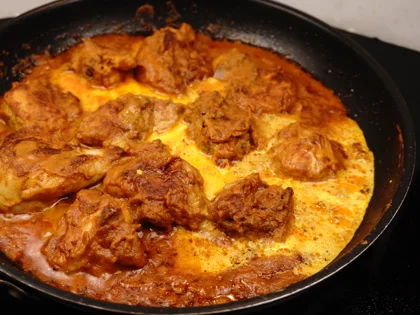
Combine the milk: Gently pour the whole milk infused with saffron threads into the pan, stirring to combine.
Without lid: Allow the mixture to simmer over low heat for approximately 3-5 minutes with the pan uncovered.
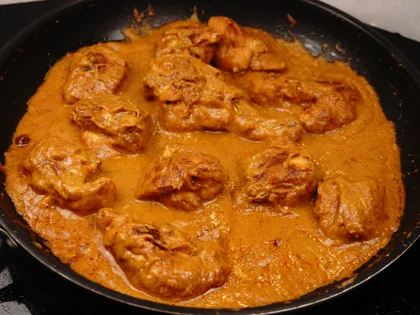
Final Texture: The gravy is ready once it reaches a rich and thick gravy.
The finishing touches
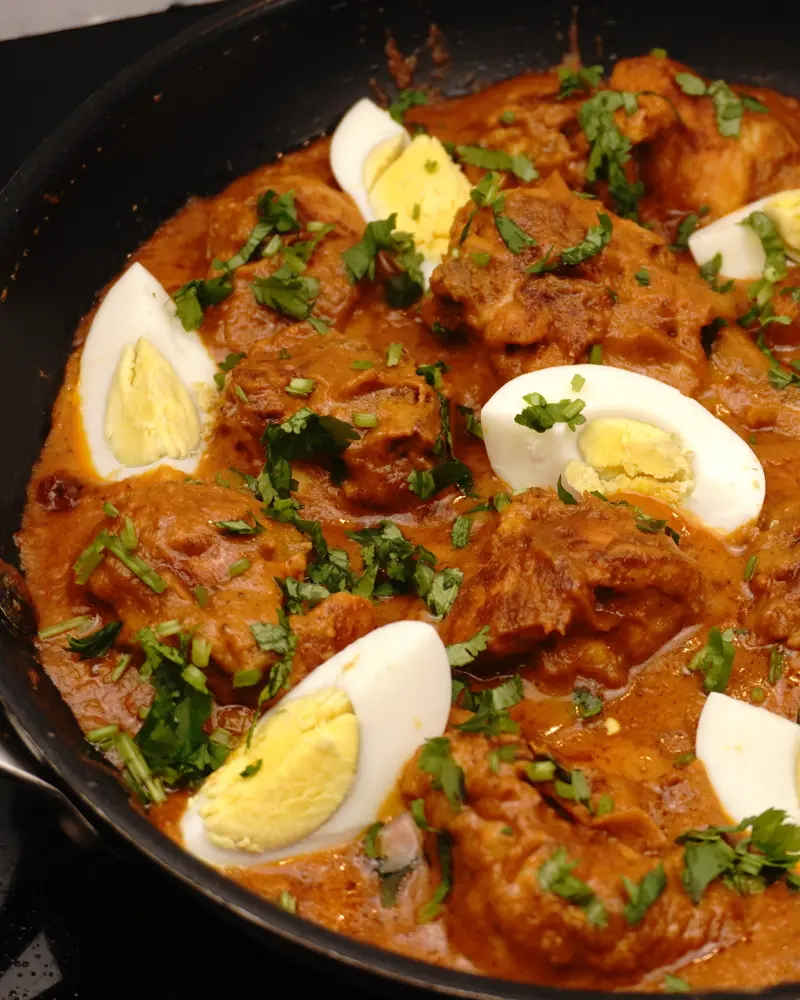
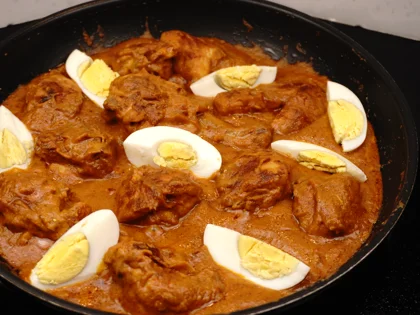
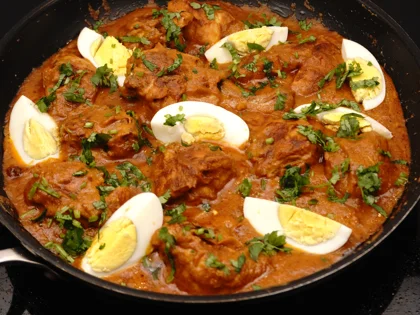
Garnish and Serve : Top the chicken gravy with 2 boiled eggs, each cut into 4 pieces and 1-2 tbsp fresh coriander leaves before serving.
Tips
💡 Adjusting Salt: Since the chicken was already marinated with salt, be careful when salt the curry base. Add only a small amount while sautéing the onions and tomatoes. Taste the gravy toward the end of cooking and add more only if needed to avoid over-salting.
💡 Make sure to pat the chicken pieces dry with a paper towel to remove surface moisture before marinating.
💡 Plan ahead: Marinate your bone in chicken pieces in the spiced curd mixture for at least 3–4 hours in refrigerator. This acts as a natural tenderizer that keeps the chicken juicy, deeply seasoned, and full of flavor.
💡 Reduce the Chill: Take the marinated chicken out of the fridge and let it sit at room temperature for 30 to 45 minutes before adding it to the pan.
💡 Make sure the frying pan is hot enough before adding the chicken. A preheated pan ensures the chicken cooks evenly and develops a nice brown crust
💡 Always use a high-quality hybrid or ceramic nonstick pan that can handle medium/medium high heat. This setup guarantees a beautiful brown crust without any sticking, making cleanup effortless later.
💡 Color is flavor—so don’t rush the onions! Sauté them until they are well-browned.
💡 Sauté all ground spices on low heat to avoid a bitter taste. If the mixture appears dry, adding a half tablespoon of fat helps.
💡 Cook the tomatoes thoroughly until they are completely soft and mushy. Similarly, sauté the curd until the moisture has fully evaporated.
💡 For perfectly cooked chicken every time, rely on an instant-read meat thermometer. The target internal temperature for safe, juicy chicken is 180°F, measured in the center of the meat.
Frequently Asked Questions
Yes, but you must use the right kind of pan. Regular, cheap nonstick pans are only made for low or medium heat. If you make them too hot to brown your chicken, they will ruin the pan and can release harmful, invisible fumes. To safely get a nice, golden-brown crust on your chicken breasts or thighs, you need a special nonstick pan that is built to handle higher heat.
Hybrid Pans: Brands like HexClad mix stainless steel and nonstick together in a web-like pattern. This gives you the excellent browning power of a metal pan, but your food still slides off easily.
Ceramic Nonstick Pans: Brands like GreenPan or OXO use a smooth coating made from sand instead of plastic chemicals. Because they are chemical-free, they can take higher heat without breaking down or releasing bad fumes.
Soaking chicken pieces in bowl of plain water can waterlog the meat and wash away its natural flavor. This makes the meat less tasty and can affect the final flavor of your dish. It is best to avoid soaking; if you prefer to wash the chicken, do so quickly under cold running water instead.
You should pat dry chicken pieces because it helps the marinade stick to the meat instead of sliding off. It also helps the chicken brown better in the pan instead of steaming.
Sauté the onions until they reach a deep brown to unlock their natural sugars. This creates a rich flavor base; If the onions aren't browned properly, the flavor and taste of the gravy will be less satisfying.
Use full-fat (whole milk) thick curd for the best results. The natural lactic acid acts as a gentle tenderizer, while the high fat content ensures your gravy is thicker, rich, creamy, smooth and flavorful finish.
Yes! Marinating with a spiced curd and salt mixture for at least 3–4 hours is essential. It tenderizes the chicken and ensures it is deeply seasoned and full of flavor.
First ensure your pan is hot enough to produce a loud sizzle when the meat touches it. Second, avoid overcrowding the pan; use a large one or cook in batches so the chicken sears instead of steaming in its own juices. Finally, don't move the meat for at least 4–5 minutes to allow the crust to form properly.
Bitterness usually comes from two things: burnt spices or charred(black color) chicken. Always sauté your spices on low heat, and when searing the chicken, aim for a dark brown crust—not black. If the meat or spices turn black, they will affect the delicate flavor of the milk and curd base.
You Might Also Like
Mughlai Chicken Curry Recipe
Mughlai Chicken is a rich, flavorful, and mildly spiced curry that originated in the royal kitchens of the Mughal Empire. It is known for its pan-seared chicken and thick gravy made from a base of fried onions, tomatoes, aromatic spices, yogurt, and milk. Simply pan-sear the chicken pieces until they are beautifully browned, then let them simmer in the mildy spiced gravy base until the chicken is cooked, juicy and tender.
Due to its thick consistency, Mughlai chicken gravy is traditionally paired with sturdy flatbreads like naan, chappathy, and paratha. This pairing is essential because the dense, milk and curd-based sauce requires a flat bread that can effectively scoop up the rich curry while balancing its complex aromatic spices.
Ingredients
- ½ kg Bone In Chicken
- 150 gm (approx. 1 medium size) Onions
- 150 g Tomatoes
- 100 g Whole milk thick curd
- 50 ml & ¼ tsp Whole milk and Zaran
- 120 ml approx. Water
- 4 to 5 cloves Garlic
- 1/2 inch Ginger
- 3 to 4 Green chili
- 2 Boiled egg
- ¼ tsp Garam masala powder
- 1½ tsp Red chili powder
- ½ tsp Turmeric powder
- ½ tsp Cumin powder
- ½ tsp Coriander powder
- 1 Cloves
- 1 Cardamom
- 1 inch Cinnamon
- ¼ tsp Pepper corns
- 2 tbsp Ghee
- 2 tbsp oil
- 1 to 2 tbsp Coriander leaves
- approx. 1 1/2 tsp Salt
Instructions
-
Choose a Cleaning Method
Dry Wipe (Recommended): Skip rinsing the chicken pieces entirely. Simply wipe the 500 g chicken pieces clean with a dry paper towel and dispose of the towel in the trash immediately. This is the safest way to prevent the spread of kitchen bacteria and to preserve the meat's natural flavor.
Rinse & Dry (Alternative): If you prefer to rinse the chicken, do so quickly under a very gentle, low-pressure stream of cold running water to avoid splashing. Also, keep the chicken piece deep down inside the sink basin. Transfer the chicken directly to a clean plate lined with paper towels, pat dry, and discard the paper towels right away.
-
Prep for Flavor Penetration
Slit Large Pieces: Use a sharp knife to make a few shallow cuts on the surface of large or thick chicken pieces. This allows the flavors to penetrate the meat thoroughly.
-
Prepare marinade, coat and refrigerate
Clear the Space : Use a spoon to move the marinated chicken to one side of the bowl to create space.
Make the Marinade in the empty space : Add the following ingredients in bowl and mix well.
Salt – 1 tsp
Whole milk thick curd – 50 g
Garam masala powder – ¼ tsp
Turmeric powder – ½ tsp
Red chili powder – 1 ½ tsp
Cumin powder – ½ tsp
Coriander powder – ½ tsp
Even distribution - Using hands, coat each piece of chicken and also in between the slits evenly with the marinade. Repeat this process until every piece is thoroughly covered.
Refrigerate: Place the marinated bone-in chicken pieces in the refrigerator.
Marinating Time: Marinate for a minimum of 3 to 4 hours, up to a maximum of overnight, to soak up the flavor.
-
First grind the whole Dry Spices then fresh spices
Pulse Dry Spices: Placing the whole dry spices in a jar: 1 clove, 1 inch cinnamon stick, 1 cardamom pod, and ¼ tsp peppercorns. Pulse for a few minutes until they form a coarse powder.
Pulse Fresh Aromatics: Add the fresh ingredients to the same jar: 4 garlic cloves, 1/2 inch ginger, and 3 to 4 green chilies. Pulse the mixture several times in short bursts until a fine texture is achieved.
Note: If the pieces are too big, just chop them down a bit first so the standard blender can handle them easily.
-
Preheat a heavy bottomed fry pan then add oil
Heat a heavy-bottomed frying pan over medium heat for 2 to 3 minutes. Add 2 to 3 tbsp of oil and let it get hot for another minute or two before adding the onions.
Note: Use a neutral oil with a high smoke point, such as vegetable, sunflower, canola, or peanut oil.
-
Saute onions until brown
Once the oil is hot, add 150g of chopped onions and little salt. Sauté over medium heat for 25 to 30 minutes, stirring often so they don't stick. Aim for a brown color. As the moisture evaporates, turn the heat down to medium-low. This ensures they brown evenly and prevents them from burning.
Note: Be patient—the base flavor of your curry depends on this browning process. Let them reach a brown color rather than rushing this step.
-
Add ground spices
In low heat sauté the prepared ground spices in the oil well for about 1 minute.
-
Add chopped tomatoes
In medium heat sauté 150 grams tomatoes for 8 to 10 minutes until they soften and become mushy.
Note: Make sure the tomatoes are completely mushy. This removes the raw taste, creates a thick sauce, and helps all the spices mix in perfectly.
-
Saute thick curd and cool
Sauté 50 g of thick curd for a few minutes until the moisture from curd has evaporated. Remove the pan from the heat and allow it to cool.
Note: Make sure the mixture has cooled completely before grinding it into a smooth paste.
-
Make paste
Transfer: Place the cooled onion mixture into a blender.
Rinsing the Pan: Pour little water for about 50 ml into the still-warm pan. Gently swirl the water or use a ladle to pick up all the flavorful browned bits left behind.
Blend: Add this "flavor water" to the blender and process until the mixture is a completely smooth paste.
-
Pre-Cooking Preparation
Reduce Chill Before Cooking: Take the marinated meat out of the fridge and let it sit at room temperature for 30 to 45 minutes to ensure even cooking.
Watch for Moisture: If using an airtight container, make sure the lid is dry by wiping away any water droplets. This prevents extra moisture from dripping onto the marinated chicken, which would ruin your sear.
-
Pan Preheating Instructions
Ghee the pan - Add 2 tbsp liquid ghee to a non stick pan. Swirl the pan to spread the ghee to the entire surface evenly. Adjust the amount of ghee based on your pan size.
Preheat: Heat the pan for 5 to 6 minutes over a medium flame.
Note: Always use a high-quality, durable nonstick pan that can safely handle cooking temperatures. This prevents sticking and makes cleanup much easier.
-
Brown the chicken pieces-( First side)
The Sizzle Test: Your pan is ready when it is hot but not smoking. Test it by touching the edge of one chicken piece to the pan surface. If it does not sizzle instantly, remove it and wait another 30 seconds before testing again.
First Side Cooking: Carefully place the chicken pieces into the hot pan over medium heat to quickly build a brown crust.
Pan Spacing : Give more space between the chicken pieces or cook in batches. If pan is crowded increase heat to medium high to maintain pan temperature.
The 4 Minute Rule: Cook the pieces for 4 minutes without moving them at all. This completely undisturbed contact with the pan is essential for a brown crust to form.
Check and Flip: Use tongs or two spoons to gently lift the edge of a chicken piece to check the bottom color. Once a brown crust is achieved across the entire piece, flip it over.
Note: Aim for a deep, golden brown color but avoid letting the chicken turn black color(burnt). Black spots can introduce a bitter flavor to your milk and curd curry.
-
Brown the chicken pieces- (Second side)
Cook - Continue cooking the chicken pieces without moving for about 2 to 3 minutes to attain brown crust.
Note : The pan is already very hot, so the second side sears much faster than the first side.
-
Simmer and Slow-Cook
Add the Paste to the pan: Once the second side of the chicken is seared, transfer the prepared ground paste from the jar to the pan. Rinse the blender jar with 50–70 ml of water and add it to the pan.
Initial Boil: Bring the mixture to a boil over a medium flame for 4–5 minutes without a lid.
Covered Simmer: After it starts to boil steadily, reduce the heat to low and cook with the lid closed for 20 minutes until the chicken is tender.
-
Simmer with Milk and Saffron
Taste and Adjust: Open the lid and taste the curry. Add salt if needed, adding a small amount at a time and tasting again until the flavors are perfectly balanced.
Combine the milk: Gently pour the whole milk infused with saffron threads into the pan, stirring to combine.
Without lid: Allow the mixture to simmer over low heat for approximately 3-5 minutes with the pan uncovered.
Final Texture: The gravy is ready once it reaches a rich and thick gravy.
-
The finishing touches
Garnish and Serve : Top the chicken gravy with 2 boiled eggs, each cut into 4 pieces and 1-2 tbsp fresh coriander leaves before serving.
Loading rating...
Write a Review
Loading reviews...