Low Carb, Less Oil Hariyali Tikka
by Viruthiga Veni
Loading rating...
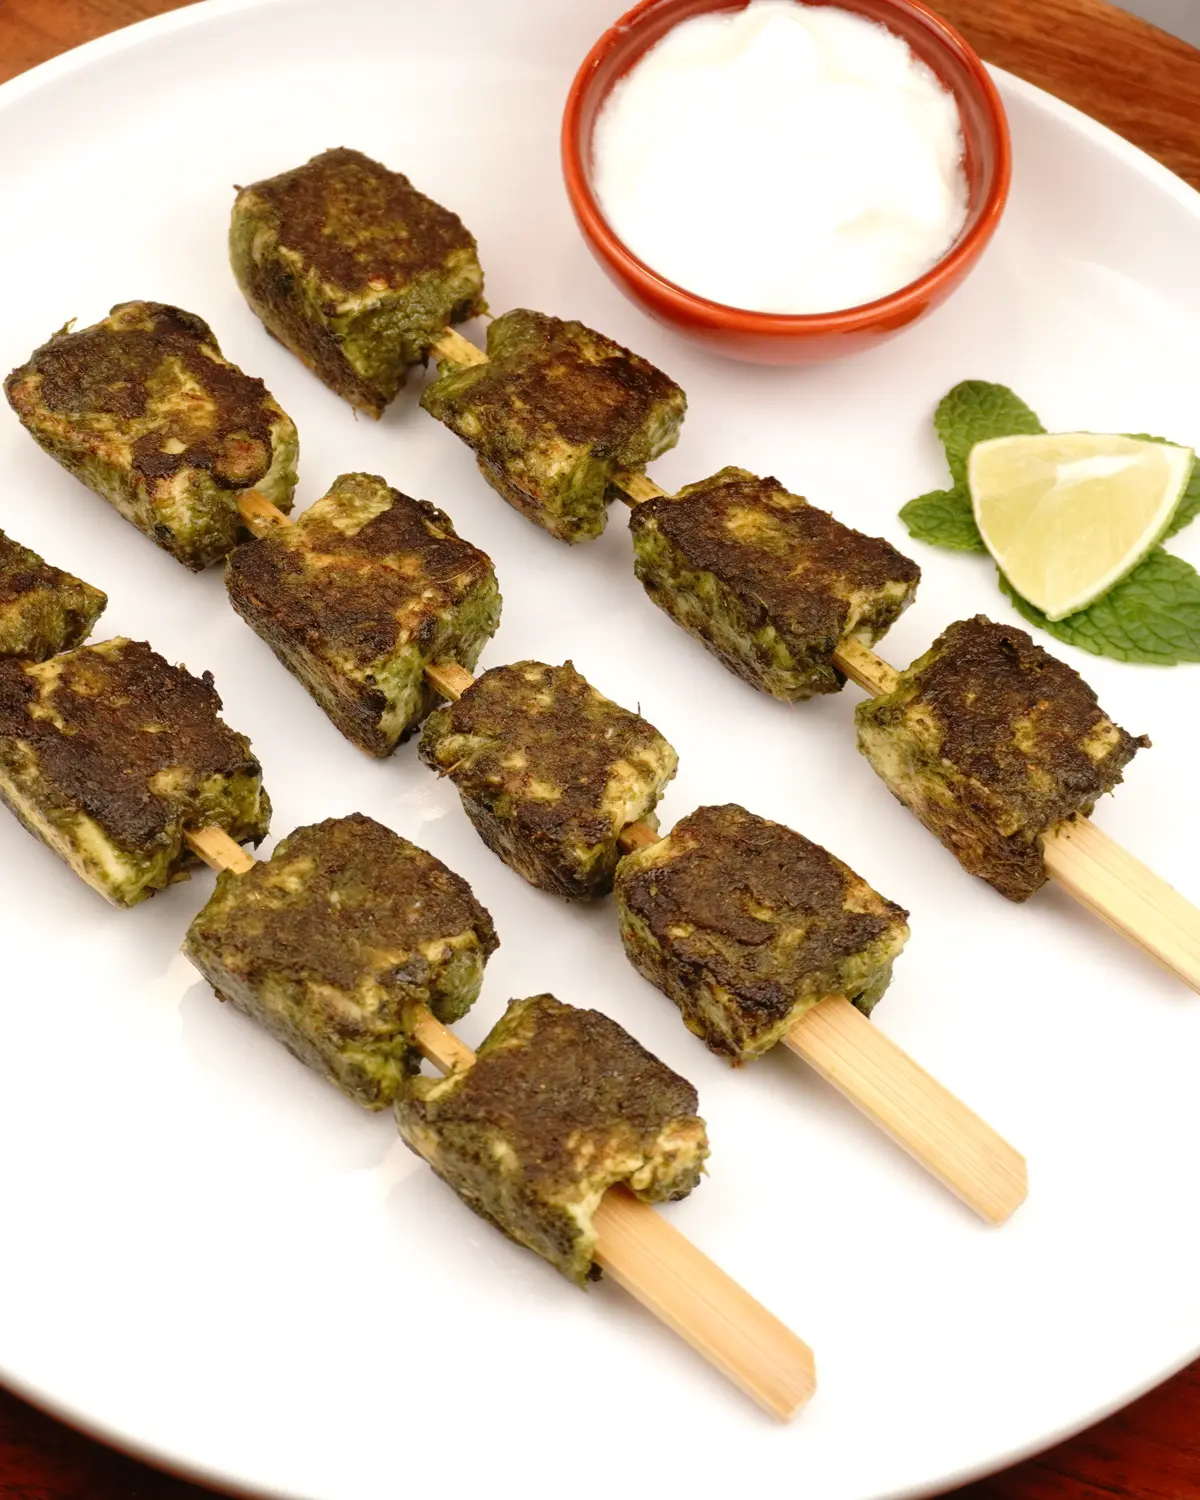
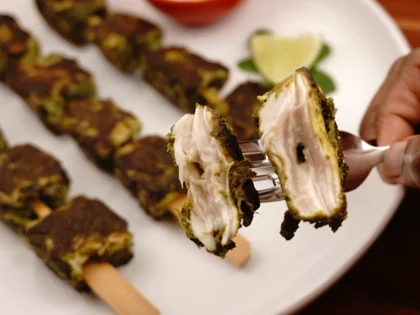
Hariyali tikka are traditionally made with rich, fattier, boneless leg pieces and pan-fried in ghee. To reduce your calorie intake, simply switch to chicken breast and use less oil. This adaptation makes the kebabs a healthier, more frequent meal option. Even with reduced fat and chicken breast, these hariyali tikkas remain moist, tender and tasty.
For a different flavor, try the Less oil afghani Murgh Tikka
Ingredients
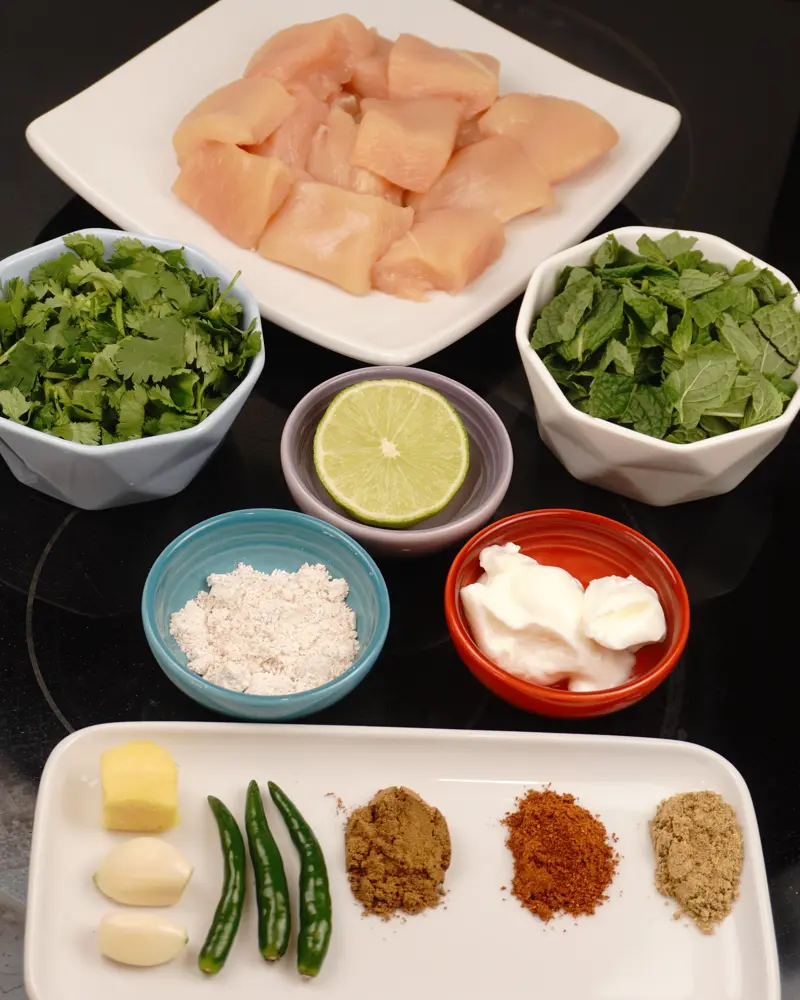
Boneless skinless chicken breast – 250 g
Coriander leaves – 20 grams (approx. 1 cup)
Mint leaves – 10 grams (approx. 1/2 cup)
Lime juice – 1 tsp (¼ medium size)
Thick fat-free or low-fat curd – 30 gms (2 tbsp)
Oat flour – 4 gms (1/2 tbsp)
Green chilies – 3 to 4 nos.
Ginger – ½ inch
Garlic – 2 to 3 cloves
Garam masala powder – ½ tsp
Zeera powder – ½ tsp
Fennel powder – ½ tsp
Oil – 11/2 - 2 tbsp
Salt – 3/4 tsp
Gather and Prepare Ingredients
Ginger, Garlic, and Green Chili : Wash and dry the ginger and green chilies. Peel the ginger, skin the garlic cloves, and remove the stems from the chilies before blending.
Low fat or fat free thick curd : If it is already thick (like mine or using Greek yogurt, you can use it directly. If your curd is too thin or runny, place it in a fine-mesh strainer over a bowl for 1 hour. This will drain the excess whey and leave you with a thick curd for marinating chicken.
Ground spices : I used Everest brand garam masala powder, and home-made fennel and cumin powders.
Oat flour : Plan ahead to make oats flour by placing the rolled oats in jar and pulse short bursts for several minutes untill fine powder. Instead of oat flour, you can also use sorghum, chickpea, or almond flour.
Oil - I used olive oil. You can also use peanut, corn, vegetable, canola or sunflower oil.
Prepare the Chicken Pieces
Choose a Cleaning Method
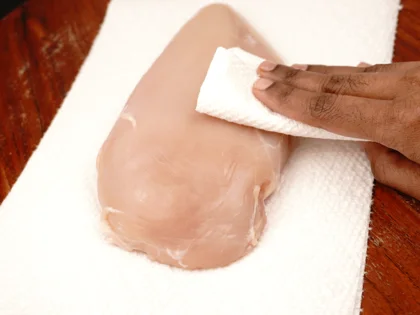
Dry Wipe (Recommended): Skip rinsing the chicken pieces entirely. Simply wipe the 250g chicken breast clean with a dry paper towel and dispose of the towel in the trash immediately. This is the safest way to prevent the spread of kitchen bacteria.
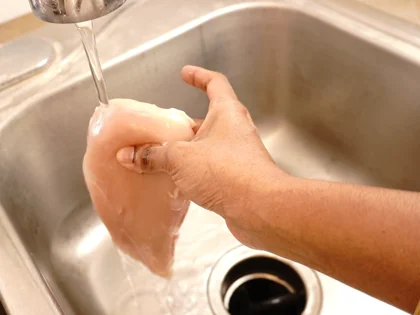
Rinse & Dry (Alternative): If you prefer to rinse the chicken, do so quickly under a very gentle, low-pressure stream of cold running water to avoid splashing. Also, keep the chicken piece deep down inside the sink basin. Transfer the chicken directly to a clean plate lined with paper towels, pat dry, and discard the paper towels right away.
Make Chicken Cutlet & Pound
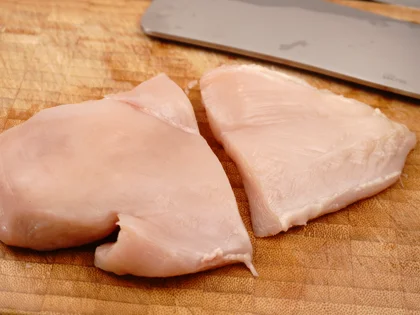
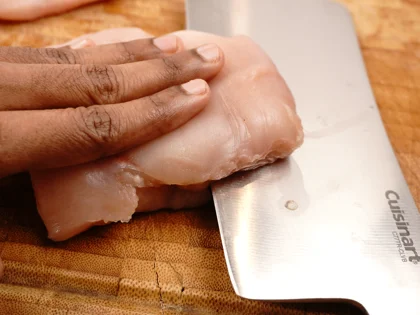
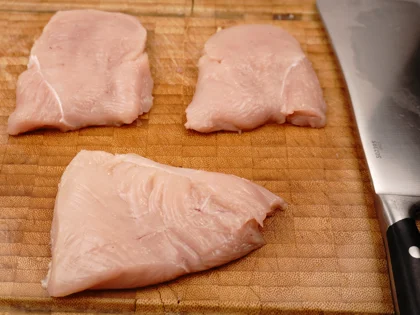
Make chicken cutlets: A thin chicken slice (or cutlet) is a chicken breast sliced horizontally into pieces about 1/4-inch thick. First, slice the chicken breast crosswise to separate the thick and thin parts. Next, slice the thick piece horizontally into two thinner layers. You will end up with three chicken pieces of 1/4-inch equal thickness.
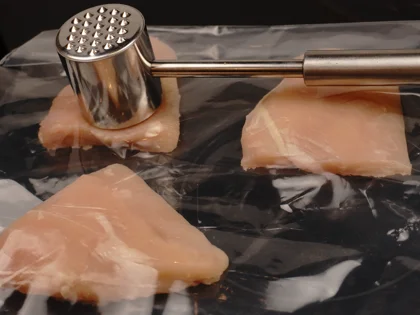
Gentle Pounding: Cover the chicken cutlets with plastic wrap. Use a mallet or a heavy flat pan to lightly pound the 1/4-inch chicken pieces.
Note: Pounding loosens the tough fibers and makes the thin chicken pieces tender. Do not skip this step.
Cut into Bite-Sized Pieces
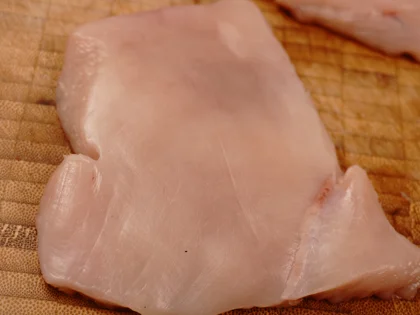
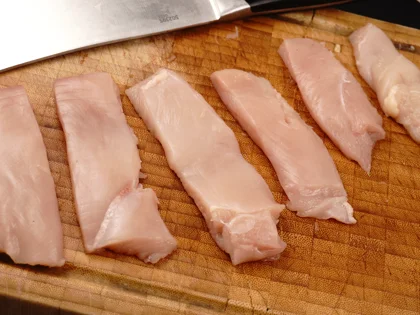
Slice into Strips: Look closely at the chicken cutlet to find the direction of the muscle fibers (the grain). Cut across these lines—never parallel to them—into 1-inch-wide strips.
Cut into Cubes: Turn the strips and slice them crosswise into 1-inch cubes.
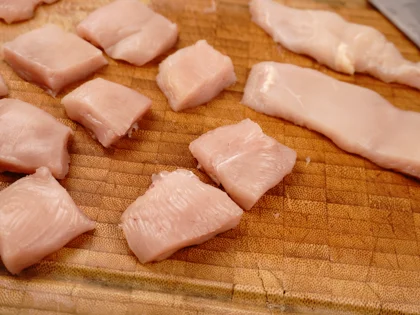
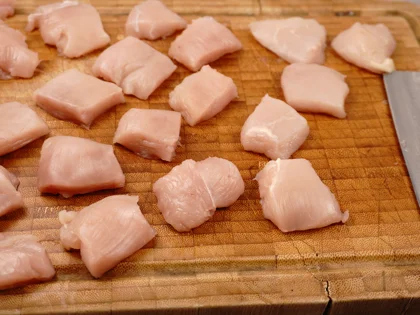
Prepare First Marinade, Coat Chicken & Chill
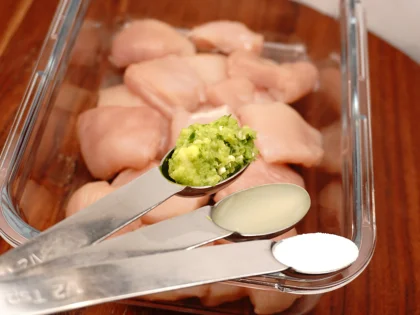
Initial marinade
Place small size ginger, 2 to 3 garlic cloves, and 2 to 3 green chilies in the jar and blend them into a coarse texture.
Note: If the pieces are too big, just chop them down a bit first so the standard blender can handle them easily.
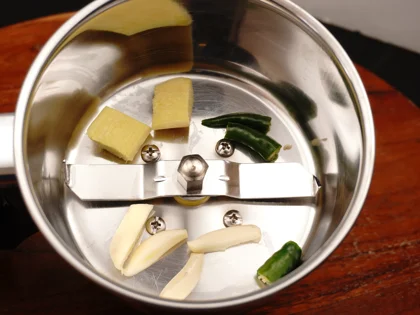
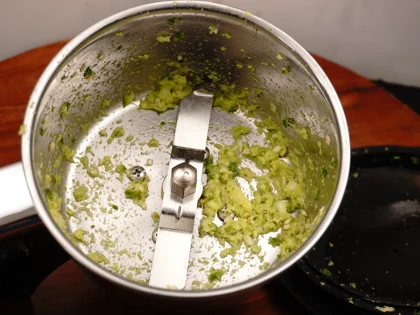
Apply the marinade and chill
Add the following to your prepared chicken pieces
1 tsp lime juice
Prepared ginger, garlic, green chili paste
1/2 tsp salt
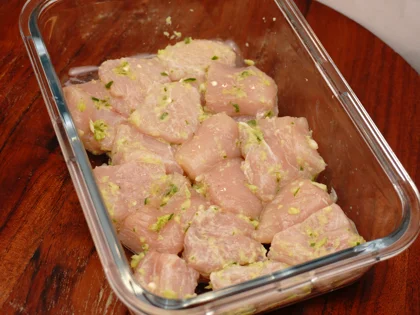
Even Distribution - Instead of pouring the ingredients in one spot, sprinkle them evenly over the chicken pieces. Use your hands to massage the paste, lime juice, and salt into each piece until thoroughly coated
Chill : Cover the bowl and let the chicken marinate in the refrigerator for at least one hour. If you’re short on time, simply let the chicken rest for as long as it takes you to prepare the fresh herbs for the second marinade.
Prepare the Fresh Herbs
To ensure the best flavor and safety, use good quality leaves. Throw away any brown or damaged leaves. Fresh leaves taste great, but bad leaves will affect the final flavor.
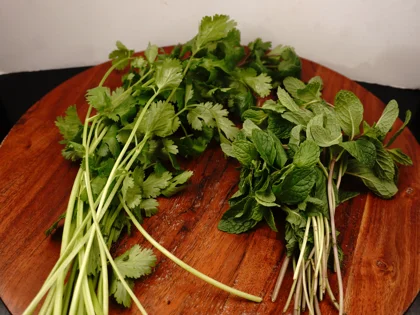
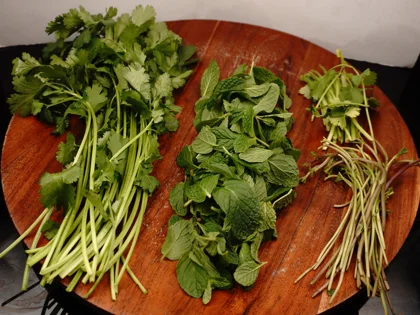
Choose good quality leaves and separate leaves
Pick : Color of the leaves should be Deep or bright green and have a fresh, earthy smell. Check that they are firm and stand upright.
Avoid : Discard any leaves that are discolored (uneven color or yellow), wilted, damaged by insects, mushy spots and bad smell.
Preparation of coriander : Remove the thick stem ends with roots of coriander.
Preparation of mint leaves : It is important to separate the mint from their stems. This is because all stems, even those that are young and tender, can introduce a bitterness and unpleasant flavor.
Clean the leaves
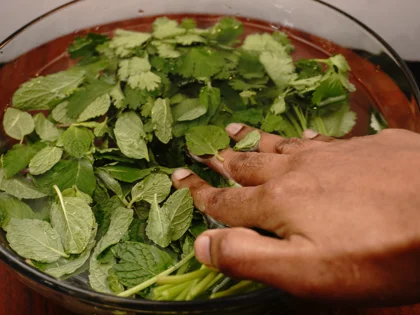
Wash method : To clean the leaves, first fill a large, clean bowl with enough water. place the leaves inside the bowl. Using your hands, swish the leaves gently in the water to remove dirt and sand. Lift the leaves from the water and place them in a colander to drain. Discard the dirty water, refill the bowl, and repeat the process until the water runs clear.
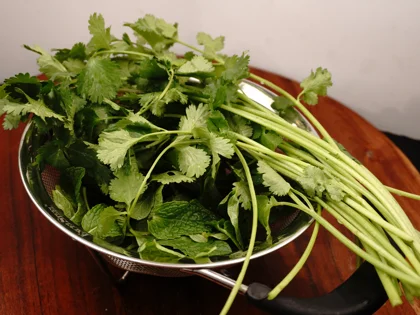
Drain water : Allowing the leaves to rest in the colander for 30 minutes lets the excess water drip off naturally.
Speed Tip: To dry the leaves faster, place the colander near an open window or under a kitchen fan.
Dry and chop leaves
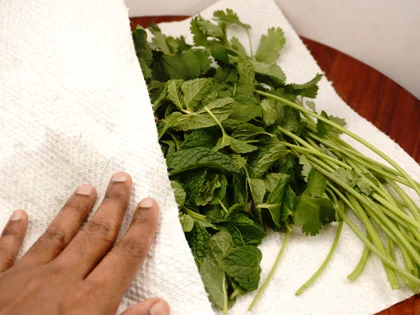
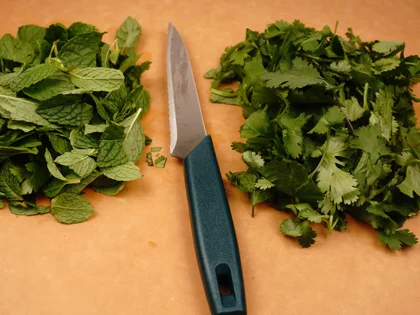
Pat the leaves with a paper towel to remove any remaining surface moisture. Once completely dry, chop them into small pieces. This will make it easier for the standard blender blades to grind them evenly.
Prepare Second Marinade, Coat Chicken & Chill
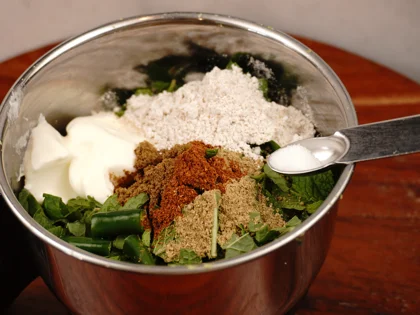
Final marinade
Place the following ingredients in the jar and pulse for a few seconds at a time. Repeat this several times until the mixture forms a fine paste.
Coriander leaves – 20 grams (approx. 1 cup)
Mint leaves – 10 grams (approx. ½ cup)
Thick curd (Low fat or fat free) – 2 tbsp (30 grams)
Oat flour – 8 grams (approx. 1/2 tbsp)
Zeera powder – ½ tsp, Garam masala powder – ½ tsp, Fennel powder – ½ tsp
Green chilies - 2 nos
Salt – little
Note: For extra flavor, you can add 8 to 10 almonds(soaked) along with the herbs when grinding.
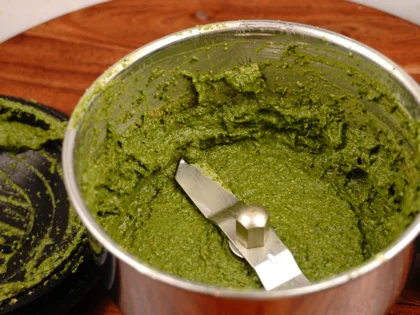
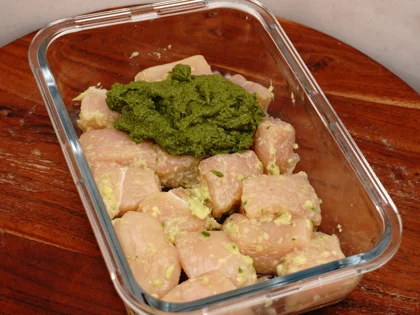
Coat prepared fresh herb marinade and chill
Add the herb marinade over the first marinade chicken. Mix thoroughly to ensure every single piece is evenly coated in the vibrant green paste.
Rest : Cover the bowl and let the chicken marinate in the refrigerator for at least 2 hours.
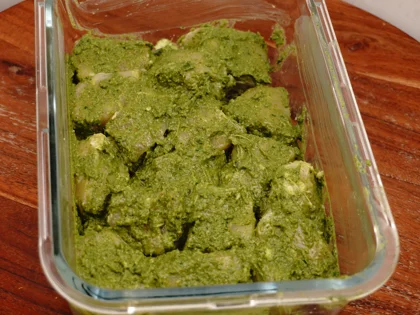
How Long to Marinate the Hariyali Tikka
Minimum Time : 1 to 2 hours. This provides the balance between flavor infusion and maintaining the firm texture of the chicken.
Maximum Time : Do not exceed 4 hours. For thin cuts in acid marinade (like lime juice), marinating longer than 4 hours can cause the proteins to break down too much, leading to a mushy texture.
Reduce Chill and Skewering the Chicken
Reduce Chill
Prep Before Cooking : Take the marinated hariyali chicken out of the fridge and let it sit at room temperature for about 20 to 30 minutes before cooking. Reducing the chill ensures the chicken cooks evenly from the edges to the center.
NOTE: If using an airtight container, ensure the lid is dry by wiping away any water droplets; this prevents moisture from dripping onto the marinated chicken
Skewer the marinated chicken piece
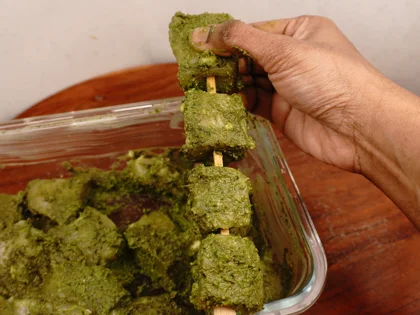
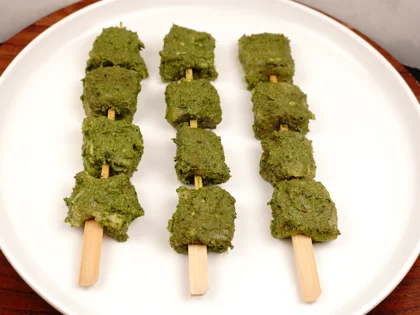
Thread each marinated chicken piece onto the skewer, ensuring the skewer passes through the center for stability.
"Same-Size" Strategy - If your chicken pieces vary in thickness, try to group them. Place thinner pieces together on one skewer and thicker pieces on another so you can adjust their cooking times accordingly.
Note: Make sure to leave a small space between the pieces.
Pan Selection and Cooking Spacing Guide
Why Use Non-Stick: It allows you to cook the chicken with less oil, prevents the meat from sticking, and makes cleanup much easier.
Option 1: High-Quality Ceramic Non-Stick (Medium Heat): A premium ceramic coating safely works at medium heat. Leave plenty of space between the chicken pieces so moisture can escape, helping you attain a light brown color.
Option 2: Hybrid or Seasoned Carbon Steel (Medium-High Heat): If using these durable pans, you can safely use medium high heat and leave a little space between the pieces while still achieving a light brown color.
Cooking of chicken pieces in nonstick pan
Oil and preheat the pan
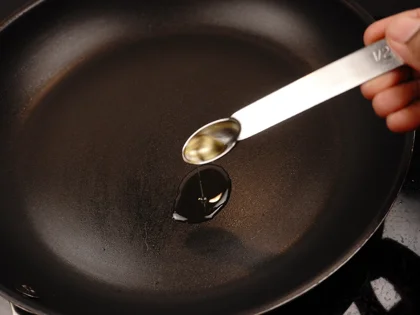
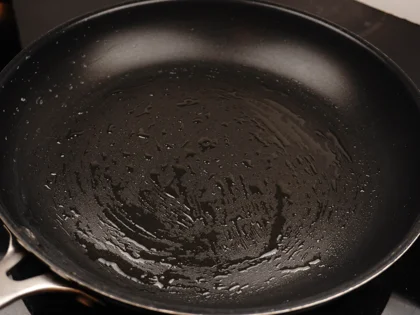
Oil the pan - Add 1/2 tsp oil to the pan. Use a pastry brush to spread the oil entirely in the bottom of the nonstick pan evenly. The usage of tsp of oil depends upon the size of your pan
Preheat- Preheat the pan for about 4 to 5 minutes over medium flame.
Preparation & Oiling
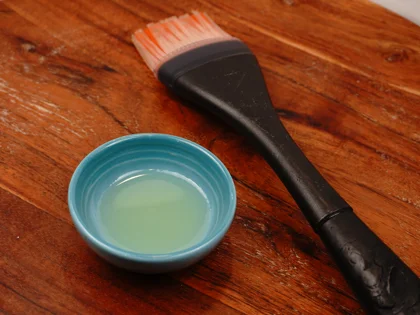
Prep the Oil : While the pan is preheating, prepare a small bowl with 1 tbsp of oil.
Apply Oil : Using a pastry brush, apply the oil to the top surface of the skewered chicken.
Benefits : This light coating prevents the chicken from sticking, keeps it moist, and helps the surface fry lightly.
Note: Make sure to apply the oil just before the chicken hits the pan to ensure the oil stays on the surface.
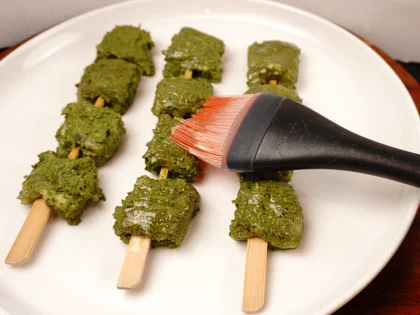
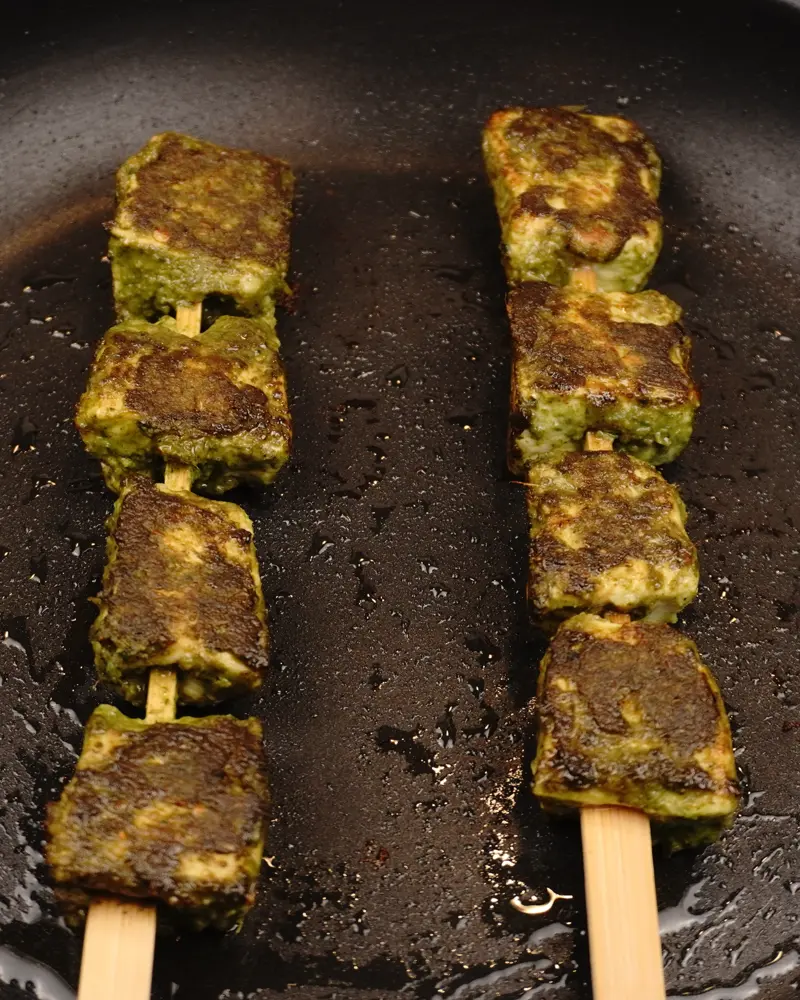
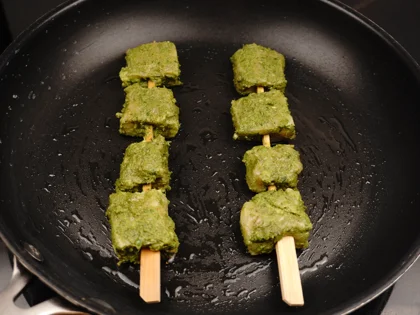
Place the chicken skewers on hot pan and contiue to cook them without moving, until to attain golden color underside the skewers
Note: I used a ceramic non-stick pan at medium heat for this recipe.
Check the Heat : You should hear a sizzling sound as soon as you place the skewers in the pan; this indicates the pan is ready.
Note :The pan should be hot enough to sizzle, but not smoking (too high) or failing to sizzle immediately (too low).
Before and After : Applying herb marinade before placing the chicken skewers on the pan and also while the chicken skewers is in the pan creates a thicker, more "infused" coating.
Place and Cook : Place the skewers with more space between them. Cook over medium heat without moving them for 3 minutes.
Check and apply oil : After 3 minutes, quickly lift the skewers to see if the chicken has turned light golden. Once a crust has formed, apply oil to the top and the both thin sides of the skewers.
Note: Less oil in the pan can cause the chicken pieces to burn easily. Avoid cooking for too long on one side over medium heat; cook only until the chicken reaches a light golden color.
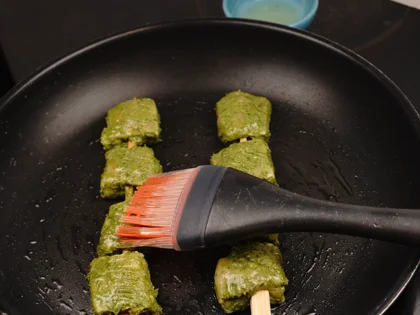
Cook on both thin sides of the skewers on medium flame then flip flat side
Thin sides : Cook each thin side with 30 to 45 sec to attain light golden color.
Note: If the chicken pieces are uniform in size, the skewers should stand on their own; otherwise, hold them briefly until golden color forms.
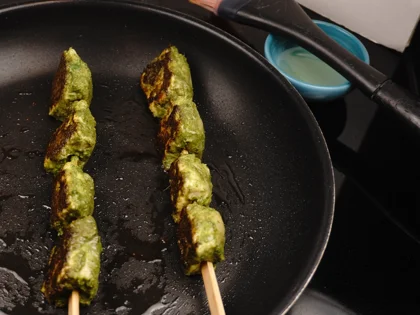
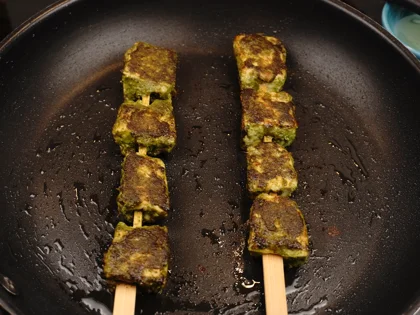
Reduce the heat to low, close pan with lid, continue to cook them for about 2 to 3 minutes
Second side- Continue cooking the skewers for about 2 to 3 minutes.
Low heat with lid closed - Reduce the heat to low and close the pan with lid. These chicken skewers are ¼ inch thick, so i cooked them with the lid closed, flipping halfway through the cooking time. If they are ½ inch thick, cook with the lid on for the entire cooking time.
Remove Excess Moisture : After removing the lid, if the chicken skewers still look slightly moist, cook them for a few more minutes uncovered. Continue cooking until the surface liquid has evaporated.
Total time- Total cooking time is usually 6–7 minutes per batch.
Check Doneness - Confirm skewered chicken are fully cooked by using a food thermometer to ensure the center reaches an internal temperature between 165-170F.
Timing will vary- The cooking time will vary depending upon the thickness of the chicken pieces, the type of cookware, the amount of heat used. If you do not pound the chicken breast, they will require slightly more time to cook.
Note: If the lid doesn’t have vent hole, leave it slightly ajar (partially open).
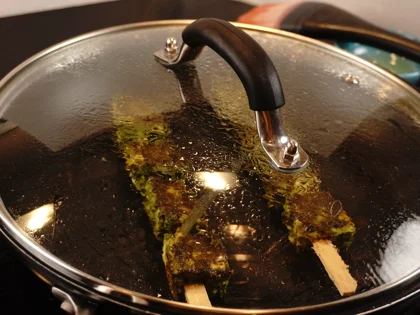
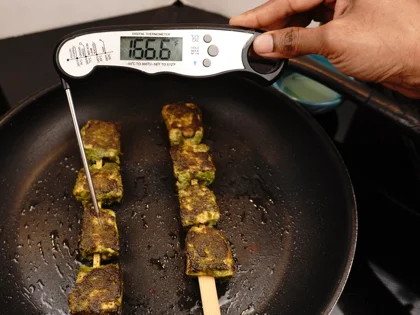
Post-Cooking Steps before serving
Drain and pat dry - Transfer the cooked skewers to a paper towel-lined plate. Using a fresh paper towel, gently pat all sides of the skewers to absorb the surface oil.
Transfer and cover - After a minute or two, move them to a clean plate and loosely cover them with a lid or foil to rest before serving.
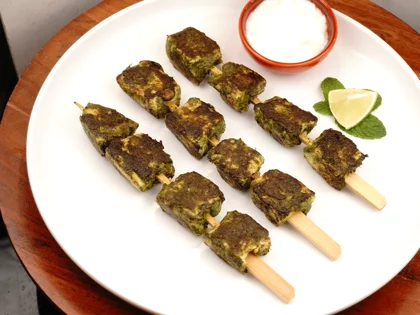
Rest - Allow the kebabs to rest for a minimum of 5 to 10 minutes before serving.
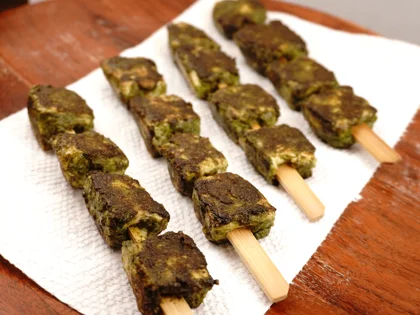
Ready to serve
Serve : After the resting period is complete, the skewers are ready to be served alongside a cooling curd dip.
Tips
For prep chicken
💡 Did you know chicken breast is the healthiest part of the chicken? It’s high-protein, low-fat, and 0-carb, making it perfect for weight loss or muscle building.
💡 Clean them by either wiping with a paper towel or giving them a quick rinse under running water.
💡 Pat it Dry: Make sure to pat the chicken breast dry with a paper towel to remove surface moisture before you begin to chop.
💡 For tender and soft chicken, lightly pound the chicken breast with a heavy object (like a rolling pin or a small skillet) before marinating.
💡 Use a sharp knife, cut the chicken breast into small pieces with same thickness. Aim for a uniform ¼-inch thickness so every piece cooks at the same time.
For marination
💡 If your curd/yogurt is too runny, you can thicken it by placing it in a strainer for about 1 hour to drain the excess liquid. If it is already thick (like mine or Greek yogurt), you can use it directly
💡 For extra flavor, you can add 8 to 10 almond(soaked) along with the herbs when grinding for marination.
💡 Planning ahead to marinate for 3–4 hours is essential. It tenderizes the chicken and ensures it is deeply seasoned and full of flavor.
💡 If your chicken pieces vary in thickness, try to group them: place thinner pieces together on one skewer and thicker pieces on another so you can adjust their cooking times accordingly.
For pan frying
💡 Using a non-stick pan is ideal for this recipe; it prevents the chicken from sticking, requires less oil for a healthier meal, and makes cleanup much easier.
💡 To get a light brown color, ensure the pan is hot enough to sizzle when placing the chicken skewers, but not smoking (too high) or failing to sizzle immediately (too low).
💡 To Attain a light Brown Color: Arrange the chicken skewers in a single layer, leaving plenty of space between them. If you are using a smaller pan, cook in multiple batches or switch to a larger pan.
💡 To avoid undercooking or overcooking the chicken pieces, to keep them juicy, tender and flavorful, use meat thermometer to cook them until the internal temperature reaches between 165 -180°F
For Salt
💡 Be careful with your salt, as it affects both flavor and texture. Too little salt leaves the chicken lacking flavor, while too much can make it tough. Remember that not all salts are the same; they have different levels of saltiness depending on the brand and type;for this recipe, I used 1/2 tsp of fine sea salt for 250g of boneless chicken and 1/4 tsp for the herb mixture.
Safe Taste-Testing
💡 Never taste the marinade once the raw chicken pieces is added, as this can lead to food poisoning. To check the salt safely, fry a small sample piece and adjust the seasoning based on the cooked taste.
Frequently Asked Questions
Chicken breast is the leanest cut available, making it the healthiest part of the chicken. Because it is low in fat, zero-carb, and has the most protein by weight, it’s an excellent choice for anyone prioritizing heart health or weight loss.
Most health organizations recommend that you don't wash chicken at all, as cooking it to an internal temperature of 165°F (74°C) is the only way to kill bacteria.
If you still choose to wash it, do so quickly under a gentle stream of cold running water. Ensure no dishes or utensils are nearby (within 3 feet) to avoid spreading germs through water splashes.
You should pat dry chicken breast because it helps the marinade stick to the meat instead of sliding off. It also helps the chicken brown better in the pan instead of steaming.
Yes! Marinating with a spiced curd, heabs and salt mixture for at least 3 to 4 hours is essential. It tenderizes the chicken and ensures it is deeply seasoned and full of flavor.
It breaks down tough muscle fibers into loose ones for a more tender softer chicken and allows flavors to penetrate slightly deeper, and reduces the total cooking time.
To reduce chillness so the chicken pieces cooks evenly.
The chicken isn't browning because the pan isn't hot enough and it’s overcrowded. Make sure the pan is preheated, and leave more space between the pieces so they can light brown properly.
You can use these chicken pieces in many different meals. Try chopping them up to use in fried rice, soups, or noodles. They also make an excellent filling for sandwiches, burgers, and chapati wraps, or you can use them as a savory stuffing for dosas and tacos.
Just put it in an airtight container and store it in the fridge immediately after cooling (and always within 2 hours of cooking). According to food safety guidelines, cooked chicken lasts in the fridge for 3–4 days.
You Might Also Like
Low Carb, Less Oil Hariyali Tikka Recipe
Hariyali tikka are traditionally made with rich, fattier, boneless leg pieces and pan-fried in ghee. To reduce your calorie intake, simply switch to chicken breast and use less oil. This adaptation makes the kebabs a healthier, more frequent meal option. Even with reduced fat and chicken breast, these hariyali tikkas remain moist, tender and tasty.
For a different flavor, try the Less oil afghani Murgh Tikka
Ingredients
- 250 g Boneless skinless chicken breast
- 20 grams (approx. 1 cup) Coriander leaves
- 10 grams (approx. 1/2 cup) Mint leaves
- 1 tsp (¼ medium size) Lime juice
- 30 gms (2 tbsp) Thick fat-free or low-fat curd
- 4 gms (1/2 tbsp) Oat flour
- 3 to 4 nos. Green chilies
- ½ inch Ginger
- 2 to 3 cloves Garlic
- ½ tsp Garam masala powder
- ½ tsp Zeera powder
- ½ tsp Fennel powder
- 11/2 - 2 tbsp Oil
- 3/4 tsp Salt
Instructions
-
Choose a Cleaning Method
Dry Wipe (Recommended): Skip rinsing the chicken pieces entirely. Simply wipe the 250g chicken breast clean with a dry paper towel and dispose of the towel in the trash immediately. This is the safest way to prevent the spread of kitchen bacteria.
Rinse & Dry (Alternative): If you prefer to rinse the chicken, do so quickly under a very gentle, low-pressure stream of cold running water to avoid splashing. Also, keep the chicken piece deep down inside the sink basin. Transfer the chicken directly to a clean plate lined with paper towels, pat dry, and discard the paper towels right away.
-
Make Chicken Cutlet & Pound
Make chicken cutlets: A thin chicken slice (or cutlet) is a chicken breast sliced horizontally into pieces about 1/4-inch thick. First, slice the chicken breast crosswise to separate the thick and thin parts. Next, slice the thick piece horizontally into two thinner layers. You will end up with three chicken pieces of 1/4-inch equal thickness.
Gentle Pounding: Cover the chicken cutlets with plastic wrap. Use a mallet or a heavy flat pan to lightly pound the 1/4-inch chicken pieces.
Note: Pounding loosens the tough fibers and makes the thin chicken pieces tender. Do not skip this step.
-
Cut into Bite-Sized Pieces
Slice into Strips: Look closely at the chicken cutlet to find the direction of the muscle fibers (the grain). Cut across these lines—never parallel to them—into 1-inch-wide strips.
Cut into Cubes: Turn the strips and slice them crosswise into 1-inch cubes.
-
Initial marinade
Place small size ginger, 2 to 3 garlic cloves, and 2 to 3 green chilies in the jar and blend them into a coarse texture.
Note: If the pieces are too big, just chop them down a bit first so the standard blender can handle them easily.
-
Apply the marinade and chill
Add the following to your prepared chicken pieces
1 tsp lime juice
Prepared ginger, garlic, green chili paste
1/2 tsp salt
Even Distribution - Instead of pouring the ingredients in one spot, sprinkle them evenly over the chicken pieces. Use your hands to massage the paste, lime juice, and salt into each piece until thoroughly coated
Chill : Cover the bowl and let the chicken marinate in the refrigerator for at least one hour. If you’re short on time, simply let the chicken rest for as long as it takes you to prepare the fresh herbs for the second marinade.
-
Choose good quality leaves and separate leaves
Pick : Color of the leaves should be Deep or bright green and have a fresh, earthy smell. Check that they are firm and stand upright.
Avoid : Discard any leaves that are discolored (uneven color or yellow), wilted, damaged by insects, mushy spots and bad smell.
Preparation of coriander : Remove the thick stem ends with roots of coriander.
Preparation of mint leaves : It is important to separate the mint from their stems. This is because all stems, even those that are young and tender, can introduce a bitterness and unpleasant flavor.
-
Clean the leaves
Wash method : To clean the leaves, first fill a large, clean bowl with enough water. place the leaves inside the bowl. Using your hands, swish the leaves gently in the water to remove dirt and sand. Lift the leaves from the water and place them in a colander to drain. Discard the dirty water, refill the bowl, and repeat the process until the water runs clear.
Drain water : Allowing the leaves to rest in the colander for 30 minutes lets the excess water drip off naturally.
Speed Tip: To dry the leaves faster, place the colander near an open window or under a kitchen fan.
-
Dry and chop leaves
Pat the leaves with a paper towel to remove any remaining surface moisture. Once completely dry, chop them into small pieces. This will make it easier for the standard blender blades to grind them evenly.
-
Final marinade
Place the following ingredients in the jar and pulse for a few seconds at a time. Repeat this several times until the mixture forms a fine paste.
Coriander leaves – 20 grams (approx. 1 cup)
Mint leaves – 10 grams (approx. ½ cup)
Thick curd (Low fat or fat free) – 2 tbsp (30 grams)
Oat flour – 8 grams (approx. 1/2 tbsp)
Zeera powder – ½ tsp, Garam masala powder – ½ tsp, Fennel powder – ½ tsp
Green chilies - 2 nos
Salt – little
Note: For extra flavor, you can add 8 to 10 almonds(soaked) along with the herbs when grinding.
-
Coat prepared fresh herb marinade and chill
Add the herb marinade over the first marinade chicken. Mix thoroughly to ensure every single piece is evenly coated in the vibrant green paste.
Rest : Cover the bowl and let the chicken marinate in the refrigerator for at least 2 hours.
-
Reduce Chill
Prep Before Cooking : Take the marinated hariyali chicken out of the fridge and let it sit at room temperature for about 20 to 30 minutes before cooking. Reducing the chill ensures the chicken cooks evenly from the edges to the center.
NOTE: If using an airtight container, ensure the lid is dry by wiping away any water droplets; this prevents moisture from dripping onto the marinated chicken
-
Skewer the marinated chicken piece
Thread each marinated chicken piece onto the skewer, ensuring the skewer passes through the center for stability.
"Same-Size" Strategy - If your chicken pieces vary in thickness, try to group them. Place thinner pieces together on one skewer and thicker pieces on another so you can adjust their cooking times accordingly.
Note: Make sure to leave a small space between the pieces.
-
Oil and preheat the pan
Oil the pan - Add 1/2 tsp oil to the pan. Use a pastry brush to spread the oil entirely in the bottom of the nonstick pan evenly. The usage of tsp of oil depends upon the size of your pan
Preheat- Preheat the pan for about 4 to 5 minutes over medium flame.
-
Preparation & Oiling
Prep the Oil : While the pan is preheating, prepare a small bowl with 1 tbsp of oil.
Apply Oil : Using a pastry brush, apply the oil to the top surface of the skewered chicken.
Benefits : This light coating prevents the chicken from sticking, keeps it moist, and helps the surface fry lightly.
Note: Make sure to apply the oil just before the chicken hits the pan to ensure the oil stays on the surface.
-
Place the chicken skewers on hot pan and contiue to cook them without moving, until to attain golden color underside the skewers
Note: I used a ceramic non-stick pan at medium heat for this recipe.
Check the Heat : You should hear a sizzling sound as soon as you place the skewers in the pan; this indicates the pan is ready.
Note :The pan should be hot enough to sizzle, but not smoking (too high) or failing to sizzle immediately (too low).
Before and After : Applying herb marinade before placing the chicken skewers on the pan and also while the chicken skewers is in the pan creates a thicker, more "infused" coating.
Place and Cook : Place the skewers with more space between them. Cook over medium heat without moving them for 3 minutes.
Check and apply oil : After 3 minutes, quickly lift the skewers to see if the chicken has turned light golden. Once a crust has formed, apply oil to the top and the both thin sides of the skewers.
Note: Less oil in the pan can cause the chicken pieces to burn easily. Avoid cooking for too long on one side over medium heat; cook only until the chicken reaches a light golden color.
-
Cook on both thin sides of the skewers on medium flame then flip flat side
Thin sides : Cook each thin side with 30 to 45 sec to attain light golden color.
Note: If the chicken pieces are uniform in size, the skewers should stand on their own; otherwise, hold them briefly until golden color forms.
-
Reduce the heat to low, close pan with lid, continue to cook them for about 2 to 3 minutes
Second side- Continue cooking the skewers for about 2 to 3 minutes.
Low heat with lid closed - Reduce the heat to low and close the pan with lid. These chicken skewers are ¼ inch thick, so i cooked them with the lid closed, flipping halfway through the cooking time. If they are ½ inch thick, cook with the lid on for the entire cooking time.
Remove Excess Moisture : After removing the lid, if the chicken skewers still look slightly moist, cook them for a few more minutes uncovered. Continue cooking until the surface liquid has evaporated.
Total time- Total cooking time is usually 6–7 minutes per batch.
Check Doneness - Confirm skewered chicken are fully cooked by using a food thermometer to ensure the center reaches an internal temperature between 165-170F.
Timing will vary- The cooking time will vary depending upon the thickness of the chicken pieces, the type of cookware, the amount of heat used. If you do not pound the chicken breast, they will require slightly more time to cook.
Note: If the lid doesn’t have vent hole, leave it slightly ajar (partially open).
-
Post-Cooking Steps before serving
Drain and pat dry - Transfer the cooked skewers to a paper towel-lined plate. Using a fresh paper towel, gently pat all sides of the skewers to absorb the surface oil.
Transfer and cover - After a minute or two, move them to a clean plate and loosely cover them with a lid or foil to rest before serving.
Rest - Allow the kebabs to rest for a minimum of 5 to 10 minutes before serving.
-
Ready to serve
Serve : After the resting period is complete, the skewers are ready to be served alongside a cooling curd dip.
Loading rating...
Write a Review
Loading reviews...