Herb Chicken Tikka (Hariyali Murgh Tikka)
by Viruthiga Veni
Loading rating...
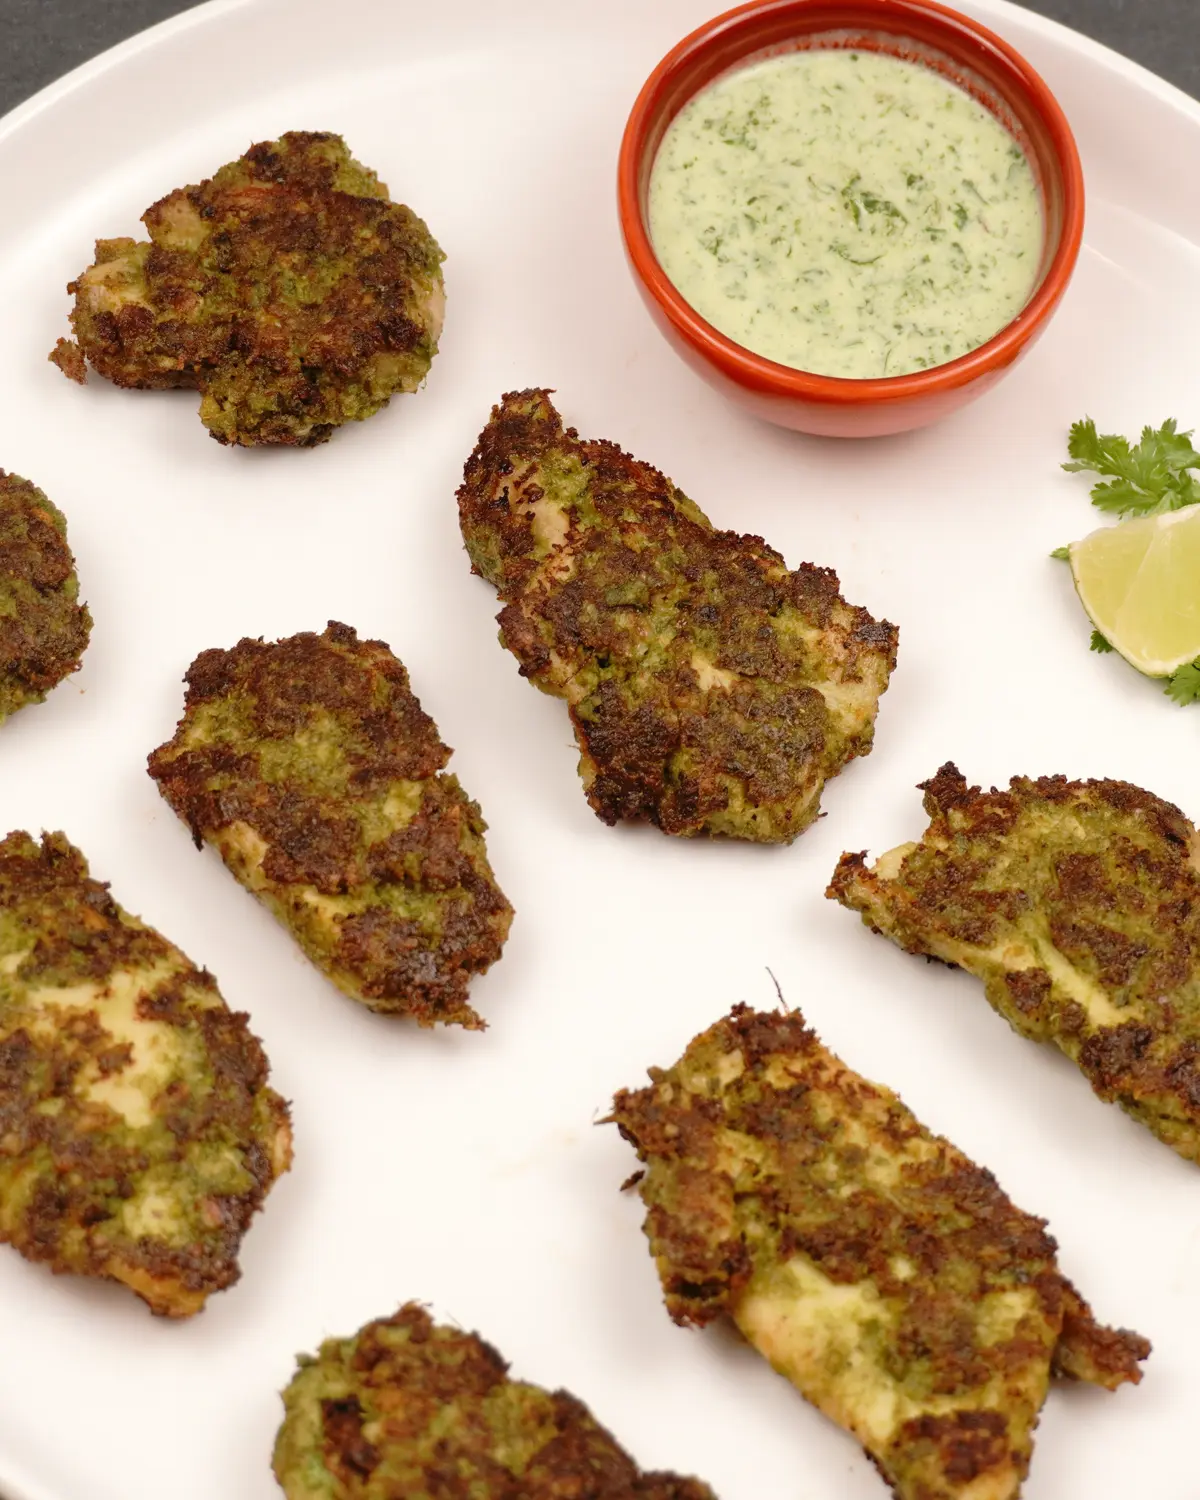
Herb Chicken Tikka (Hariyali Murgh Tikka) translates directly to "green chicken pieces"—derived from hariyali (green), murgh (chicken), and tikka (small chunks). This dish features tender, bite-sized chicken pieces marinated in a vibrant blend of fresh herbs—like coriander and pudina (mint)—and warm spices.
Then the marinated herb chicken tikka are inserted through the skewers and cooked in a large clay oven known as a tandoor. But in home we can cook over charcoal fire in barbeque, under the oven broiler and grill /normal pan.
In this recipe, a frying pan is used to get the outside surface of the chicken pieces to attain a brown color. These pan fried chicken tikka are tender, juicy inside with a brown flavorful crust outside.
For a different flavor, try the Afghani Murgh Tikka.
Ingredients
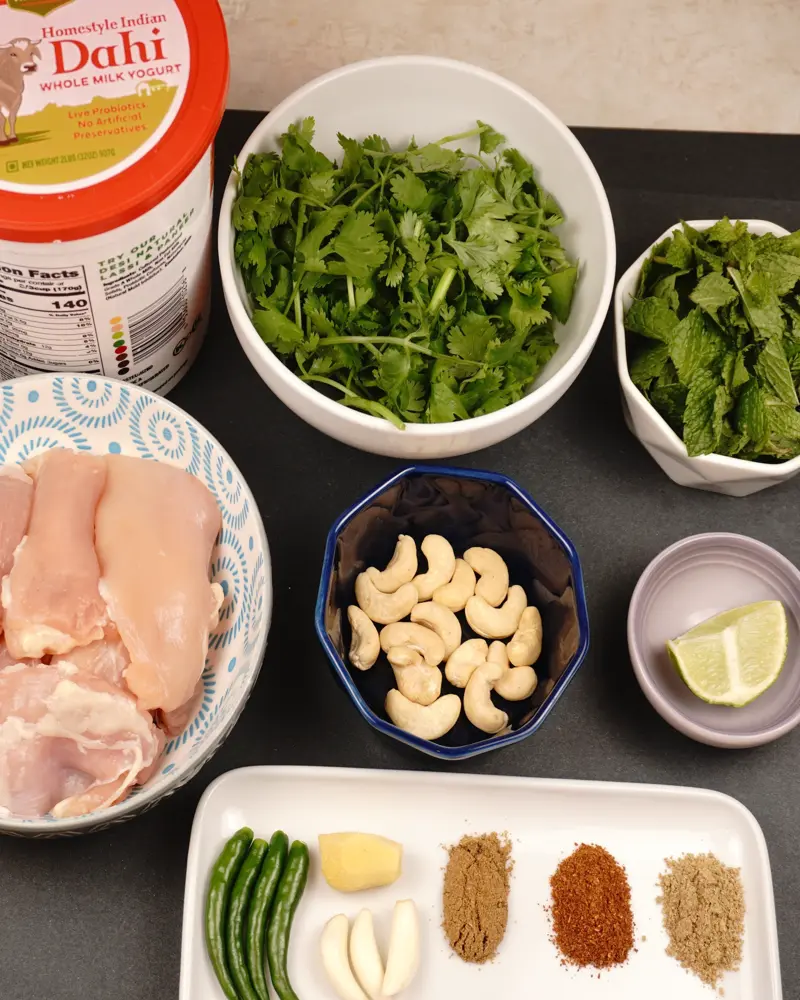
Boneless skinless chicken thigh pieces – 250 gm
Coriander leaves – 20 grams (approx. 1 cup)
Mint leaves – 10 grams (approx. ½ cup)
Whole Milk Hung curd – 3 tbsp (45 g)
Garlic – 2 to 3 cloves
Green chilies – 3 to 4
Raw cashews – 20 gm (15 pieces small size)
Zeera powder – ½ tsp
Fennel powder – ½ tsp
Garam masala powder – ½ tsp
Lime juice – 1 tsp (1/4 medium size)
Ghee – 4 tbsp
Salt – ¾ tsp approx.
Prep Chicken Pieces
Choose a Cleaning Method
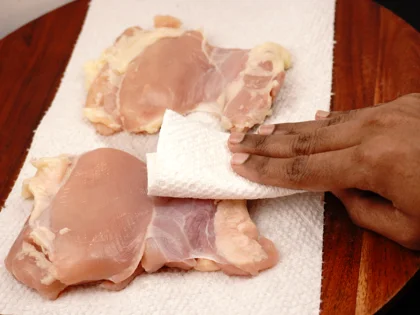
Dry Wipe (Recommended): Skip rinsing the chicken pieces entirely. Simply wipe the 250g chicken thigh clean with a dry paper towel and dispose of the towel in the trash immediately. This is the safest way to prevent the spread of kitchen bacteria.
Rinse & Dry (Alternative): If you prefer to rinse the chicken, do so quickly under a very gentle, low-pressure stream of cold running water to avoid splashing. Also, keep the chicken piece deep down inside the sink basin. Transfer the chicken directly to a clean plate lined with paper towels, pat dry, and discard the paper towels right away. Always thoroughly wash and sanitize the sink basin immediately afterward.
Butterfly and pound
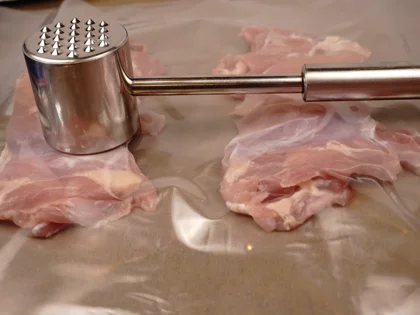
To ensure even cooking, make the entire chicken piece to a uniform 1/4-inch thickness. For extra tender chicken, pound the meat to loosen its tough fibers.
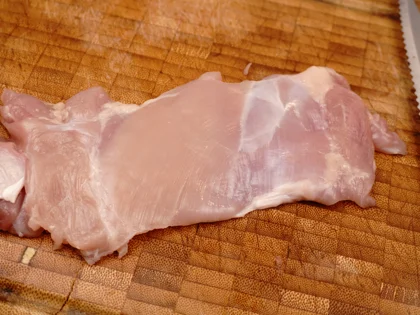
Butterfly: If one side of the thigh is thicker than the other, slice horizontally through that thick side to split it, bringing the entire piece down to an even 1/4 inch thickness.
Pound: Cover the butterflied chicken pieces with plastic wrap. Using a meat mallet or a heavy, flat pan, lightly pound the meat to loosens tough fiber.
Slice into Small Pieces
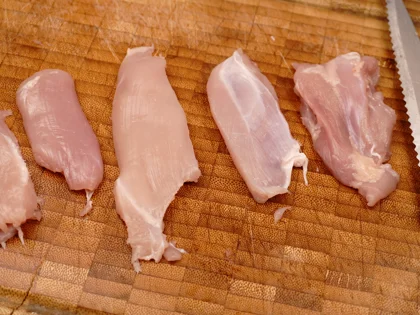
Using a sharp knife, cut the prepared, butterflied chicken thighs into small pieces about 1 inch wide.
Prep Hung Yogurt/Curd
Hung Curd Consistency
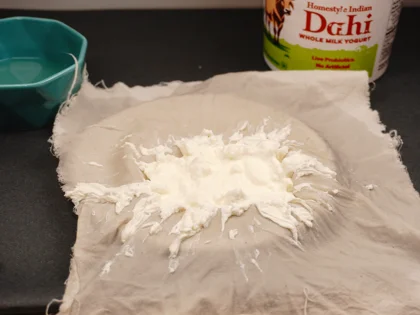
Aim for a medium hung curd consistency. If the curd is too runny, the marinade will be too watery, won't stick to the chicken, and will lack flavor. On the other hand, if the hung curd is too thick and stiff, it won't spread easily, making it difficult to coat the chicken. Preparing a medium hung curd ensures there is just a little liquid left, providing the perfect balance for a smooth, even spread.
How to Prep
Prep using either a quick method or the straining method:
Option A: The Quick Method (Ready in Minutes) Best if you are short on time. Requires a damp muslin or cheesecloth.
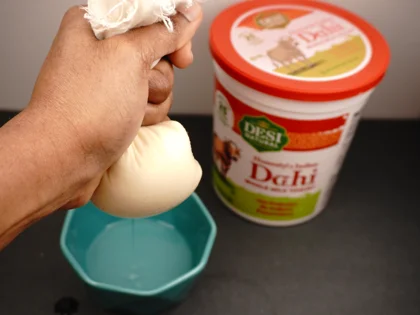
Pour & Gather: Pour about 70 g yogurt/curd into the center of your damp cloth. Bring the four corners together and lift it up to create a small pouch.
Squeeze Gently: Hold the top of the pouch tightly. Very gently press and squeeze the cloth along with the curd to release the excess liquid until it reaches a medium consistency.
Tip: Keep your touch light! Pressing too hard will force the creamy yogurt solids through the fabric, reducing your yield.
Option B: The Straining Method (Hands-Free) Best if you are planning ahead and want gravity to do the work.
The Setup: Pour about 70 g yogurt/curd directly into a fine-mesh strainer set over a bowl.
The Wait: Place the setup in the refrigerator and let it drain undisturbed for 3 to 4 hours until it reaches a medium, creamy consistency.
Measure for Marinade
Open the cloth and measure out 45 g (3 tbsp) of the medium hung curd for your marinade.
Tip: Always choose a whole-milk yogurt or curd. Full-fat options add much more flavor and creaminess to your tikka marinade than low-fat alternatives.
Prep First Marinade
Make the Ginger-Garlic Paste
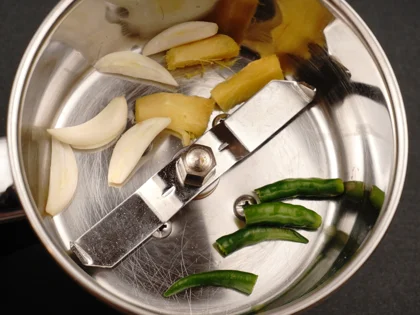
Prep the Aromatics : Wash and dry the ginger and green chilies. Peel the ginger, skin the garlic cloves, and remove the stems from the chilies.
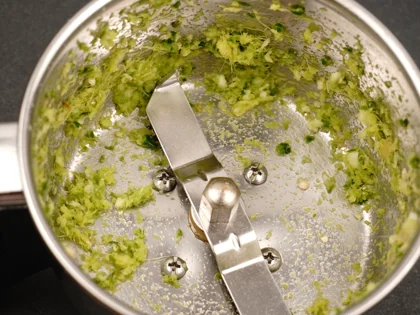
Blend to a Coarse Texture: Put your 1/2 inch ginger, 2 to 3 cloves garlic, and 1 to 2 green chilies in the jar and blend them into a coarse texture.
Note: If the pieces are too big, just chop them down a bit first so the standard blender can handle them easily.
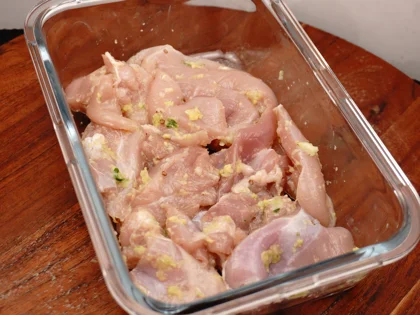
Coat the chicken pieces and keep aside
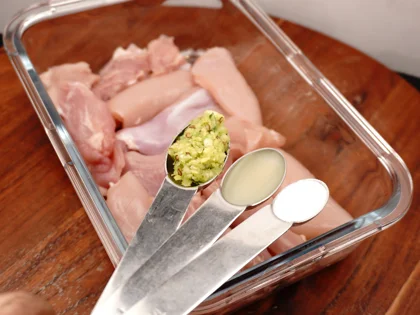
Add the following to your prepared chicken pieces
Prepared paste
½ tsp salt
1 tsp lime juice
Even Distribution - Instead of pouring them in one spot with a spoon, sprinkle it evenly over the chicken pieces. Apply it to all sides of the pieces to ensure a uniform coating. Set aside.
Prepare the Fresh Herbs
To ensure the best flavor and safety, use good quality leaves. Throw away any brown or damaged leaves. Fresh leaves taste great, but bad leaves will affect the final flavor.
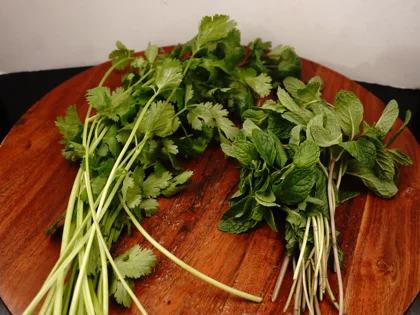
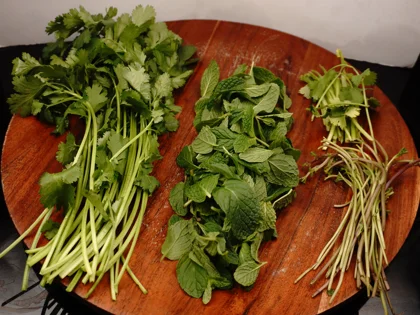
Choose good quality leaves and separate leaves
Pick : Color of the leaves should be Deep or bright green and have a fresh, earthy smell. Check that they are firm and stand upright.
Avoid : Discard any leaves that are discolored (uneven color or yellow), wilted, damaged by insects, mushy spots and bad smell.
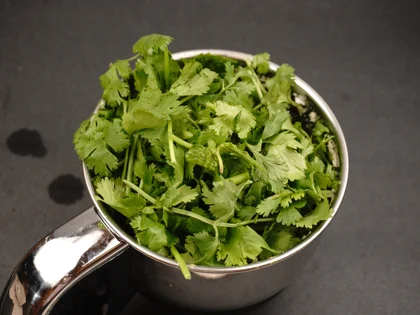
Preparation of coriander : Remove the thick stem ends with roots of coriander.
Preparation of mint leaves : It is important to separate the mint from their stems. This is because all stems, even those that are young and tender, can introduce a bitterness and unpleasant flavor.
Clean the leaves & Drain
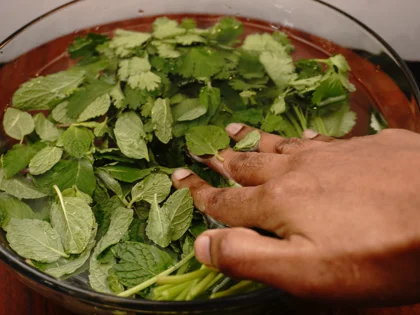
Wash method : To clean the leaves, first fill a large, clean bowl with enough water. place the leaves inside the bowl. Using your hands, swish the leaves gently in the water to remove dirt and sand. Lift the leaves from the water and place them in a colander to drain. Discard the dirty water, refill the bowl, and repeat the process until the water runs clear.
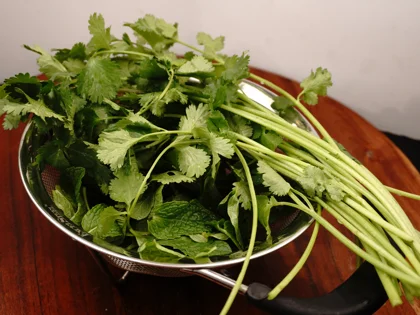
Remove Excess Moisture : Allow the leaves to rest in the colander for a few minutes to let the excess moisture drain away naturally. Alternatively, you can give the colander a few gentle shakes, or simply lift the leaves in your hand and give them a quick shake to remove the excess water.
Roughly chop leaves
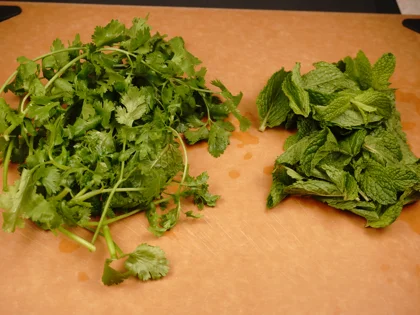
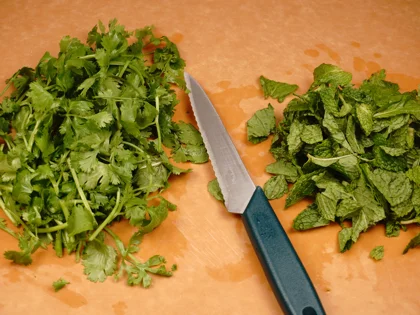
Place your drained leaves onto a cutting board. Roughly chop the leaves into small pieces so your standard blender can easily handle and process them.
Prep Second Marinade & Chill
Soak the Cashews
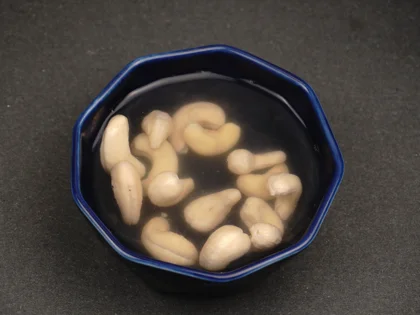
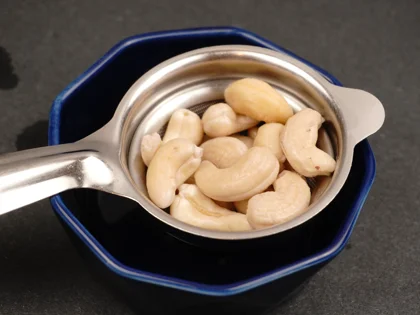
Soak: Place 20 grams (about 15 small pieces) of raw cashews in a small bowl. Pour in enough hot water to submerge them and let them sit for 10 to 15 minutes.
Drain & Rinse: Drain the hot water and give the soaked cashews a quick rinse with water.
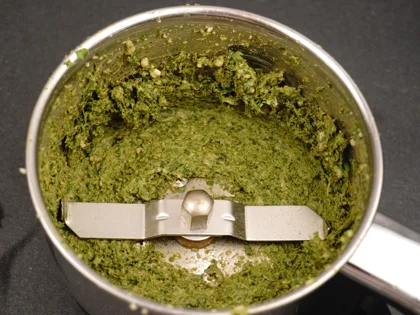
Blend to a Thick, Coarse Paste
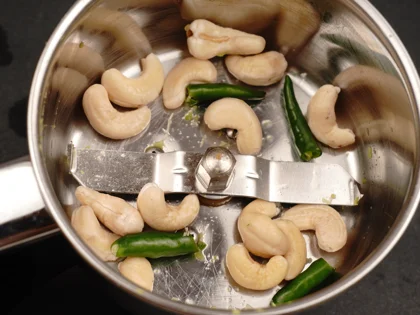
Cashew & Chili Paste: Place the soaked cashews and 1 to 2 green chilies into the blender jar. Pulse a few times in short bursts until they form a coarse paste.
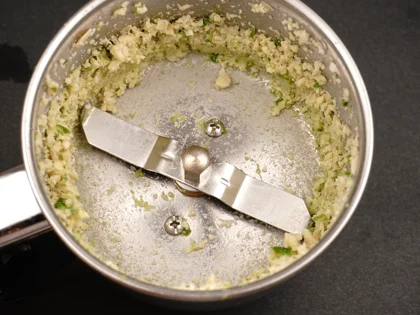
Add the Herbs: Add 10 grams of prep-chopped pudina (mint) leaves and 20 grams of prep-chopped coriander (cilantro) leaves directly into the same jar. Pulse again until the herbs are broken down into a coarse texture with the cashews.
Pro-Tip: The surface moisture on the washed leaves and soaked cashews is usually enough to help your blender run without turning the mixture watery. Make sure to shake off any excess water from the leaves before grinding, as too much liquid will make the herb mixture runny.
To Attain a Thick, Coarse Paste: Do not add extra water at the start. Instead, stop the blender and scrape down the sides of the jar a few times with a spatula to ensure an even grind.
If the Blades Get Stuck: Only add a tiny splash of extra water (a teaspoon at a time) if absolutely necessary to get the blades moving, keeping the final texture thick and coarse.
Mix the Marinade
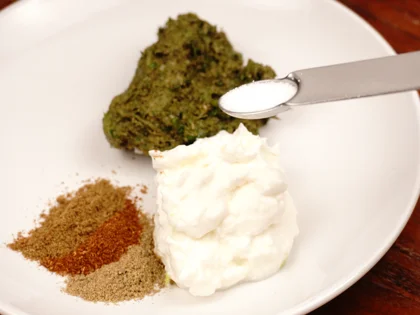
In a mixing bowl, combine
45 grams (3 tbsp) of prepared medium hung curd,
Coarse cashew-herb paste,
1/2 tsp garam masala (Everest brand)
1/2 tsp cumin and 1/2 tsp fennel powder (Homemade)
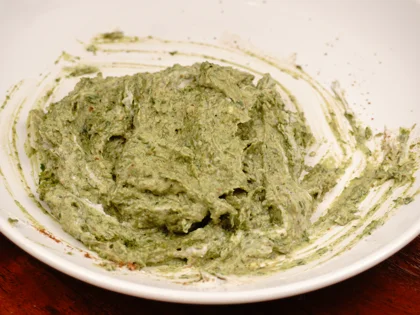
Note: I missed adding the salt when grinding the cashews and herbs, so I just mixed it directly into the marinade. Gently stir the mixture together until combined.
Check the Consistency and Coat the Chicken
For the best results, your marinade should have a thick, spreadable consistency so it sticks to the chicken effectively without sliding off.
If the Marinade is Too Thick: If the mixture is too stiff to spread evenly, whisk in a tiny amount of plain yogurt or runny curd—just a teaspoon at a time—to loosen it up.
If the Marinade is Thin: If the mixture mistakenly turns out a little watery, mix in 2 to 3 teaspoons of cornstarch. The cornstarch will absorb the excess liquid while resting and help the marinade stick.
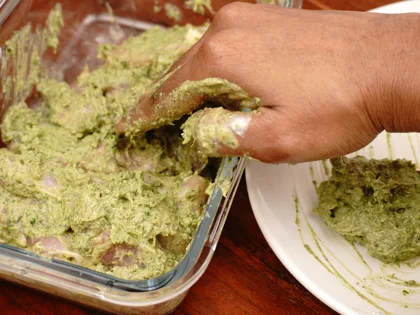
Applying the Marinade:
Using your hands, coat each piece of chicken evenly with the marinade on both sides. Repeat this process until every single piece is thoroughly coated.
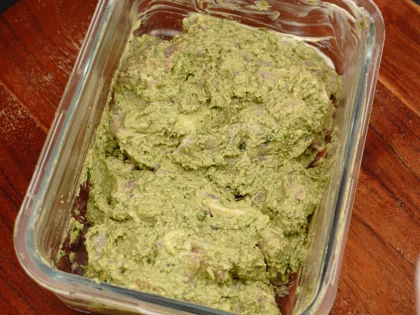
How Long to Marinate the Hariyali Tikka
Minimum Time : 2 hours. This provides the balance between flavor infusion and maintaining the firm texture of the chicken.
Maximum Time : Do not exceed 4 hours. For thin cuts in acid marinade (like lime juice), marinating longer than 4 hours can cause the proteins to break down too much, leading to a mushy texture.
Reduce Chill
Prep Before Cooking : Take the marinated afghani chicken out of the fridge and let it sit at room temperature for about 20 to 30 minutes before cooking. Reducing the chill ensures the chicken cooks evenly from the edges to the center.
NOTE: If using an airtight container, ensure the lid is dry by wiping away any water droplets; this prevents moisture from dripping onto the marinated chicken.
Pan Selection and Cooking Spacing Guide
Choosing the right pan and managing your spacing is the key to achieving that perfect restaurant-style crust.
Why Use Non-Stick: It allows you to cook the chicken skewers with less oil, prevents the meat from sticking, and makes cleanup much easier.
Option 1: Ceramic Non-Stick (Medium Heat): A premium ceramic coating safely works at medium heat. Best for cooking fewer pieces at a time. Leave plenty of space between the chicken skewers so moisture can escape, helping you attain a brown/dark brown color.
Option 2: Hybrid or Seasoned Carbon Steel (Medium-High Heat): If using these durable pans, you can safely use the stove up to medium-high heat. This higher heat allows you to cook more pieces at a time in a pan and leave a little space between the chicken skewers to still achieve a deep, dark brown color.
Cooking of Hariyali Chicken Tikka in Nonstick Pan
Heat the Ghee
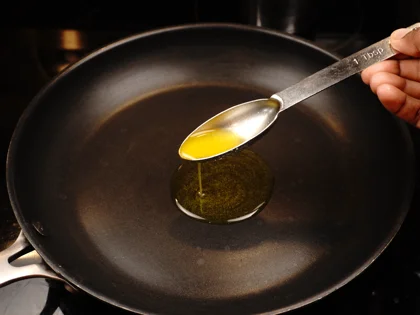
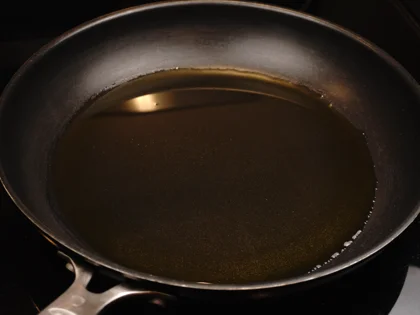
Add 2 tbsp of liquid ghee to a non-stick frying pan and swirl it around to coat the surface evenly. Preheat the pan over a medium flame for about 4 to 5 minutes, until the ghee is hot, but not smoking.
Note on Ghee Amount: The exact amount of ghee you need depends on the size of your pan—aim for a thin, even layer across the bottom.
Why Ghee Beats Butter: Traditional restaurants cook chicken skewers in ghee because it infuses a rich flavor and helps create a beautiful crust. Avoid using regular butter; its high water content prevents the chicken from browning and causes the fat to burn too quickly.
Cooking the Chicken (First Side)
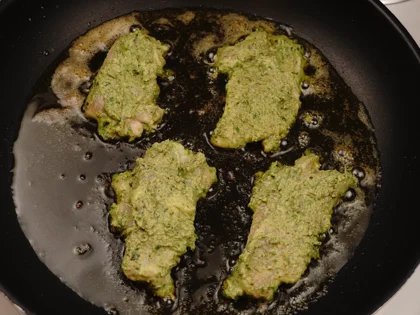
The Sizzle Check: Before adding the chicken, make sure the pan is at the perfect temperature. You should hear a sharp sizzling sound the second the meat hits the ghee. If it doesn't sizzle, the pan is not hot enough. If the ghee is smoking, it's too hot.
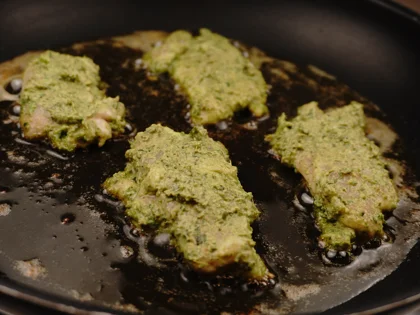
Flavor Boost (No Waste): Apply a bit more of the herb marinade to the chicken pieces right before placing them in the pan, and apply any remaining mixture onto the top side while the bottom side cooks. This ensures you use up all the herb-curd marinade without letting any go to waste, while building a thicker, flavorful crust.
Give Them Space to Brown: Once the pan is ready, place the chicken pieces into the hot ghee, leaving plenty of space between each one. Spacing them out ensures they brown well instead of crowding the pan and steaming.
Develop the Crust: Cook undisturbed for 3 to 4 minutes over medium heat. Do not move or turn the pieces.
Check and Flip: After 3 to 4 minutes, use a spoon to gently lift the edge of a piece to check if a brown crust has formed. Once it has, flip the chicken over.
Cooking the Chicken (Second Side)
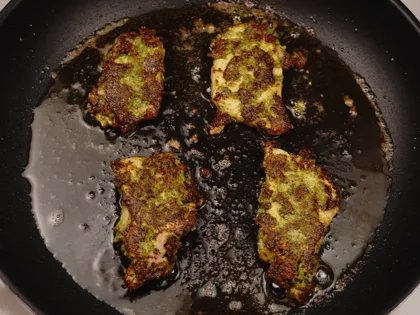
Flip the chicken pieces : Carefully flip them to the other side, then immediately reduce the heat to medium-low.
Complete the Cook : Cook the second side for another 2 to 3 minutes. The total cooking time for a batch will be about 7 to 9 minutes.
⏱️ Why Cooking Times Vary: Keep in mind that exact times can change depending on your cookware, the heat of your stove, the thickness of the chicken pieces and how much you pounded.
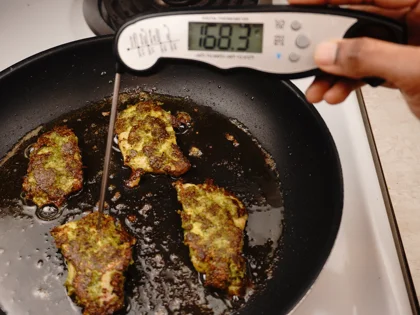
Check for Doneness : Verify with a Thermometer - For tender, juicy, and flavorful chicken pieces every time, insert an instant-read thermometer into the thickest part of the meat. Ensure it reaches an internal temperature between 165–180°F.This helps you avoid undercooked or overcooked chicken.
Post-Cooking Steps before serving
Drain and pat dry- Transfer the cooked pieces to a paper towel-lined plate. Using a fresh paper towel, gently pat all sides of the spieces to absorb the surface oil.
Transfer and cover- After a minute or two, move them to a clean plate and loosely cover them with a lid or foil to rest before serving.
Rest- Allow the kebabs to rest for a minimum of 5 to 10 minutes before serving.
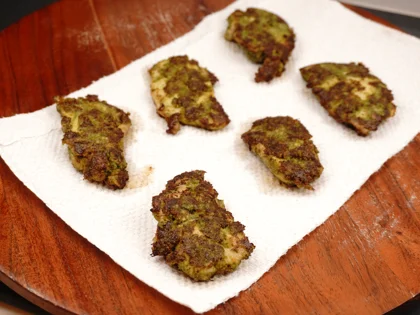
Ready to serve
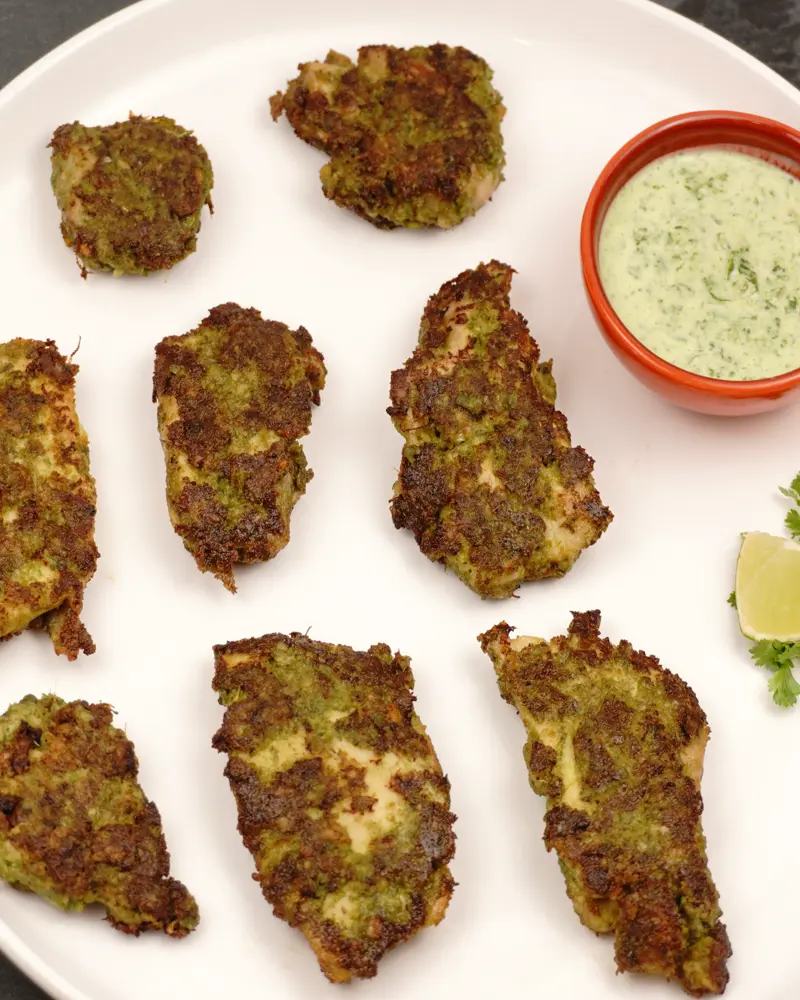
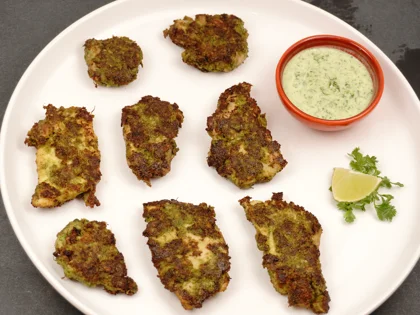
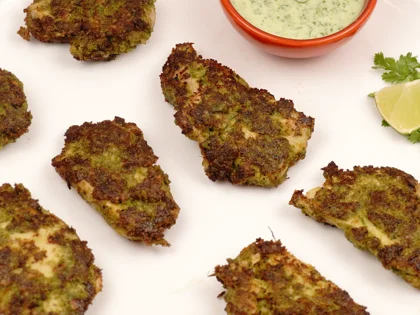
Ready to Serve: After resting for 5 to 10 minutes, your hariyali chicken pieces are perfectly juicy and ready to enjoy.
Perfect Pairings :Serve them fresh alongside a refreshing, cool curd mint dip (pudina raita), sliced red onions, and lemon wedges.
Tips
The Secret to Hariyali Murgh Tikka
💡 Choose Leg Meat: Use boneless, skinless chicken thighs or drumsticks. They offer flavor and a juicier texture than chicken breast.
💡 Pat Dry & Pound for Tenderness: Do not skip this step! Pat the chicken dry with a paper towel to remove any surface moisture, then lightly pound it with a mallet or a small skillet. This loosens tough fibers, ensuring your chicken turns out extra tender and soft.
💡 The Marinade Guide: Always use whole-milk medium hung curd or yogurt, which adds more richness, flavor, and creaminess than low-fat options. Be sure to prepare your hung curd herb mixture into a thick, coarse, and easily spreadable consistency so it clings to the chicken perfectly. Plan ahead and let the chicken marinate for at least 2 hours to allow the salt to penetrate.
💡 To attain brown/dark brown color: I cook the chicken in a non-stick pan, it will help to prevent the delicate herb coating from sticking, and use ghee instead of regular oil for a rich flavor. Ensure the pan is hot enough to sizzle instantly, and leave plenty of space between the pieces so they get a brown/dark brown crust instead of steaming. (To save time and cook more pieces in a pan, switch to a hybrid or seasoned carbon steel pan, which allows you to safely use medium-high heat).
💡 Verify the Temp: For tender, juicy, and flavorful chicken pieces every time, use an instant-read thermometer to check the thickest part of the chicken pieces, ensuring it reaches a safe internal temperature between 165–180°F.
For Salt & Safe Tasting
💡 Be careful with your salt, as it affects both flavor and texture. Too little salt leaves the chicken lacking flavor, while too much can make it tough. Remember that not all salts are the same; they have different levels of saltiness depending on the brand and type; for this recipe, I used 1/2 tsp of sea salt for 250g of boneless chicken and 1/4 tsp for the herb mixture.
💡 Never taste the marinade once the raw chicken pieces is added, as this can lead to food poisoning. To check the salt safely, fry a small sample piece and adjust the seasoning based on the cooked taste.
Frequently Asked Questions
Most health organizations recommend that you don't wash chicken at all, as cooking it to an internal temperature of 165°F (74°C) is the only way to kill bacteria.
If you still choose to wash it, do so quickly under a gentle stream of cold running water. Ensure no dishes or utensils are nearby (within 3 feet) to avoid spreading germs through water splashes
You should pat dry chicken thighs because it helps the marinade stick to the meat instead of sliding off. It also helps the chicken brown better in the pan instead of steaming.
Yes! Marinating chicken with curd, salt, and herbs for at least 2 hours is key. The curd tenderizes the meat, while the salt penetrates deeply to keep it juicy.
It breaks down tough muscle fibers for a more tender softer chicken and allows flavors to penetrate slightly deeper, and reduces the total cooking time.
For the best results, use boneless, skinless chicken leg pieces (such as drumsticks or thighs).
It contains a higher fat content, which provides more flavor and a juicy texture.
To reduce chillness so the chicken pieces cooks evenly.
The chicken isn't browning because the pan isn't hot enough and it’s overcrowded. Make sure the pan is preheated, and leave enough space between the pieces so they can brown properly.
Thick chicken pieces can stay raw in the middle. To fix this, cover the pan with a lid halfway through cooking to trap heat. You can also add more oil to the pan for a shallow fry to help them cook more evenly.
You can use these chicken pieces in many different meals. Try chopping them up to use in fried rice, soups, or noodles. They also make an excellent filling for sandwiches, burgers, and chapati wraps, or you can use them as a savory stuffing for dosas and tacos.
Just put it in an airtight container and store it in the fridge immediately after cooling (and always within 2 hours of cooking). According to food safety guidelines, cooked chicken lasts in the fridge for 3–4 days.
You Might Also Like
Herb Chicken Tikka (Hariyali Murgh Tikka) Recipe
Herb Chicken Tikka (Hariyali Murgh Tikka) translates directly to "green chicken pieces"—derived from hariyali (green), murgh (chicken), and tikka (small chunks). This dish features tender, bite-sized chicken pieces marinated in a vibrant blend of fresh herbs—like coriander and pudina (mint)—and warm spices.
Then the marinated herb chicken tikka are inserted through the skewers and cooked in a large clay oven known as a tandoor. But in home we can cook over charcoal fire in barbeque, under the oven broiler and grill /normal pan.
In this recipe, a frying pan is used to get the outside surface of the chicken pieces to attain a brown color. These pan fried chicken tikka are tender, juicy inside with a brown flavorful crust outside.
For a different flavor, try the Afghani Murgh Tikka.
Ingredients
- 250 gm Boneless skinless chicken thigh pieces
- 20 grams (approx. 1 cup) Coriander leaves
- 10 grams (approx. ½ cup) Mint leaves
- 3 tbsp (45 g) Whole Milk Hung curd
- 2 to 3 cloves Garlic
- 3 to 4 Green chilies
- 20 gm (15 pieces small size) Raw cashews
- ½ tsp Zeera powder
- ½ tsp Fennel powder
- ½ tsp Garam masala powder
- 1 tsp (1/4 medium size) Lime juice
- 4 tbsp Ghee
- ¾ tsp approx. Salt
Instructions
-
Choose a Cleaning Method
Dry Wipe (Recommended): Skip rinsing the chicken pieces entirely. Simply wipe the 250g chicken thigh clean with a dry paper towel and dispose of the towel in the trash immediately. This is the safest way to prevent the spread of kitchen bacteria.
Rinse & Dry (Alternative): If you prefer to rinse the chicken, do so quickly under a very gentle, low-pressure stream of cold running water to avoid splashing. Also, keep the chicken piece deep down inside the sink basin. Transfer the chicken directly to a clean plate lined with paper towels, pat dry, and discard the paper towels right away. Always thoroughly wash and sanitize the sink basin immediately afterward.
-
Butterfly and pound
To ensure even cooking, make the entire chicken piece to a uniform 1/4-inch thickness. For extra tender chicken, pound the meat to loosen its tough fibers.
Butterfly: If one side of the thigh is thicker than the other, slice horizontally through that thick side to split it, bringing the entire piece down to an even 1/4 inch thickness.
Pound: Cover the butterflied chicken pieces with plastic wrap. Using a meat mallet or a heavy, flat pan, lightly pound the meat to loosens tough fiber.
-
Slice into Small Pieces
Using a sharp knife, cut the prepared, butterflied chicken thighs into small pieces about 1 inch wide.
-
Hung Curd Consistency
Aim for a medium hung curd consistency. If the curd is too runny, the marinade will be too watery, won't stick to the chicken, and will lack flavor. On the other hand, if the hung curd is too thick and stiff, it won't spread easily, making it difficult to coat the chicken. Preparing a medium hung curd ensures there is just a little liquid left, providing the perfect balance for a smooth, even spread.
-
How to Prep
Prep using either a quick method or the straining method:
Option A: The Quick Method (Ready in Minutes) Best if you are short on time. Requires a damp muslin or cheesecloth.
Pour & Gather: Pour about 70 g yogurt/curd into the center of your damp cloth. Bring the four corners together and lift it up to create a small pouch.
Squeeze Gently: Hold the top of the pouch tightly. Very gently press and squeeze the cloth along with the curd to release the excess liquid until it reaches a medium consistency.
Tip: Keep your touch light! Pressing too hard will force the creamy yogurt solids through the fabric, reducing your yield.
Option B: The Straining Method (Hands-Free) Best if you are planning ahead and want gravity to do the work.
The Setup: Pour about 70 g yogurt/curd directly into a fine-mesh strainer set over a bowl.
The Wait: Place the setup in the refrigerator and let it drain undisturbed for 3 to 4 hours until it reaches a medium, creamy consistency.
-
Measure for Marinade
Open the cloth and measure out 45 g (3 tbsp) of the medium hung curd for your marinade.
Tip: Always choose a whole-milk yogurt or curd. Full-fat options add much more flavor and creaminess to your tikka marinade than low-fat alternatives.
-
Make the Ginger-Garlic Paste
Prep the Aromatics : Wash and dry the ginger and green chilies. Peel the ginger, skin the garlic cloves, and remove the stems from the chilies.
Blend to a Coarse Texture: Put your 1/2 inch ginger, 2 to 3 cloves garlic, and 1 to 2 green chilies in the jar and blend them into a coarse texture.
Note: If the pieces are too big, just chop them down a bit first so the standard blender can handle them easily.
-
Coat the chicken pieces and keep aside
Add the following to your prepared chicken pieces
Prepared paste
½ tsp salt
1 tsp lime juice
Even Distribution - Instead of pouring them in one spot with a spoon, sprinkle it evenly over the chicken pieces. Apply it to all sides of the pieces to ensure a uniform coating. Set aside.
-
Choose good quality leaves and separate leaves
Pick : Color of the leaves should be Deep or bright green and have a fresh, earthy smell. Check that they are firm and stand upright.
Avoid : Discard any leaves that are discolored (uneven color or yellow), wilted, damaged by insects, mushy spots and bad smell.
Preparation of coriander : Remove the thick stem ends with roots of coriander.
Preparation of mint leaves : It is important to separate the mint from their stems. This is because all stems, even those that are young and tender, can introduce a bitterness and unpleasant flavor.
-
Clean the leaves & Drain
Wash method : To clean the leaves, first fill a large, clean bowl with enough water. place the leaves inside the bowl. Using your hands, swish the leaves gently in the water to remove dirt and sand. Lift the leaves from the water and place them in a colander to drain. Discard the dirty water, refill the bowl, and repeat the process until the water runs clear.
Remove Excess Moisture : Allow the leaves to rest in the colander for a few minutes to let the excess moisture drain away naturally. Alternatively, you can give the colander a few gentle shakes, or simply lift the leaves in your hand and give them a quick shake to remove the excess water.
-
Roughly chop leaves
Place your drained leaves onto a cutting board. Roughly chop the leaves into small pieces so your standard blender can easily handle and process them.
-
Soak the Cashews
Soak: Place 20 grams (about 15 small pieces) of raw cashews in a small bowl. Pour in enough hot water to submerge them and let them sit for 10 to 15 minutes.
Drain & Rinse: Drain the hot water and give the soaked cashews a quick rinse with water.
-
Blend to a Thick, Coarse Paste
Cashew & Chili Paste: Place the soaked cashews and 1 to 2 green chilies into the blender jar. Pulse a few times in short bursts until they form a coarse paste.
Add the Herbs: Add 10 grams of prep-chopped pudina (mint) leaves and 20 grams of prep-chopped coriander (cilantro) leaves directly into the same jar. Pulse again until the herbs are broken down into a coarse texture with the cashews.
Pro-Tip: The surface moisture on the washed leaves and soaked cashews is usually enough to help your blender run without turning the mixture watery. Make sure to shake off any excess water from the leaves before grinding, as too much liquid will make the herb mixture runny.
To Attain a Thick, Coarse Paste: Do not add extra water at the start. Instead, stop the blender and scrape down the sides of the jar a few times with a spatula to ensure an even grind.
If the Blades Get Stuck: Only add a tiny splash of extra water (a teaspoon at a time) if absolutely necessary to get the blades moving, keeping the final texture thick and coarse.
-
Mix the Marinade
In a mixing bowl, combine
45 grams (3 tbsp) of prepared medium hung curd,
Coarse cashew-herb paste,
1/2 tsp garam masala (Everest brand)
1/2 tsp cumin and 1/2 tsp fennel powder (Homemade)
Note: I missed adding the salt when grinding the cashews and herbs, so I just mixed it directly into the marinade. Gently stir the mixture together until combined.
-
Check the Consistency and Coat the Chicken
For the best results, your marinade should have a thick, spreadable consistency so it sticks to the chicken effectively without sliding off.
If the Marinade is Too Thick: If the mixture is too stiff to spread evenly, whisk in a tiny amount of plain yogurt or runny curd—just a teaspoon at a time—to loosen it up.
If the Marinade is Thin: If the mixture mistakenly turns out a little watery, mix in 2 to 3 teaspoons of cornstarch. The cornstarch will absorb the excess liquid while resting and help the marinade stick.
Applying the Marinade:
Using your hands, coat each piece of chicken evenly with the marinade on both sides. Repeat this process until every single piece is thoroughly coated.
-
Heat the Ghee
Add 2 tbsp of liquid ghee to a non-stick frying pan and swirl it around to coat the surface evenly. Preheat the pan over a medium flame for about 4 to 5 minutes, until the ghee is hot, but not smoking.
Note on Ghee Amount: The exact amount of ghee you need depends on the size of your pan—aim for a thin, even layer across the bottom.
Why Ghee Beats Butter: Traditional restaurants cook chicken skewers in ghee because it infuses a rich flavor and helps create a beautiful crust. Avoid using regular butter; its high water content prevents the chicken from browning and causes the fat to burn too quickly.
-
Cooking the Chicken (First Side)
The Sizzle Check: Before adding the chicken, make sure the pan is at the perfect temperature. You should hear a sharp sizzling sound the second the meat hits the ghee. If it doesn't sizzle, the pan is not hot enough. If the ghee is smoking, it's too hot.
Flavor Boost (No Waste): Apply a bit more of the herb marinade to the chicken pieces right before placing them in the pan, and apply any remaining mixture onto the top side while the bottom side cooks. This ensures you use up all the herb-curd marinade without letting any go to waste, while building a thicker, flavorful crust.
Give Them Space to Brown: Once the pan is ready, place the chicken pieces into the hot ghee, leaving plenty of space between each one. Spacing them out ensures they brown well instead of crowding the pan and steaming.
Develop the Crust: Cook undisturbed for 3 to 4 minutes over medium heat. Do not move or turn the pieces.
Check and Flip: After 3 to 4 minutes, use a spoon to gently lift the edge of a piece to check if a brown crust has formed. Once it has, flip the chicken over.
-
Cooking the Chicken (Second Side)
Flip the chicken pieces : Carefully flip them to the other side, then immediately reduce the heat to medium-low.
Complete the Cook : Cook the second side for another 2 to 3 minutes. The total cooking time for a batch will be about 7 to 9 minutes.
⏱️ Why Cooking Times Vary: Keep in mind that exact times can change depending on your cookware, the heat of your stove, the thickness of the chicken pieces and how much you pounded.
Check for Doneness : Verify with a Thermometer - For tender, juicy, and flavorful chicken pieces every time, insert an instant-read thermometer into the thickest part of the meat. Ensure it reaches an internal temperature between 165–180°F.This helps you avoid undercooked or overcooked chicken.
-
Post-Cooking Steps before serving
Drain and pat dry- Transfer the cooked pieces to a paper towel-lined plate. Using a fresh paper towel, gently pat all sides of the spieces to absorb the surface oil.
Transfer and cover- After a minute or two, move them to a clean plate and loosely cover them with a lid or foil to rest before serving.
Rest- Allow the kebabs to rest for a minimum of 5 to 10 minutes before serving.
-
Ready to serve
Ready to Serve: After resting for 5 to 10 minutes, your hariyali chicken pieces are perfectly juicy and ready to enjoy.
Perfect Pairings :Serve them fresh alongside a refreshing, cool curd mint dip (pudina raita), sliced red onions, and lemon wedges.
Loading rating...
Write a Review
Loading reviews...