
Green gram sprouts
by Viruthiga Veni
Loading rating...
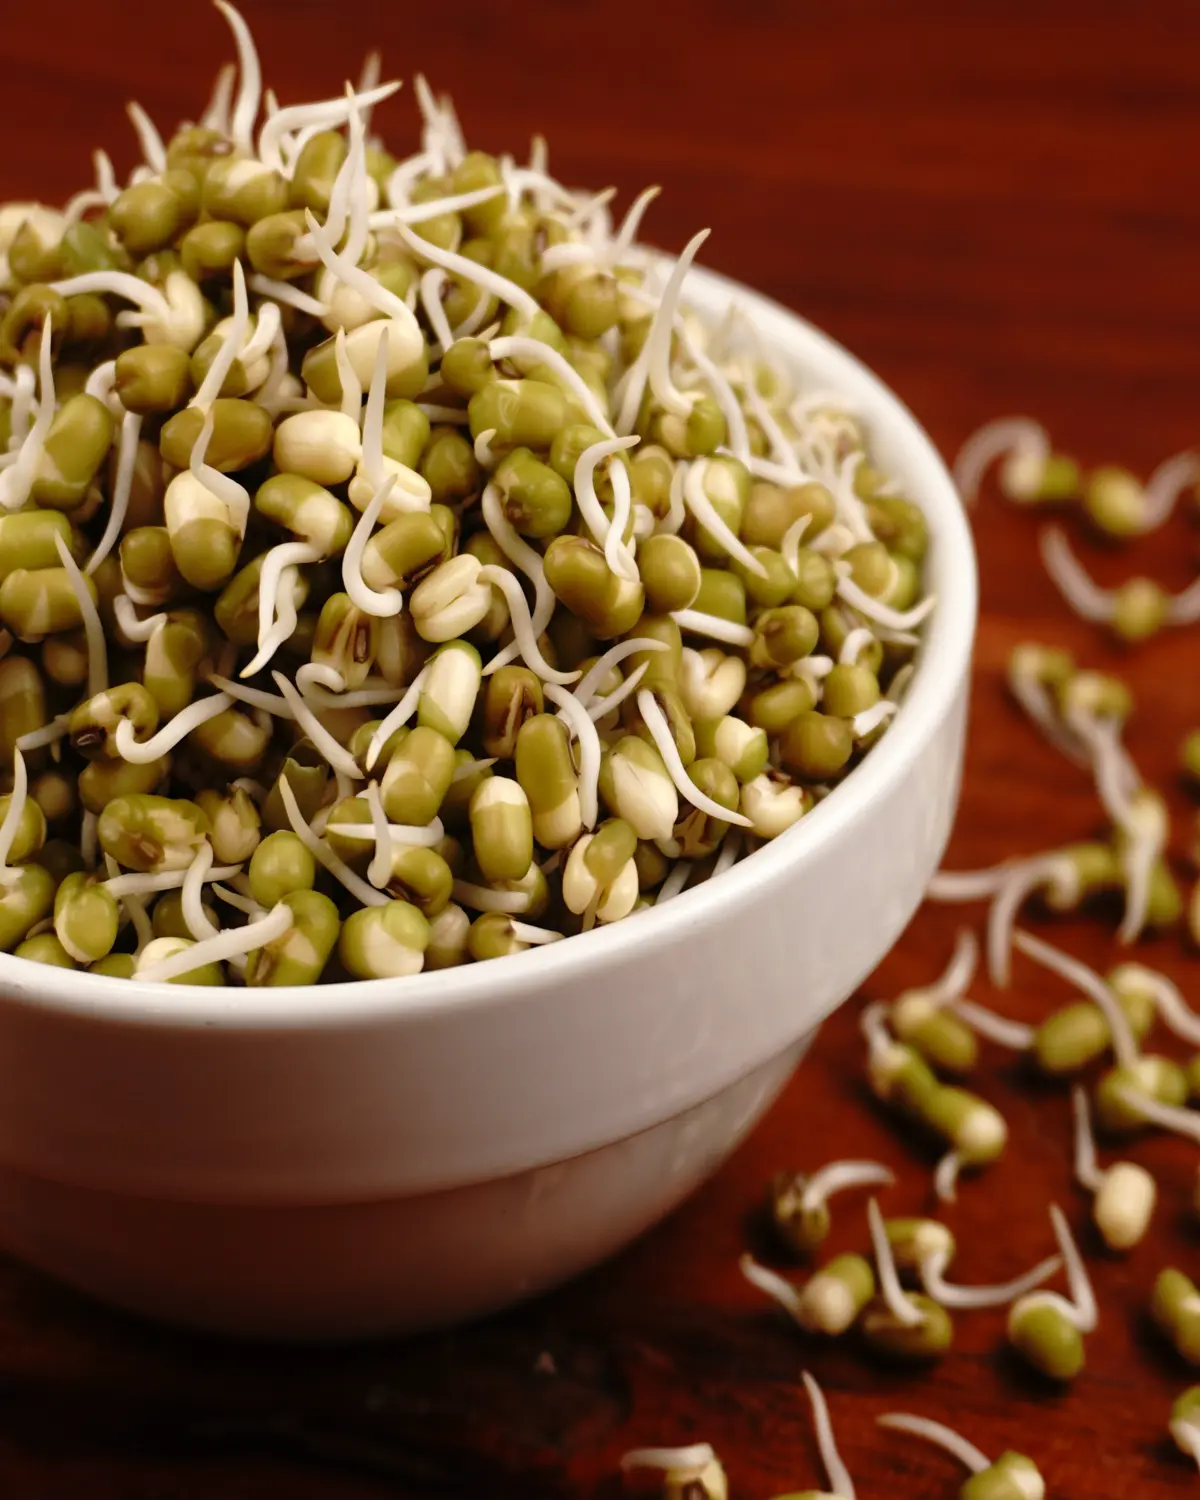
Green gram, also known as mung bean or moong. They are small, green color, roughly oval shaped that belong to the legume family. Green grams are one of the best plant-based sources of protein. Why to sprout the mung beans Sprouted mung beans offer several advantages over unsprouted beans
- Enhanced Nutritional Content like vitamins, minerals, protein and fiber
- Easier Digestion
- Reduced Antinutrients
- Fewer Calories and Carbohydrates
- Reduced Cooking Time
Ingredients
Green gram – 100 grams
Room temperature drinking water (soaking, rinsing) – As required
How to sprout green gram/mung bean
- Clean and rinse – Start by removing impurities from the green gram and wash thoroughly.
- Soak - Place the green gram in water for atleast 8 hours.
- Drain, rinse - Drain the water completely. Rinse the green gram with water and drain water again.
- Setting up the Sprouting(colander) set - Transfer the rinsed seeds to your sprouting set up.
- Rinsing, Draining, and Repeat the Process until reach the desired length - Rinse and drain the green gram seeds/sprouts 3 times daily until the tails reach your desired length.
Different methods to sprout seeds
- Colander/strainer method
- Glass jar method
- Cloth bag
- Tray-type sprouters
- Sprouting automatically Here, colander/strainer method is used to sprout the green gram.
Colander/strainer method
- Using a colander/strainer is a convenient and easy way to sprout green gram.
- This method works best when you are only sprouting one type of seed at a time.
Equipment needed for sprouting
- Stainless steel/plastic colander/strainer
- Stainless steel large container / dark color plastic large container
- Small stainless steel lid / dark color small size cloth
Step by step sprouting process
Clean and rinse green gram (Previous day night)
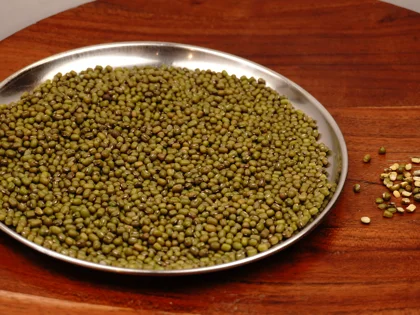
- Clean - Remove any twigs, small stones, and damaged or discolored seeds. While it may be difficult to remove every single imperfect seed, try to remove as many as possible.
- Hand-Rinse the Seeds – Place the green gram seeds in a bowl of water. Start by rubbing the seeds with your clean hands to wash away dirt and dust. Discard the water and repeat this 3 to 4 times until it runs clear. This is also the perfect time to pick out any stones, broken beans, or debris that might float to the top.
Soak (Previous day night)
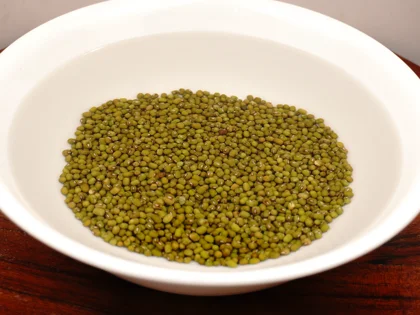
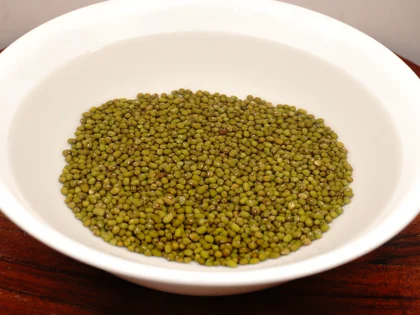
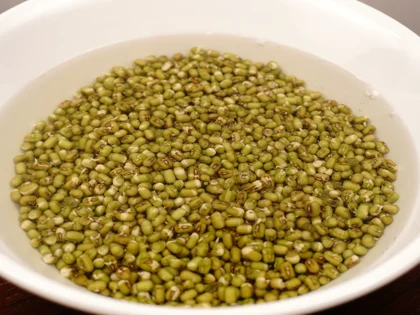
- Soak - Transfer the washed seeds to a large shallow bowl. Fill the bowl with plenty of water so the water level is a few more inches above the seeds.
- Time - Let the seeds soak for atleast 8 hours (or overnight).
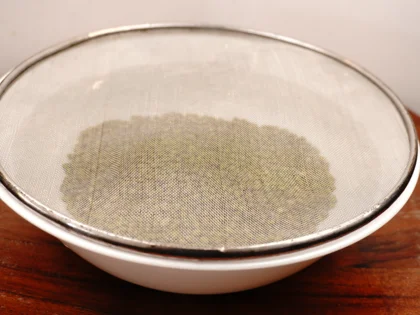
- Air circulation - Close the bowl with mesh lid or leave the standard lid slightly open, to ensure the green gram can breathe during the soaking period.
Drain, rinse (Day 1 morning)
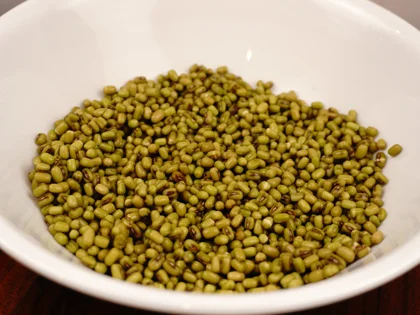
- Drain all water - After 8 hours or overnight of soaking, pour off all the soaking water completely.
- Fresh water rinse - Refill the bowl with enough fresh water to cover the seeds. Use clean hands to gently move the seeds around, ensuring the water reaches everywhere and again drain the water completely.
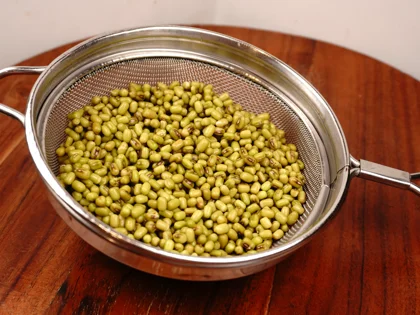
- Transfer the seeds to strainer - Place the rinsed mung bean seeds into the strainer. Let the seeds left in strainer for few minutes until the water has drained completely.
Setting up the Sprouting(strainer) set up (Day 1 morning)
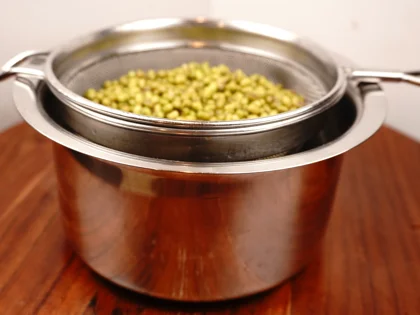
To successfully sprout mung beans, you need to create a controlled environment that manages darkness, moisture, and airflow. The strainer method provides an effective solution for these needs.
- No standing water - Make sure there is no standing water left in the strainer.
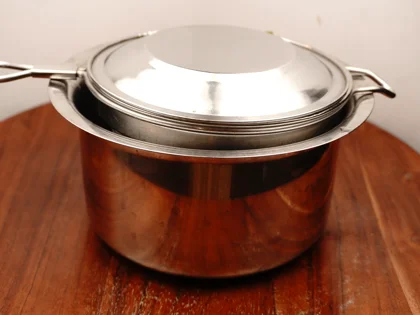
- Strainer setup and cover them - Set the strainer over the large container. And cover the strainer with a clean, moist dark color towel or a lid.
- Create darkness - The goal of this strainer setup is to block all light while helping to maintain the necessary darkness, moisture, and airflow for successful sprouting.
- Location - Place the colander set up in the shaded area.
Rinsing, Draining, and Repeat the Process until sprout tails reach the desired length (Day 1 mid afternoon and night)
To ensure successful and healthy growth of sprouts, you must continue to rinse and drain the sprouts at least 3 times dialy (roughly every 5 to 6 hours)—once in the morning, mid afternoon and night. How to Rinse Your Sprouts
- Start the routine - Begin the rinsing process about 5 to 6 hours after the initial setup of your strainer.
- Rinse gently - Remove the lid from your sprouting set up. Transfer the growing sprouts from the strainer/colander to a water-filled bowl. Don't rush. You can gently swirl them with your hand ensures every single bean and sprout tail gets completely hydrated. How to Drain Your Sprouts
- Drain Completely - Transfer the rinsed sprouts from the bowl into the strainer, then gently shake the strainer well to ensure complete water drainage.
- Return to sprouting setup - Once the water has completely drained (no standing water is left in strainer), place the strainer back into the sprouting set up and location.
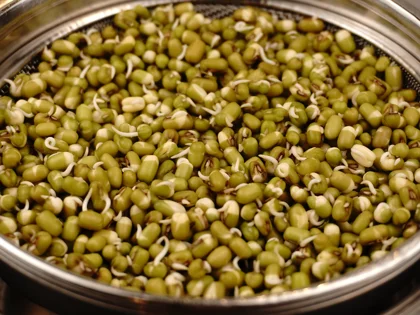
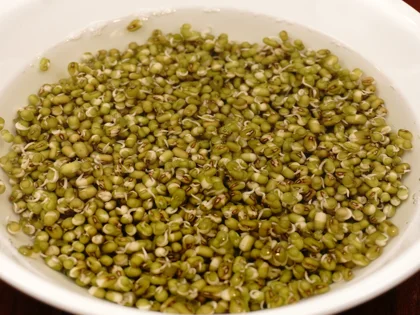
When Sprouts Are Ready ( Final drain and rinse ) (Day 2 morning)
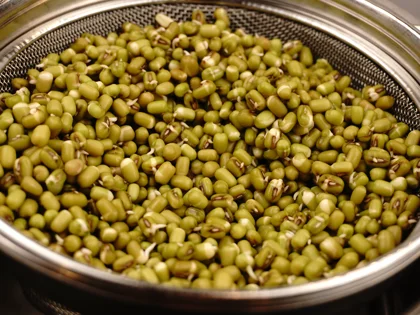
- Be careful with tails : Once the sprouts start growing little tails through the colander holes, handle them gently to prevent the tails from breaking off.
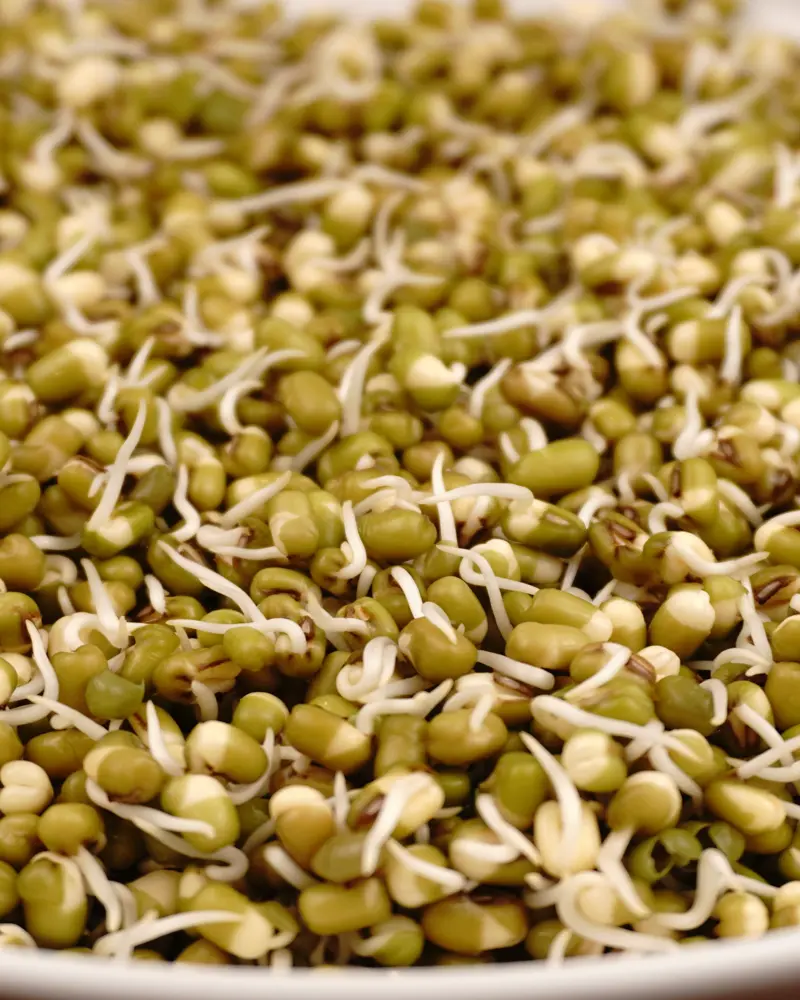
- When Sprouts Are Ready : Sprouts are ready to use within 12 hours after the initial soaking. Mung bean sprouts are ready to eat when their little shoot (tail) is about the length of the original bean or slightly longer.
- Personal Preference : Many people prefer to eat shorter, smaller sprouts within 12 hours after the initial soaking, while others prefer waiting 1 to 2 days for slightly more developed sprouts; ultimately, it depends entirely on your personal preference for size and crunch. It's best to taste your sprouted seeds daily and enjoy them once they taste good to you, as seeds will lose their mild flavor if sprouted for too long.
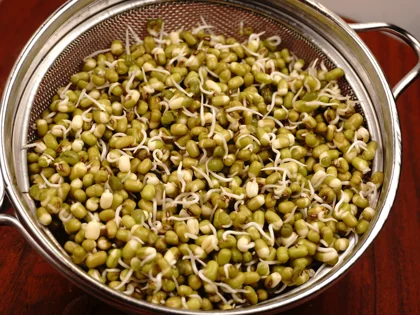
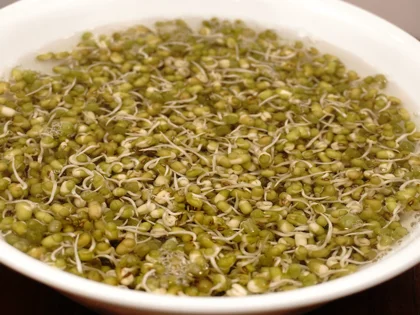
Faster Growth:
- Mung bean sprouts grow quickly, typically developing their first little shoots (tails) within 12 hours after the initial soak.
Tips for Managing the environment for colander setup
- Ensure shade and avoid direct sunlight - Place the entire colander setup on your kitchen counter in a shaded area. Do not expose the setup to direct sunlight, as this will cause the seeds/sprouts to dry out quickly.
- Maintain moisture - The seeds should be consistently moist (not dry) throughout the sprouting process. Covering the colander with a moist cloth/lid will help to keep the soaked seeds moist and prevent them from drying out.
- Oxygenation(airflow) - The seeds need oxygen to sprout. The holes in the colander allow for essential air circulation. Leave the seeds in this carefully controlled, darkness, consistent moisture with good air flow environment throughout the entire sprouting process, ensuring these conditions are consistently maintained.
Reason for spoilage of sprouts
- Bad seeds
- Contaminated water
- Inconsistent rinsing
- Not drained well
- Poor airflow
Frequently Asked Questions
What kind of water should I use for sprouting?
The source and temperature of your water are very important. For the best results throughout the sprouting process, always use room-temperature drinking water. Avoid using very cold or hot water, as temperature extremes can damage the sprouts.
Where should I place my mung beans while they sprout?
In the Shaded area – Find a location for your strainer set up that is away from direct sunlight. Aim for a low-light area.
why it is important to rinse the sprouts/seeds 3 times (roughly every 5 to 6 hours) in a day?
Always rinse thoroughly to protect from mold and bacteria. This practice ensures your sprouts have enough moisture, fresh air, and oxygen to grow safely and quickly.
why Increase Rinsing times the seeds/sprouts in warm Weather?
When it is warm, you must increase the number of rinses to 4 or 5 times a day (instead of 3). The extra rinsing is essential to keep the sprouts cool, prevent bad bacteria from growing, and ensure they stay fresh and healthy in the heat.
Why is it important to drain the sprouts well in the strainer/colander after each rinse?
Drain Thoroughly – It is very important to let all the water drain out completely in the strainer to avoid bacterial growth. That is because if water pools at the bottom of the colander, bacteria can grow and make the seeds/sprouts rot. Always make sure there is no standing water left in the colander.
Why should I maintain consistent moisture for seeds/sprouts in the colander?
Moisture is Life – You must keep the seeds consistently moist throughout the entire sprouting process. Moisture provides the essential hydration and energy needed for the seeds to wake up and grow. Without enough moisture, the seeds will fail to sprout or will produce poor results. So, keep them damp, but never let them sit in a pool of water or become completely dry.
Why is airflow important for your colander /strainer setup?
Let Them Breathe – It is very important to make sure your sprouts get enough fresh air in the strainer set up. Just like us, seeds are alive and need to breathe to stay healthy and grow. So don't place the strainer set up inside a closed cabinet.
How does my home’s temperature affect the sprouting process?
Watch the Temperature – Your home’s temperature changes how fast your sprouts grow. Sprouts/seeds grow quickly in a warm house but will take much longer to develop if your kitchen is cool.
Tips
💡 Start with a Hand-Rub – During the initial cleaning stage, rub the seeds with your hands to scrub away stubborn dirt. Doing this at the very beginning ensures your seeds are perfectly clean and ready to soak and sprout.
You Might Also Like




Green gram sprouts Recipe
Green gram, also known as mung bean or moong. They are small, green color, roughly oval shaped that belong to the legume family. Green grams are one of the best plant-based sources of protein. Why to sprout the mung beans Sprouted mung beans offer several advantages over unsprouted beans
- Enhanced Nutritional Content like vitamins, minerals, protein and fiber
- Easier Digestion
- Reduced Antinutrients
- Fewer Calories and Carbohydrates
- Reduced Cooking Time
Ingredients
- 100 grams Green gram
- As required Room temperature drinking water (soaking, rinsing)
Instructions
-
Clean and rinse green gram (Previous day night)
- Clean - Remove any twigs, small stones, and damaged or discolored seeds. While it may be difficult to remove every single imperfect seed, try to remove as many as possible.
- Hand-Rinse the Seeds – Place the green gram seeds in a bowl of water. Start by rubbing the seeds with your clean hands to wash away dirt and dust. Discard the water and repeat this 3 to 4 times until it runs clear. This is also the perfect time to pick out any stones, broken beans, or debris that might float to the top.
-
Soak (Previous day night)
- Soak - Transfer the washed seeds to a large shallow bowl. Fill the bowl with plenty of water so the water level is a few more inches above the seeds.
- Time - Let the seeds soak for atleast 8 hours (or overnight).
- Air circulation - Close the bowl with mesh lid or leave the standard lid slightly open, to ensure the green gram can breathe during the soaking period.
-
Drain, rinse (Day 1 morning)
- Drain all water - After 8 hours or overnight of soaking, pour off all the soaking water completely.
- Fresh water rinse - Refill the bowl with enough fresh water to cover the seeds. Use clean hands to gently move the seeds around, ensuring the water reaches everywhere and again drain the water completely.
- Transfer the seeds to strainer - Place the rinsed mung bean seeds into the strainer. Let the seeds left in strainer for few minutes until the water has drained completely.
-
Setting up the Sprouting(strainer) set up (Day 1 morning)
To successfully sprout mung beans, you need to create a controlled environment that manages darkness, moisture, and airflow. The strainer method provides an effective solution for these needs.
- No standing water - Make sure there is no standing water left in the strainer.
- Strainer setup and cover them - Set the strainer over the large container. And cover the strainer with a clean, moist dark color towel or a lid.
- Create darkness - The goal of this strainer setup is to block all light while helping to maintain the necessary darkness, moisture, and airflow for successful sprouting.
- Location - Place the colander set up in the shaded area.
-
Rinsing, Draining, and Repeat the Process until sprout tails reach the desired length (Day 1 mid afternoon and night)
To ensure successful and healthy growth of sprouts, you must continue to rinse and drain the sprouts at least 3 times dialy (roughly every 5 to 6 hours)—once in the morning, mid afternoon and night. How to Rinse Your Sprouts
- Start the routine - Begin the rinsing process about 5 to 6 hours after the initial setup of your strainer.
- Rinse gently - Remove the lid from your sprouting set up. Transfer the growing sprouts from the strainer/colander to a water-filled bowl. Don't rush. You can gently swirl them with your hand ensures every single bean and sprout tail gets completely hydrated. How to Drain Your Sprouts
- Drain Completely - Transfer the rinsed sprouts from the bowl into the strainer, then gently shake the strainer well to ensure complete water drainage.
- Return to sprouting setup - Once the water has completely drained (no standing water is left in strainer), place the strainer back into the sprouting set up and location.
-
When Sprouts Are Ready ( Final drain and rinse ) (Day 2 morning)
- Be careful with tails : Once the sprouts start growing little tails through the colander holes, handle them gently to prevent the tails from breaking off.
- When Sprouts Are Ready : Sprouts are ready to use within 12 hours after the initial soaking. Mung bean sprouts are ready to eat when their little shoot (tail) is about the length of the original bean or slightly longer.
- Personal Preference : Many people prefer to eat shorter, smaller sprouts within 12 hours after the initial soaking, while others prefer waiting 1 to 2 days for slightly more developed sprouts; ultimately, it depends entirely on your personal preference for size and crunch. It's best to taste your sprouted seeds daily and enjoy them once they taste good to you, as seeds will lose their mild flavor if sprouted for too long.
- What kind of water should I use for sprouting? The source and temperature of your water are very important. For the best results throughout the sprouting process, always use room-temperature drinking water. Avoid using very cold or hot water, as temperature extremes can damage the sprouts.
- Where should I place my mung beans while they sprout? In the Shaded area – Find a location for your strainer set up that is away from direct sunlight. Aim for a low-light area.
- why it is important to rinse the sprouts/seeds 3 times (roughly every 5 to 6 hours) in a day? Always rinse thoroughly to protect from mold and bacteria. This practice ensures your sprouts have enough moisture, fresh air, and oxygen to grow safely and quickly.
- why Increase Rinsing times the seeds/sprouts in warm Weather? When it is warm, you must increase the number of rinses to 4 or 5 times a day (instead of 3). The extra rinsing is essential to keep the sprouts cool, prevent bad bacteria from growing, and ensure they stay fresh and healthy in the heat.
- Why is it important to drain the sprouts well in the strainer/colander after each rinse? Drain Thoroughly – It is very important to let all the water drain out completely in the strainer to avoid bacterial growth. That is because if water pools at the bottom of the colander, bacteria can grow and make the seeds/sprouts rot. Always make sure there is no standing water left in the colander.
- Why should I maintain consistent moisture for seeds/sprouts in the colander? Moisture is Life – You must keep the seeds consistently moist throughout the entire sprouting process. Moisture provides the essential hydration and energy needed for the seeds to wake up and grow. Without enough moisture, the seeds will fail to sprout or will produce poor results. So, keep them damp, but never let them sit in a pool of water or become completely dry.
- Why is airflow important for your colander /strainer setup? Let Them Breathe – It is very important to make sure your sprouts get enough fresh air in the strainer set up. Just like us, seeds are alive and need to breathe to stay healthy and grow. So don't place the strainer set up inside a closed cabinet.
- How does my home’s temperature affect the sprouting process? Watch the Temperature – Your home’s temperature changes how fast your sprouts grow. Sprouts/seeds grow quickly in a warm house but will take much longer to develop if your kitchen is cool.
Loading rating...
Write a Review
Loading reviews...