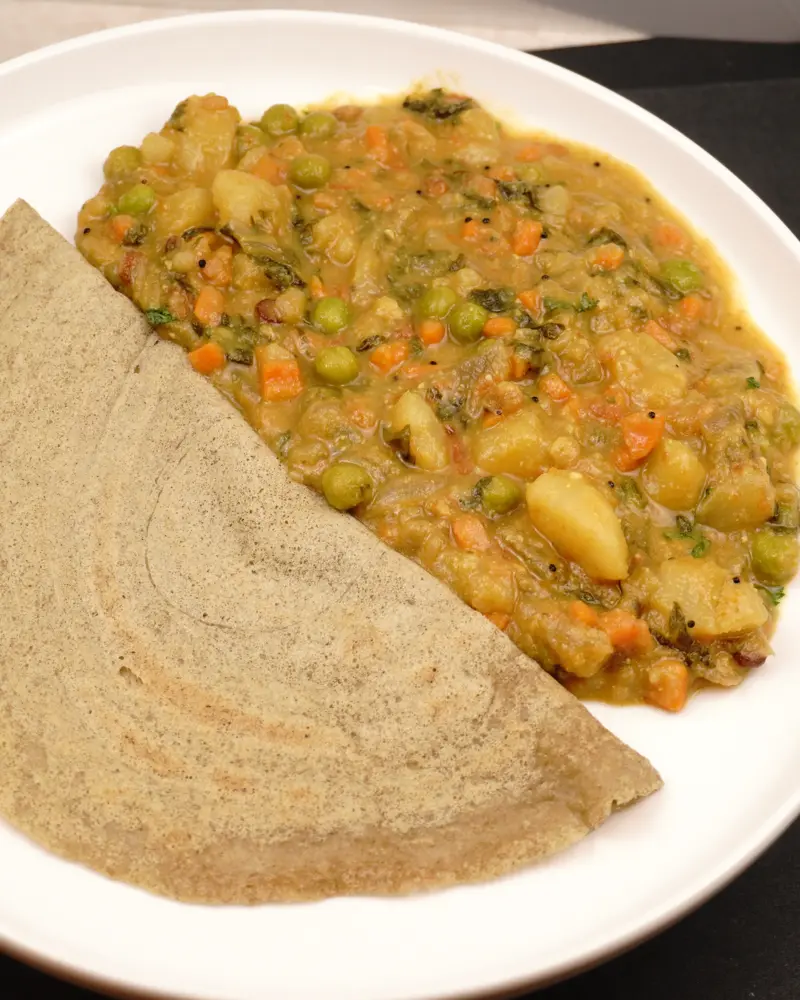
Chickpeas Sprout
by Viruthiga Veni
Loading rating...
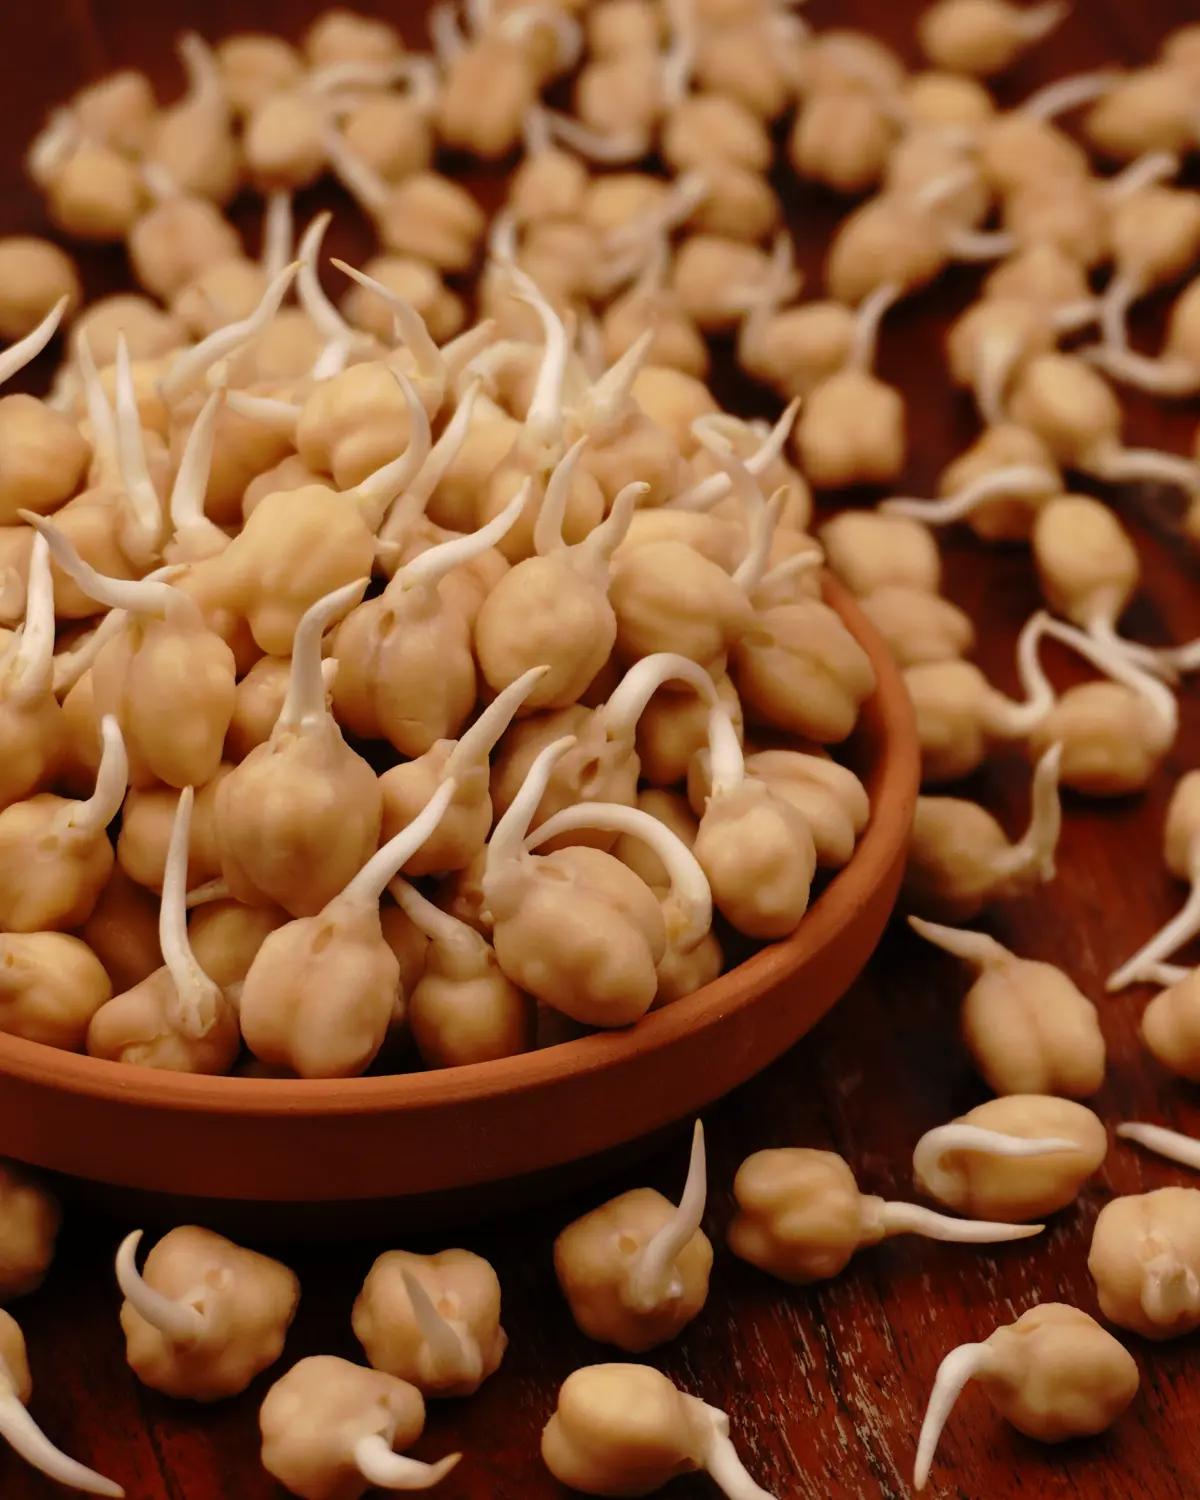
Chickpeas, also called garbanzo beans, are round, nutritious legumes known for their incredible health benefits. They are a powerhouse of plant-based protein and fiber, making them a favorite for anyone looking to eat more nutritiously. I love including them in my diet because they are so flexible—you can blend them into creamy hummus, toss them into salads, or simmer them in curries.
For a perfect, healthy crunch, you can try this recipe for Crunchy Air Fried Sprouted Chickpeas.
The Benefits of Sprouting Chickpeas
Sprouting chickpeas makes them a superior choice for your recipes. Here are the key advantages:
Higher Nutrients: Increased vitamins, minerals, and protein.
Easier Digestion: Less gas and bloating.
Better Absorption: Lower antinutrient levels.
Lower Calories: Reduced starch and carbohydrate content.
Faster Cooking: Shorter preparation time.
Ingredients
Chickpeas (Garbanzo beans) – 200 gms
Room temperature drinking water (soaking, rinsing) – As required
Equipment Needed for Sprouting Setup
Colander: Use either a stainless steel or plastic colander.
Large, Solid Container (with a Lid or Cloth): Avoid using clear glass containers or bowls, as light easily passes through them. Choose a dark or light-blocking container instead.
Setup Note: This large container will hold the colander inside it, while the lid or cloth will be used to cover the top to create total darkness. Although total darkness is not essential, just recommended.
The Colander Method
Using a colander is one of the easiest ways to sprout chickpeas at home, especially for a single batch. The large drainage holes provide better airflow, which keeps the chickpeas fresh as they sprout. While this setup works perfectly for medium-to-large beans and legumes, it is not suitable for small seeds or grains.
How to Sprout Chickpeas
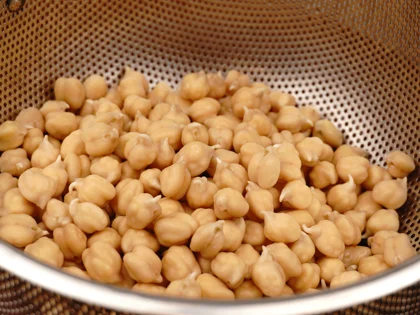
Clean and rinse – Start by removing impurities from the chickpeas and wash thoroughly.
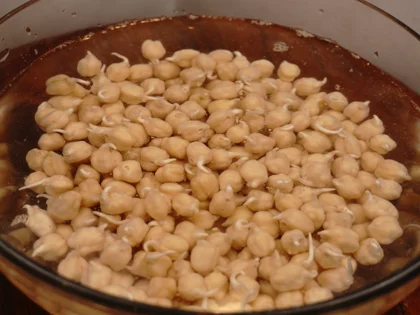
Soak - Place the chickpeas in water for at least 10 hours or overnight.
Drain & Set up - Drain the soaking water completely. Rinse the chickpeas again and transfer them to your sprouting setup.
Rinse and Repeat - Rinse and drain the chickpeas seeds/sprouts 3 times daily until the tails reach your desired length.
Step by Step Sprouting Process
Night : Prep and Soak
Clean : Remove any twigs, small stones, or discolored seeds. While it may be difficult to remove every single imperfect seed, try to remove as much as possible.
Hand-wash thoroughly: Place the chickpeas in a large bowl of room-temperature water. Using clean hands, gently scrub the chickpeas together to loosen any dust or surface dirt. Taking the time to hand-scrub at the beginning is essential. It ensures every seed is perfectly clean before it starts the soaking process.
Rinse until clear: Drain the water and repeat the washing process 3 to 4 times. Once the water runs perfectly clear, your chickpeas are ready. This is also the perfect time to skim off any floating damaged seeds or loose skins.
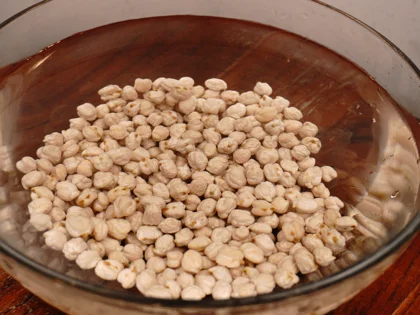
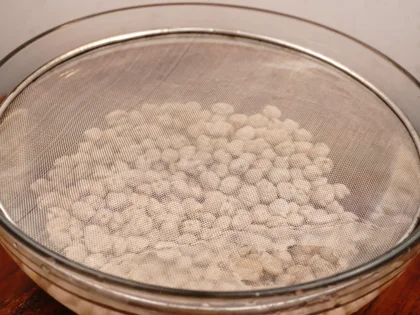
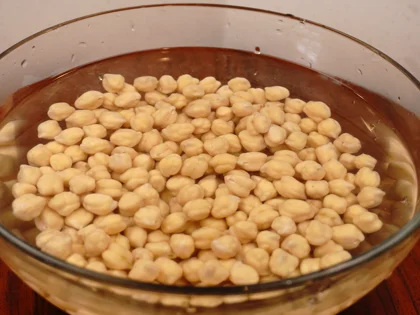
Set up the overnight soak: Transfer your clean chickpeas into a large, wide bowl. Pour in enough room-temperature or cool water so that it sits 2 to 3 inches above the chickpeas (avoid using hot or freezing cold water). Let them soak for at least 10 hours, or overnight.
Note: Cover the bowl with a mesh lid or leave a standard lid slightly ajar so the chickpeas can breathe. Using a wide bowl instead of a deep one. It gives the seeds plenty of room to expand without the bottom layer getting crushed and ensures plenty of airflow.
Day 1- The Sprouting Routine
Morning: The Initial Setup
Drain and Rinse
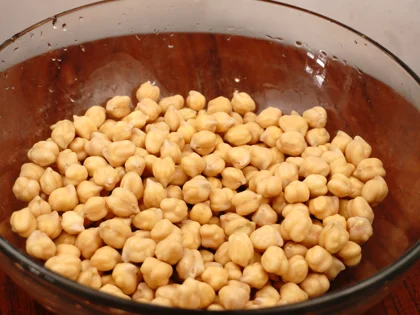
After soaking for 10 hours or overnight, pour off the old water completely. Refill the bowl with fresh water and gently move the chickpeas around with your hands to give them a final cleanse.
The Colander Setup
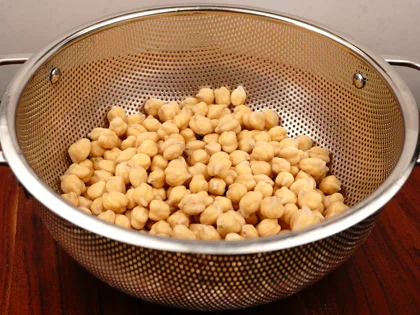
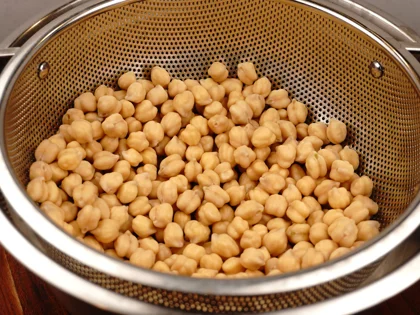
Drain Completely: Transfer your rinsed chickpeas to a colander. Give it a gentle shake and let them sit for a minute until all excess water has dripped away. Note: Ensure no standing water remains in the colander.
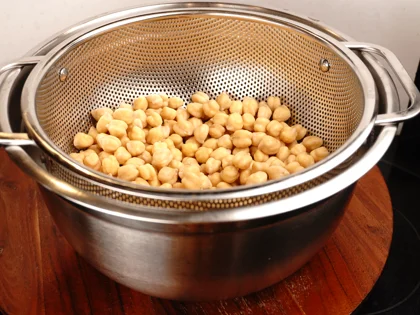
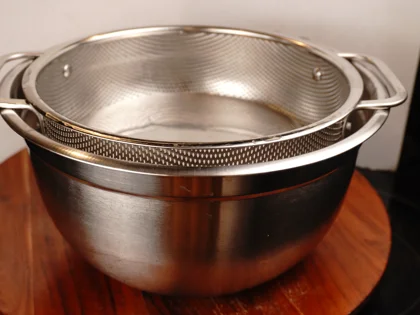
Elevate for Airflow: Place the colander on top of a larger bowl. This creates a gap that allows fresh air to reach the chickpeas from the bottom and sides.
Block the Light: Cover the setup with a damp, dark cloth or a solid lid to maintain darkness and a humid environment. Although total darkness is not essential, it is recommended
Find the Right Spot: Keep the sprouting setup in a shaded area, away from direct sunlight..
💡Rule: Successful sprouting requires darkness, moisture, and airflow throughout the process. This colander set up is an effective way to manage all three.
The Ongoing Daily Routine
To keep your sprouts growing healthy, continue to rinse and drain them 3 times a day: morning, mid-afternoon, and right before bed.
The Rinse: Move the chickpeas into a bowl of fresh, water. Make sure they are fully hydrate the outer skin.
The Drain: Pour them back into the colander. Let the water drain completely and give it a final shake. It is important that no standing water is left behind.
Reset the Setup: Place the colander back over the bowl, cover it with your damp towel/lid, and put it back in its shaded spot.
Note - If you don't see any "tails" by the end of Day 1, that is perfectly normal! Depending on the temperature in your kitchen, the sprouts usually show up on Day 2.
Day 2 - The First Signs of Growth
Watch for the Tails
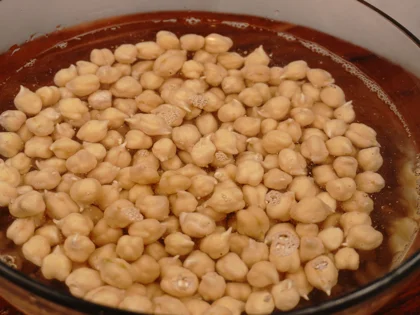
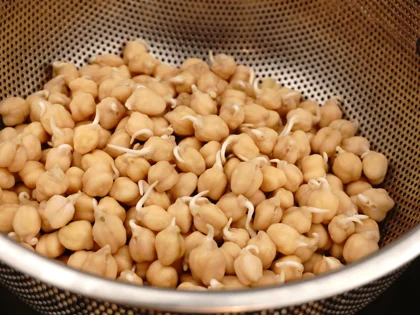
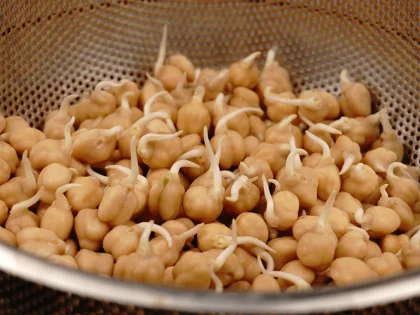
You will likely start to see small "tails" appearing on from the chickpeas today. Continue the maintenance routine until the tails reach your desired length.
Rinse Frequently : Continue to rinse and drain your sprouts at least 3 times daily —once in the morning, mid afternoon and night. This keeps them hydrated and prevents bacteria or mold from growing.
Handle with Care: Be extra gentle once the tails begin to grow through the colander holes. These roots are very fragile; handle the sprouts carefully during washing and transferring to prevent them from breaking off.
Day 3 - When Sprouts Are Ready
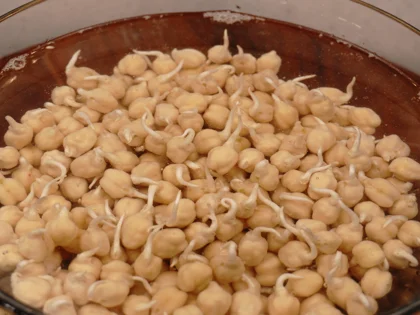
Your chickpea sprouts will usually be ready on Day 2 or Day 3 after their initial soak.
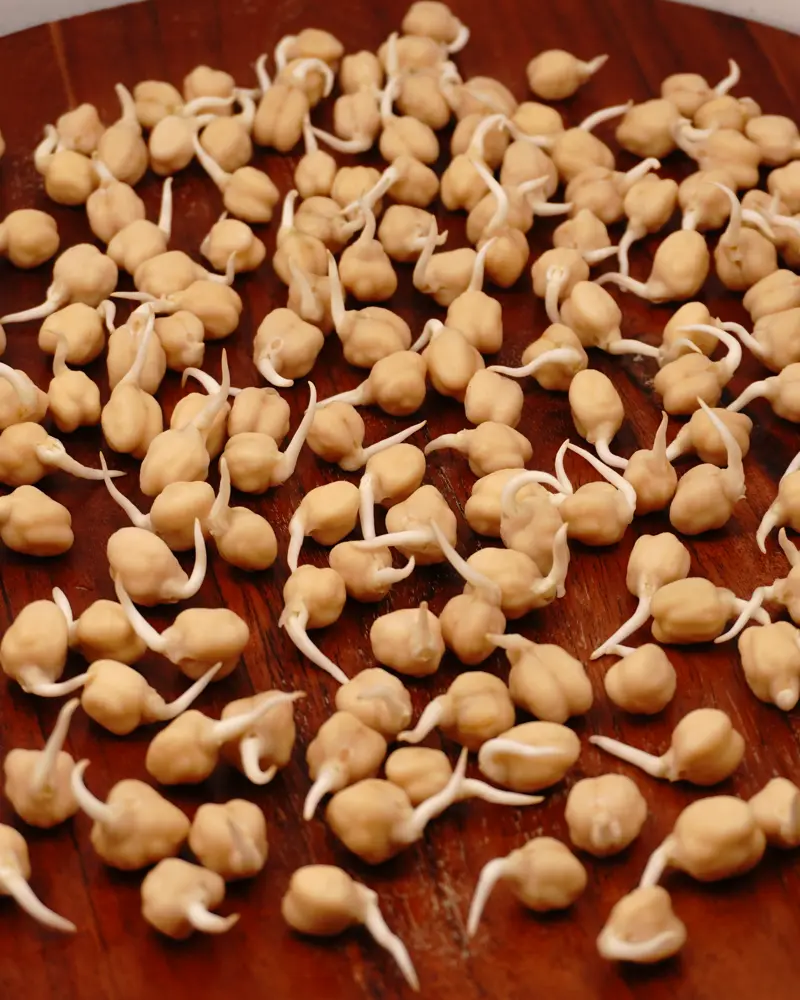
The Tail Length: If you want short sprouts, it takes about two to three days. This is when the tail is about half the length of the chickpea itself. If you want longer sprouts, you can let them grow until the tail is the same length as the chickpeas or slightly longer.
Common Reasons for Sprout Spoilage
Using Low-Quality Seeds: Avoid chickpeas that are too old, cracked, or visibly damaged.
Using the Wrong Water Temperature: Always use room-temperature or cool drinking water. Water that is too hot will cook and kill the live seed embryo, while cold water will shock the seeds.
Skipping Daily Rinses: If you forget to rinse the seeds with water, bacteria and heat will quickly build up, causing them to spoil. At the same time, a total lack of moisture will cause the seeds to dry out and stop sprouting.
Letting Water pool at the bottom: If the chickpeas sit in a puddle of water at the bottom of the colander (because the water did not drain completely), they cannot breathe. This will make them turn mushy, slimy, and sour.
A Lack of airflow: Sprouts need fresh air to grow. If air cannot move between the colander and the bottom bowl, air gets stuck. This creates a perfect spot for mold to grow.
Alternative Setup Method
Simply cover your colander of seeds with a lid. Next, place it inside a dark room or cabinet, keeping the door slightly open for airflow. This is an easy shortcut because the dark room or cabinet does all the work to block out the light—no extra large containers required!
Tips
💡 Never Skip the Initial Hand-Scrub: Taking the time to gently hand-scrub the chickpeas during the initial wash is essential. This physical scrubbing loosens dust and surface dirt, ensuring every seed is perfectly clean before soaking.
💡 Choose a Wide Bowl Over a Deep One: Using a large, wide bowl for the overnight soak is a secret for healthier sprouts. A wide bowl provides more airflow, ensures even water absorption, and prevents crushing the seeds at the bottom.
💡 Find a Shaded, Low-Light Spot: Keep your sprouting setup in a naturally shaded area of your kitchen. Keeping it completely away from direct sunlight prevents the sprouts from overheating or drying out too quickly.
💡 For successful Sprouting: From start to finish, always ensure your setup maintains: darkness, consistent moisture, and constant ventilation.
💡 Follow a Consistent Rinsing Schedule : Rinse your chickpeas 3 times daily until the tails reach the length you want. Rinse your chickpeas exactly 3 times daily until the tails reach your desired length. Regular rinsing provides the essential moisture the seeds need to grow while actively flushing away bacteria.
💡 Thorough Draining : Always let the water drain out of the colander completely. Ensuring there is no standing water left is the best way to keep your sprouts healthy and prevent spoilage.
💡 Handle Fragile Roots with Care: Be extra gentle during your daily rinses once the tiny white tails begin to grow through the colander holes. These roots are incredibly fragile; handle the chickpeas carefully to prevent the sprouts from breaking off.
Frequently Asked Questions
Using a narrow container causes the seeds to pile high, where the weight of the top layer crushes the seeds at the bottom. This leads to uneven soaking and prevents the seeds from expanding fully.
Hand-rinsing is essential to remove dirt and dust. Rubbing the seeds together with your hands, you provides the pressure needed to scrub them clean before sprouting begins.
The source and temperature of your water are very important. For the best results throughout the sprouting process, always use room-temperature or cool drinking water.
Avoid using cold, or hot water, as temperature extremes and can affect the sprouts.
In the Shaded area – Find a location for your sprouting set up that is away from direct sunlight. Aim for a low-light area.
If you forget to rinse the seeds with water, bacteria and heat will quickly build up, causing them to spoil. At the same time, a total lack of moisture will cause the seeds to dry out and stop sprouting. Regular rinsing provides the moisture and fresh air needed to grow safely and quickly.
Drain Thoroughly – It is very important to let all the water drain out completely in the colander to avoid bacterial growth. That is because if water pools at the bottom of the colander, bacteria can grow and make the seeds/sprouts rot. Always make sure there is no standing water left in the colander.
Moisture is Life – You must keep the seeds consistently moist throughout the entire sprouting process from start to finish. Moisture provides the essential hydration and energy needed for the seeds to wake up and grow. Without enough moisture, the seeds will fail to sprout or will produce poor results. So, keep them damp, but never let them sit in a pool of water or become completely dry.
Let Them Breathe – It is very important to make sure your sprouts get enough fresh air in the sprouting set up. Just like us, seeds are alive and need to breathe to stay healthy and grow.
Watch the Temperature – Your home’s temperature changes how fast your sprouts grow. Sprouts/seeds grow quickly in a warm house but will take much longer to develop if your kitchen is cool.
You Might Also Like




Chickpeas Sprout Recipe
Chickpeas, also called garbanzo beans, are round, nutritious legumes known for their incredible health benefits. They are a powerhouse of plant-based protein and fiber, making them a favorite for anyone looking to eat more nutritiously. I love including them in my diet because they are so flexible—you can blend them into creamy hummus, toss them into salads, or simmer them in curries.
For a perfect, healthy crunch, you can try this recipe for Crunchy Air Fried Sprouted Chickpeas.
The Benefits of Sprouting Chickpeas
Sprouting chickpeas makes them a superior choice for your recipes. Here are the key advantages:
Higher Nutrients: Increased vitamins, minerals, and protein.
Easier Digestion: Less gas and bloating.
Better Absorption: Lower antinutrient levels.
Lower Calories: Reduced starch and carbohydrate content.
Faster Cooking: Shorter preparation time.
Ingredients
- 200 gms Chickpeas (Garbanzo beans)
- As required Room temperature drinking water (soaking, rinsing)
Instructions
-
Morning: The Initial Setup
Drain and Rinse
After soaking for 10 hours or overnight, pour off the old water completely. Refill the bowl with fresh water and gently move the chickpeas around with your hands to give them a final cleanse.The Colander Setup
Drain Completely: Transfer your rinsed chickpeas to a colander. Give it a gentle shake and let them sit for a minute until all excess water has dripped away. Note: Ensure no standing water remains in the colander.
Elevate for Airflow: Place the colander on top of a larger bowl. This creates a gap that allows fresh air to reach the chickpeas from the bottom and sides.
Block the Light: Cover the setup with a damp, dark cloth or a solid lid to maintain darkness and a humid environment. Although total darkness is not essential, it is recommended
Find the Right Spot: Keep the sprouting setup in a shaded area, away from direct sunlight..
💡Rule: Successful sprouting requires darkness, moisture, and airflow throughout the process. This colander set up is an effective way to manage all three.
-
The Ongoing Daily Routine
To keep your sprouts growing healthy, continue to rinse and drain them 3 times a day: morning, mid-afternoon, and right before bed.
The Rinse: Move the chickpeas into a bowl of fresh, water. Make sure they are fully hydrate the outer skin.
The Drain: Pour them back into the colander. Let the water drain completely and give it a final shake. It is important that no standing water is left behind.
Reset the Setup: Place the colander back over the bowl, cover it with your damp towel/lid, and put it back in its shaded spot.
Note - If you don't see any "tails" by the end of Day 1, that is perfectly normal! Depending on the temperature in your kitchen, the sprouts usually show up on Day 2.
-
Watch for the Tails
You will likely start to see small "tails" appearing on from the chickpeas today. Continue the maintenance routine until the tails reach your desired length.
Rinse Frequently : Continue to rinse and drain your sprouts at least 3 times daily —once in the morning, mid afternoon and night. This keeps them hydrated and prevents bacteria or mold from growing.
Handle with Care: Be extra gentle once the tails begin to grow through the colander holes. These roots are very fragile; handle the sprouts carefully during washing and transferring to prevent them from breaking off.
Loading rating...
Write a Review
Loading reviews...