Crispy Pan Fried Panko Chicken
by Viruthiga Veni
Loading rating...
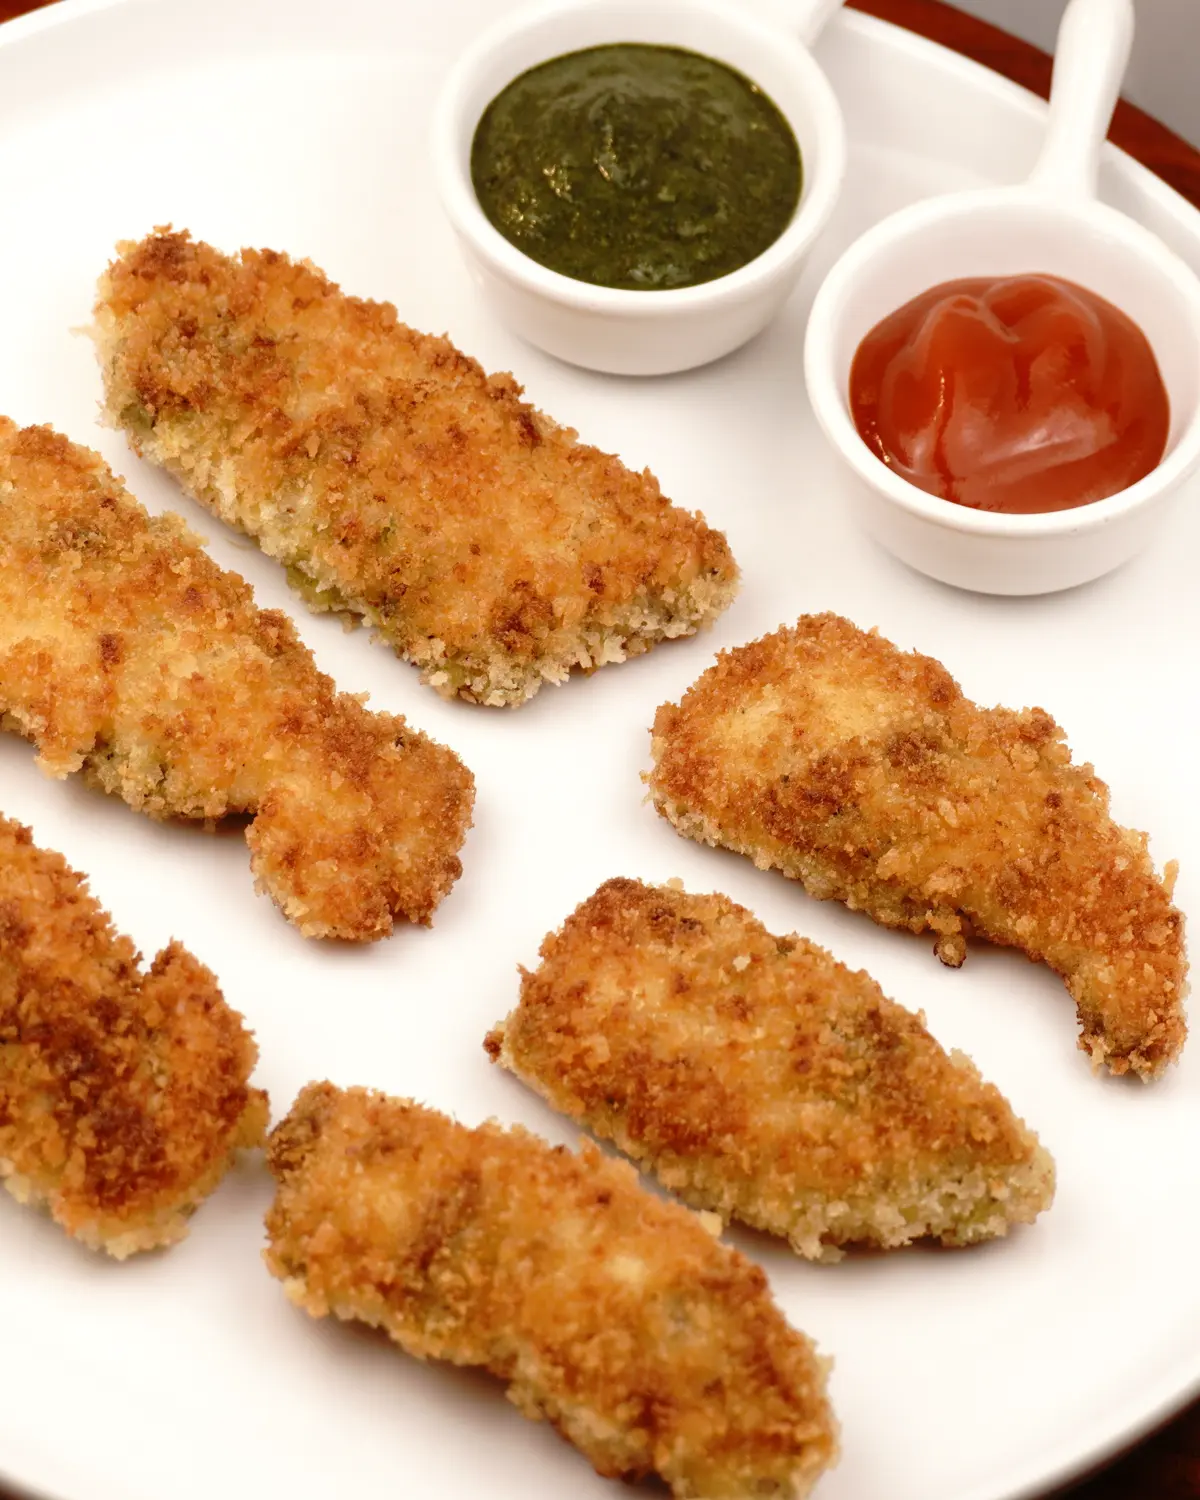
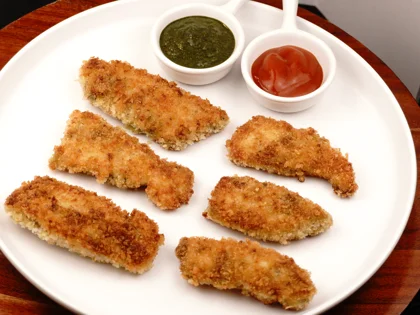
Enjoy the Crispy Pan-Fried Panko Chicken made right in your own kitchen! By using thin chicken slices(cutlet) and special panko breadcrumbs, you can get a perfect golden crust and juicy meat every time. Pan-frying in a hot skillet ensures a loud crunch in every bite, making it a quick and easy meal that everyone will love.
Ingredients
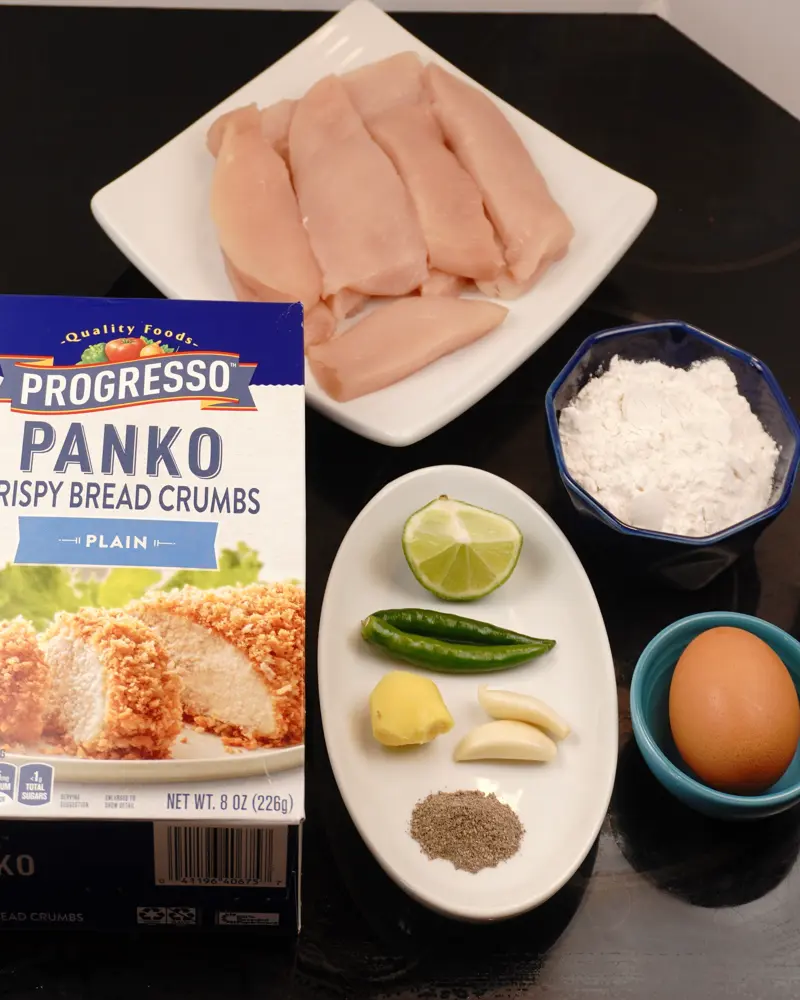
Ginger – 1/2 inch
Skinless Boneless Chicken Breast – 250 g
Garlic – 2 to 3 small cloves
Green Chili – 2 to 3
lime juice – 1 tsp (1/4 medium size)
Pepper – 1/2 tsp
Egg – 1
Panko Bread Crumbs – approx. 50 g
All purpose flour – approx. 20 g
Salt – approx. 1/2 tsp
Oil – 6 tbsp
Prepare the Chicken Pieces
Choose a Cleaning Method
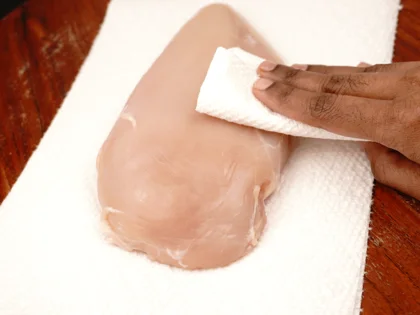
Dry Wipe (Recommended): Skip rinsing the chicken pieces entirely. Simply wipe the 250g chicken breast clean with a dry paper towel and dispose of the towel in the trash immediately. This is the safest way to prevent the spread of kitchen bacteria.
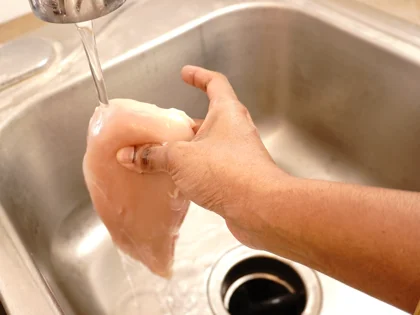
Rinse & Dry (Alternative): If you prefer to rinse the chicken, do so quickly under a very gentle, low-pressure stream of cold running water to avoid splashing. Also, keep the chicken piece deep down inside the sink basin. Transfer the chicken directly to a clean plate lined with paper towels, pat dry, and discard the paper towels right away.
Prepare chicken cutlet & Pounding
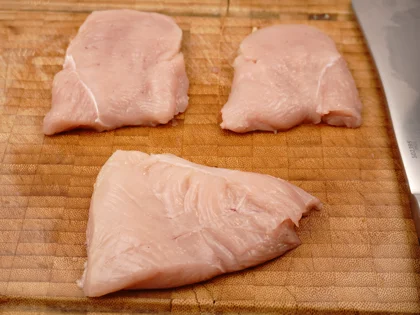
A thin chicken slice (or cutlet) is a chicken breast sliced horizontally into thin pieces about 1/4 inch thick.
The Goal: Create chicken pieces that are all 1/4 inch thick
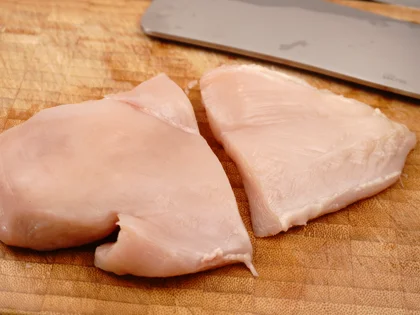
Separate: Cut the chicken breast crosswise into two pieces to separate the thick and thin parts.
Slice: Take the thick piece and slice it horizontally into two thinner layers.
Result: You now have three pieces that are all 1/4 inch thick.
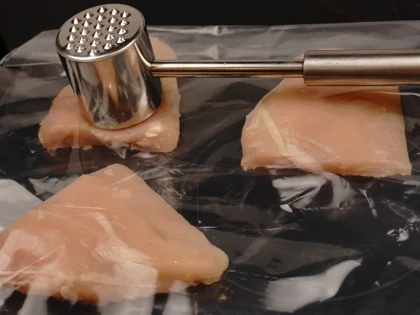
Gentle Pounding - Use a mallet or heavy flat pan to lightly pound the three chicken pieces.
Note: Pounding loosens the tough fibers and makes the thin chicken pieces tender. Do not skip this step.
Transforming Cutlets into Strips
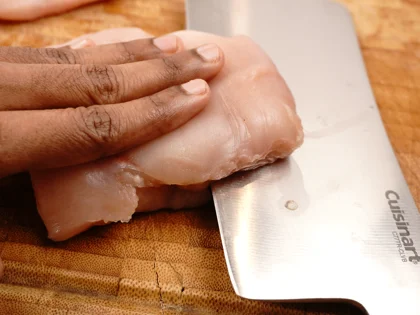
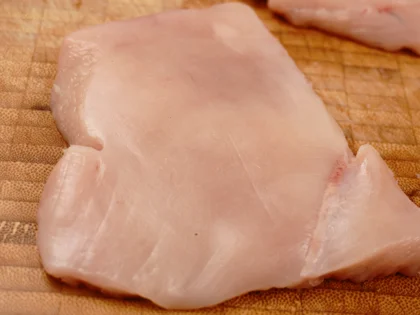
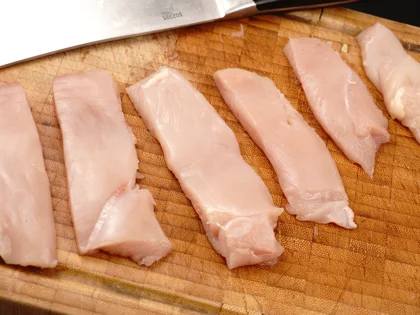
Slice across the lines: Look closely at the chicken cutlet to find the direction of the muscle fibers (the grain). Cut across these lines—never parallel to them—into 1-inch-wide strips.
Note: Slice the chicken pieces across the natural lines (grain) makes it more tender and will be easier to chew otherwise the chicken pieces will be stringier and harder to chew.
Prepare Marinade, Coat Chicken & Rest
Marinade
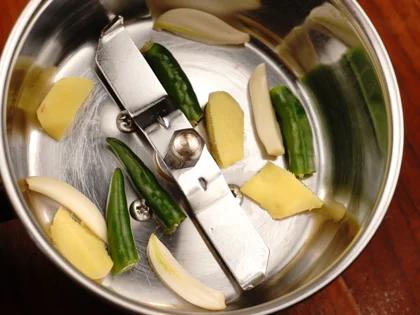
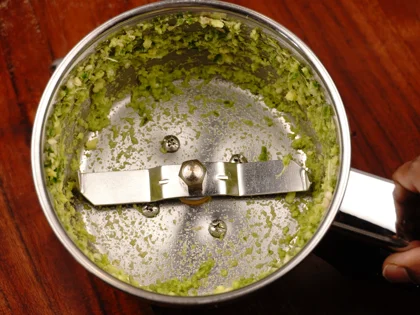
Place 1/2 inch ginger, 2 to 3 garlic cloves, and 2 to 3 green chilies in the jar and blend them into a fine texture.
Note: If the pieces are too big, just chop them down a bit first so the standard blender can handle them easily.
Apply the Marinade and Rest
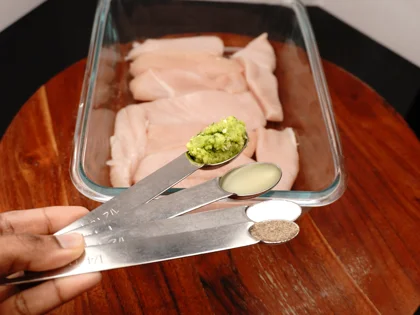
Add the following to your prepared chicken pieces
1 tsp lime juice
Prepared ginger, garlic, green chili paste
1/2 tsp salt
1/2 tsp pepper
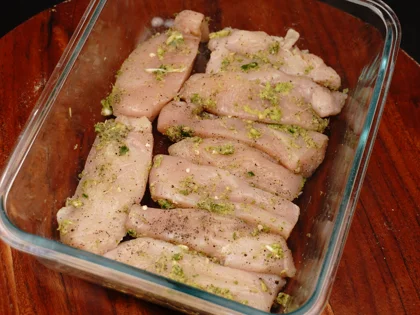
Even Distribution - Instead of pouring the ingredients in one spot, sprinkle them evenly over the chicken pieces. Use your hands to massage the paste, lime juice, pepper and salt into each piece until thoroughly coated.
Resting Time: Let the marinated chicken pieces rest at room temperature for at least 30 minutes.
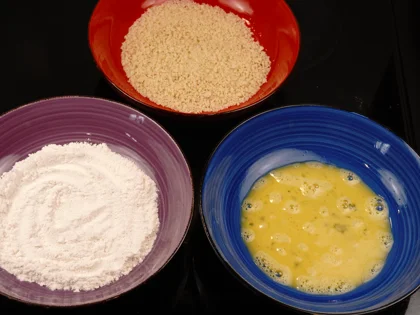
3-Bowl Setup for Coating
Set up three shallow bowls:
Bowl 1: All-purpose flour – 2 tbsp
Bowl 2: One egg, beaten well.
Bowl 3: Panko breadcrumbs – 50 g
Note: Start with a small amount of flour and crumbs. Refill them as needed to avoid wasting ingredients and keep things fresh.
How to Coat the Chicken
Follow these three steps for the perfect crunch.
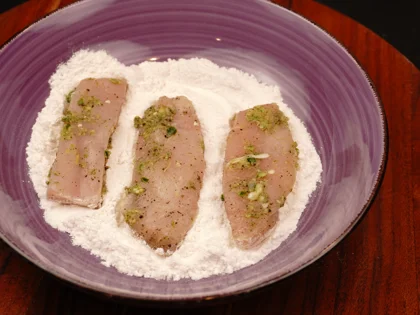
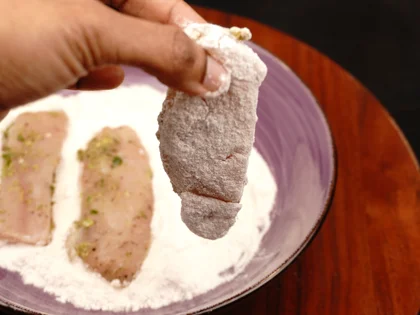
The Flour Coating
Using your "dry" left hand, take a piece of marinated chicken and dip it into the flour. Flip it 2 to 3 times to coat thoroughly, then gently shake off the excess flour.
Note: Keep this left hand completely dry when touching the flour, so the flour doesn't turn into a sticky paste on your fingers.
The Egg Coating
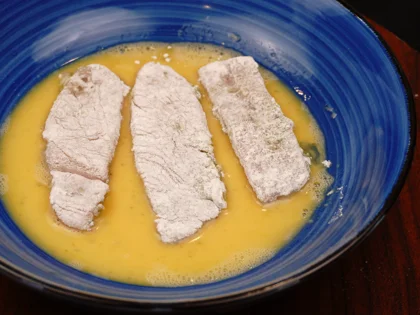
After shaking off the excess flour, place the chicken into the egg bowl. Use a tong to dip and flip the piece 2 to 3 times until it is thoroughly coated, then gently shake off any extra egg wash.
Note: Do not use your dry hand here; use your tong to keep your hands clean for the next step.
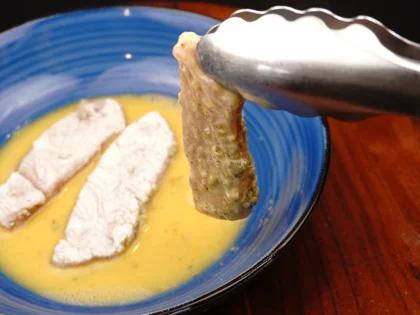
The Panko bread crumb Coating
Using your "wet" tong, transfer the chicken from the egg wash into the breadcrumb bowl. Use your "dry" right hand to flip the piece 2 to 3 times until thoroughly covered. Using hands firmly press the breadcrumbs onto the chicken to ensure the coating sticks well for a perfect crunch.
Note: Keep your right hand dry so the crumbs stick to the chicken, not to your fingers!
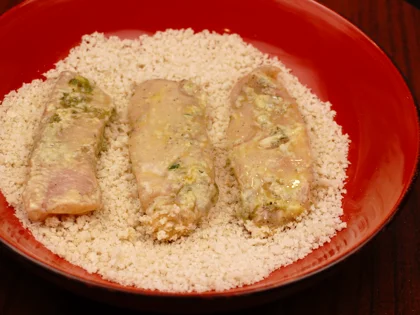
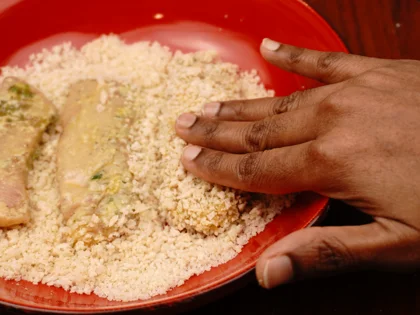
Rest
Let the coated chicken sit for 10 to 15 minutes before frying.
Note: Discard any leftover flour, egg, or breadcrumbs that have touched raw chicken to prevent food poisoning. Start with small amounts of each coating and refill as needed to avoid waste. If you want to save leftovers, you must cook them immediately; otherwise, throw them away.
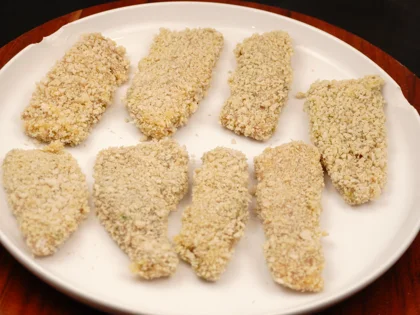
Pro Tip: Avoid the Sticky Finger Mess!
Note: Practice the "dry hand" rule! Make sure your hand stays dry when touching the flour and crumbs to avoid "club hand" (messy, breaded fingers).
Choose the one that works best for you to keep your hands mess-free!
The Hybrid System (Recommended):
Use your left hand for flour, a tong for the egg, and your right hand for the crumbs.
The Hand System:
Use one hand only for dry steps (flour/crumbs) and the other hand only for wet steps (egg).
The Tong System:
Use three separate tongs—one for each bowl—to keep your hands completely clean.
Cooking Of Coated Chicken Pieces In Nonstick Pan
Heat a oil in the nonstick fry pan
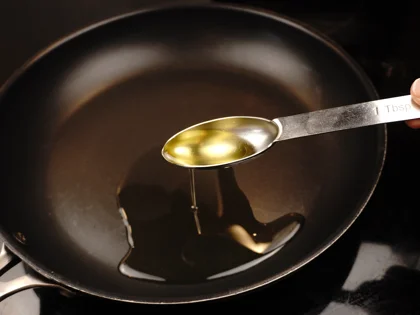
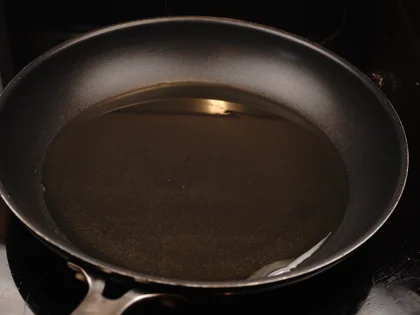
Oil the pan - Add 3 tbsp oil to an 8-inch non stick pan. Swirl the pan evenly to spread oil to the entire surface of the pan. The usage of tbsp of oil depends upon the size of your pan.
Preheat- Preheat the pan for about 5 to 7 minutes over medium flame.
Frying the First Side
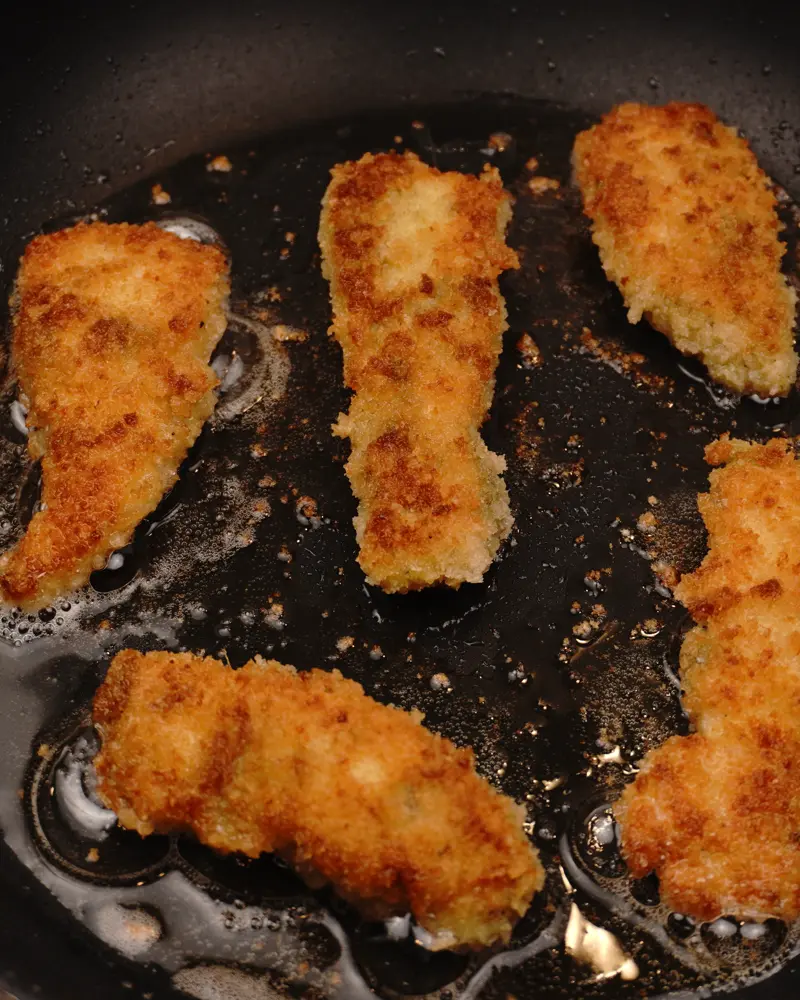
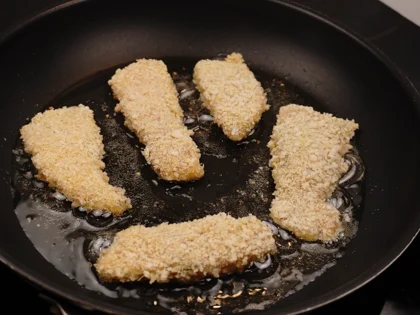
Check the Heat- The pan is ready when it is very hot. You should hear a sizzling sound the moment the chicken touches the surface. If you don't hear that sizzle, the pan isn’t ready.
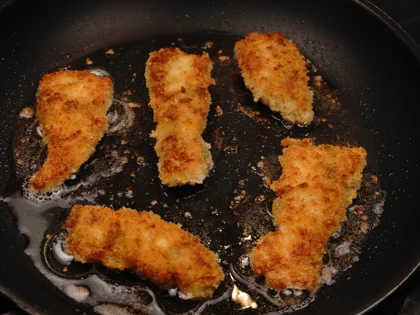
Place and Cook- Cook over medium high heat without moving them for 3 minutes.
Check and Flip- After 3 minutes, quickly peek by lifting the sides of the pieces using two spoons, whether golden brown crust formed. Once formed then flip.
Frying the Second Side
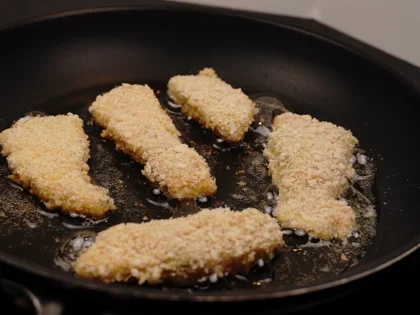
Flip and Cook: Once you flip the pieces, reduce heat to medium and continue cooking for another 2 to 3 minutes. The chicken is ready when it is golden brown on both sides.
Total Cooking Time: 5 to 7 minutes for 1 batch.
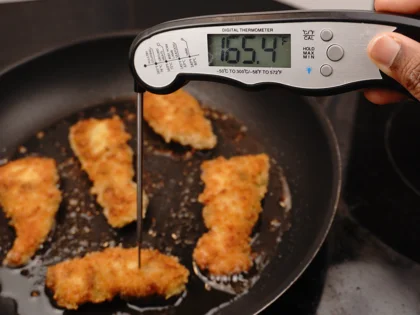
Note: The Key to Perfect Chicken - For tender, juicy, and flavorful chicken every time, use an instant-read thermometer. Ensure the thickest part of the chicken reaches an internal temperature between 165–170°F.
Pro Tip: For the next batch, wipe the pan clean and add 3 tbsp of new oil to keep the flavor and avoid burnt bits
Post-Cooking Steps before serving
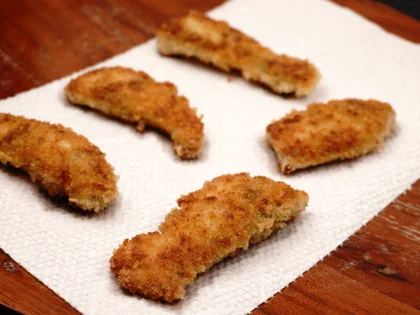
Remove Surface Oil : Transfer the cooked chicken to a plate lined with paper towels. Using a fresh paper towel, gently pat all sides of the pieces to absorb any extra surface oil.
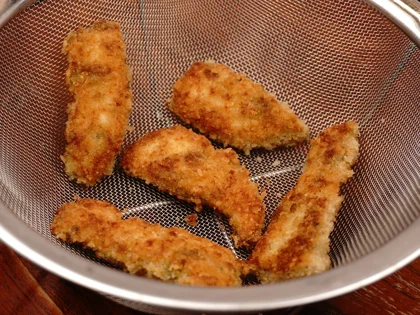
Move to a Rack : After 30 seconds, immediately move the chicken to a wire rack or a strainer.
Let it Rest : Allow the chicken to rest for 5 to 10 minutes before serving.
Note: If you leave it on the paper towel too long, the steam will make the bottom of the chicken soft. A rack lets air move around the whole piece.
Ready to serve
After the resting period is complete, your crispy chicken is ready!
Note: Since panko breading is not spicy, it pairs perfectly with a spicy sauce. Serve with a refreshing spicy curd mint dip or a sweet chili sauce.
Tips
💡 I Used a non-stick pan to cook the chicken pieces so they do not stick and to make cleaning up much easier
💡 Use a high smoke point oil like vegetable, peanut, or light olive oil for cooking.
💡 Get your pan really hot before you start. This helps the chicken brown evenly and stay extra crunchy.
💡 The meat thermometer will help to avoid undercooked and overcooked chicken pieces and gives your chicken a juiciest and tastiest.
💡 Discard any leftover flour, egg, or breadcrumbs that have touched raw chicken to prevent food poisoning. Start with small amounts of each coating and refill as needed to avoid waste. If you want to save leftovers, you must cook them immediately; otherwise, throw them away.
💡 Try using panko breadcrumbs for a better crunch. While regular bread crumbs work, panko makes the chicken much crispier.
💡 Note: Practice the 'dry hand' rule! Make sure your hand stays dry when touching the flour and crumbs to avoid getting messy, breaded fingers.
Frequently Asked Questions
Panko is lighter and airier. It absorbs less oil and stays much crunchier than standard crumbs
Pounding isn't just about thickness; it breaks down tough muscle fibers and connective tissues. By loosening these fibers, the chicken becomes much more tender.
Make sure your pan is very hot so the breading crisps instantly. If the pan isn't hot enough, the breading will soak up the oil and turn soggy.
You Might Also Like
Crispy Pan Fried Panko Chicken Recipe
Enjoy the Crispy Pan-Fried Panko Chicken made right in your own kitchen! By using thin chicken slices(cutlet) and special panko breadcrumbs, you can get a perfect golden crust and juicy meat every time. Pan-frying in a hot skillet ensures a loud crunch in every bite, making it a quick and easy meal that everyone will love.
Ingredients
- 1/2 inch Ginger
- 250 g Skinless Boneless Chicken Breast
- 2 to 3 small cloves Garlic
- 2 to 3 Green Chili
- 1 tsp (1/4 medium size) lime juice
- 1/2 tsp Pepper
- 1 Egg
- approx. 50 g Panko Bread Crumbs
- approx. 20 g All purpose flour
- approx. 1/2 tsp Salt
- 6 tbsp Oil
Instructions
-
Choose a Cleaning Method
Dry Wipe (Recommended): Skip rinsing the chicken pieces entirely. Simply wipe the 250g chicken breast clean with a dry paper towel and dispose of the towel in the trash immediately. This is the safest way to prevent the spread of kitchen bacteria.
Rinse & Dry (Alternative): If you prefer to rinse the chicken, do so quickly under a very gentle, low-pressure stream of cold running water to avoid splashing. Also, keep the chicken piece deep down inside the sink basin. Transfer the chicken directly to a clean plate lined with paper towels, pat dry, and discard the paper towels right away.
-
Prepare chicken cutlet & Pounding
A thin chicken slice (or cutlet) is a chicken breast sliced horizontally into thin pieces about 1/4 inch thick.
The Goal: Create chicken pieces that are all 1/4 inch thick
Separate: Cut the chicken breast crosswise into two pieces to separate the thick and thin parts.
Slice: Take the thick piece and slice it horizontally into two thinner layers.
Result: You now have three pieces that are all 1/4 inch thick.
Gentle Pounding - Use a mallet or heavy flat pan to lightly pound the three chicken pieces.
Note: Pounding loosens the tough fibers and makes the thin chicken pieces tender. Do not skip this step.
-
Transforming Cutlets into Strips
Slice across the lines: Look closely at the chicken cutlet to find the direction of the muscle fibers (the grain). Cut across these lines—never parallel to them—into 1-inch-wide strips.
Note: Slice the chicken pieces across the natural lines (grain) makes it more tender and will be easier to chew otherwise the chicken pieces will be stringier and harder to chew.
-
Marinade
Place 1/2 inch ginger, 2 to 3 garlic cloves, and 2 to 3 green chilies in the jar and blend them into a fine texture.
Note: If the pieces are too big, just chop them down a bit first so the standard blender can handle them easily.
-
Apply the Marinade and Rest
Add the following to your prepared chicken pieces
1 tsp lime juice
Prepared ginger, garlic, green chili paste
1/2 tsp salt
1/2 tsp pepper
Even Distribution - Instead of pouring the ingredients in one spot, sprinkle them evenly over the chicken pieces. Use your hands to massage the paste, lime juice, pepper and salt into each piece until thoroughly coated.
Resting Time: Let the marinated chicken pieces rest at room temperature for at least 30 minutes.
-
Set up three shallow bowls:
Bowl 1: All-purpose flour – 2 tbsp
Bowl 2: One egg, beaten well.
Bowl 3: Panko breadcrumbs – 50 g
Note: Start with a small amount of flour and crumbs. Refill them as needed to avoid wasting ingredients and keep things fresh.
-
The Flour Coating
Using your "dry" left hand, take a piece of marinated chicken and dip it into the flour. Flip it 2 to 3 times to coat thoroughly, then gently shake off the excess flour.
Note: Keep this left hand completely dry when touching the flour, so the flour doesn't turn into a sticky paste on your fingers.
-
The Egg Coating
After shaking off the excess flour, place the chicken into the egg bowl. Use a tong to dip and flip the piece 2 to 3 times until it is thoroughly coated, then gently shake off any extra egg wash.
Note: Do not use your dry hand here; use your tong to keep your hands clean for the next step.
-
The Panko bread crumb Coating
Using your "wet" tong, transfer the chicken from the egg wash into the breadcrumb bowl. Use your "dry" right hand to flip the piece 2 to 3 times until thoroughly covered. Using hands firmly press the breadcrumbs onto the chicken to ensure the coating sticks well for a perfect crunch.
Note: Keep your right hand dry so the crumbs stick to the chicken, not to your fingers!
-
Rest
Let the coated chicken sit for 10 to 15 minutes before frying.
Note: Discard any leftover flour, egg, or breadcrumbs that have touched raw chicken to prevent food poisoning. Start with small amounts of each coating and refill as needed to avoid waste. If you want to save leftovers, you must cook them immediately; otherwise, throw them away.
-
The Hybrid System (Recommended):
Use your left hand for flour, a tong for the egg, and your right hand for the crumbs.
-
The Hand System:
Use one hand only for dry steps (flour/crumbs) and the other hand only for wet steps (egg).
-
The Tong System:
Use three separate tongs—one for each bowl—to keep your hands completely clean.
-
Heat a oil in the nonstick fry pan
Oil the pan - Add 3 tbsp oil to an 8-inch non stick pan. Swirl the pan evenly to spread oil to the entire surface of the pan. The usage of tbsp of oil depends upon the size of your pan.
Preheat- Preheat the pan for about 5 to 7 minutes over medium flame.
-
Frying the First Side
Check the Heat- The pan is ready when it is very hot. You should hear a sizzling sound the moment the chicken touches the surface. If you don't hear that sizzle, the pan isn’t ready.
Place and Cook- Cook over medium high heat without moving them for 3 minutes.
Check and Flip- After 3 minutes, quickly peek by lifting the sides of the pieces using two spoons, whether golden brown crust formed. Once formed then flip.
-
Frying the Second Side
Flip and Cook: Once you flip the pieces, reduce heat to medium and continue cooking for another 2 to 3 minutes. The chicken is ready when it is golden brown on both sides.
Total Cooking Time: 5 to 7 minutes for 1 batch.
Note: The Key to Perfect Chicken - For tender, juicy, and flavorful chicken every time, use an instant-read thermometer. Ensure the thickest part of the chicken reaches an internal temperature between 165–170°F.
Pro Tip: For the next batch, wipe the pan clean and add 3 tbsp of new oil to keep the flavor and avoid burnt bits
-
Post-Cooking Steps before serving
Remove Surface Oil : Transfer the cooked chicken to a plate lined with paper towels. Using a fresh paper towel, gently pat all sides of the pieces to absorb any extra surface oil.
Move to a Rack : After 30 seconds, immediately move the chicken to a wire rack or a strainer.
Let it Rest : Allow the chicken to rest for 5 to 10 minutes before serving.
Note: If you leave it on the paper towel too long, the steam will make the bottom of the chicken soft. A rack lets air move around the whole piece.
-
Ready to serve
After the resting period is complete, your crispy chicken is ready!
Note: Since panko breading is not spicy, it pairs perfectly with a spicy sauce. Serve with a refreshing spicy curd mint dip or a sweet chili sauce.
Loading rating...
Write a Review
Loading reviews...